
Add Provider
Table of Contents:
Instructions
- Log in to OnCare360.
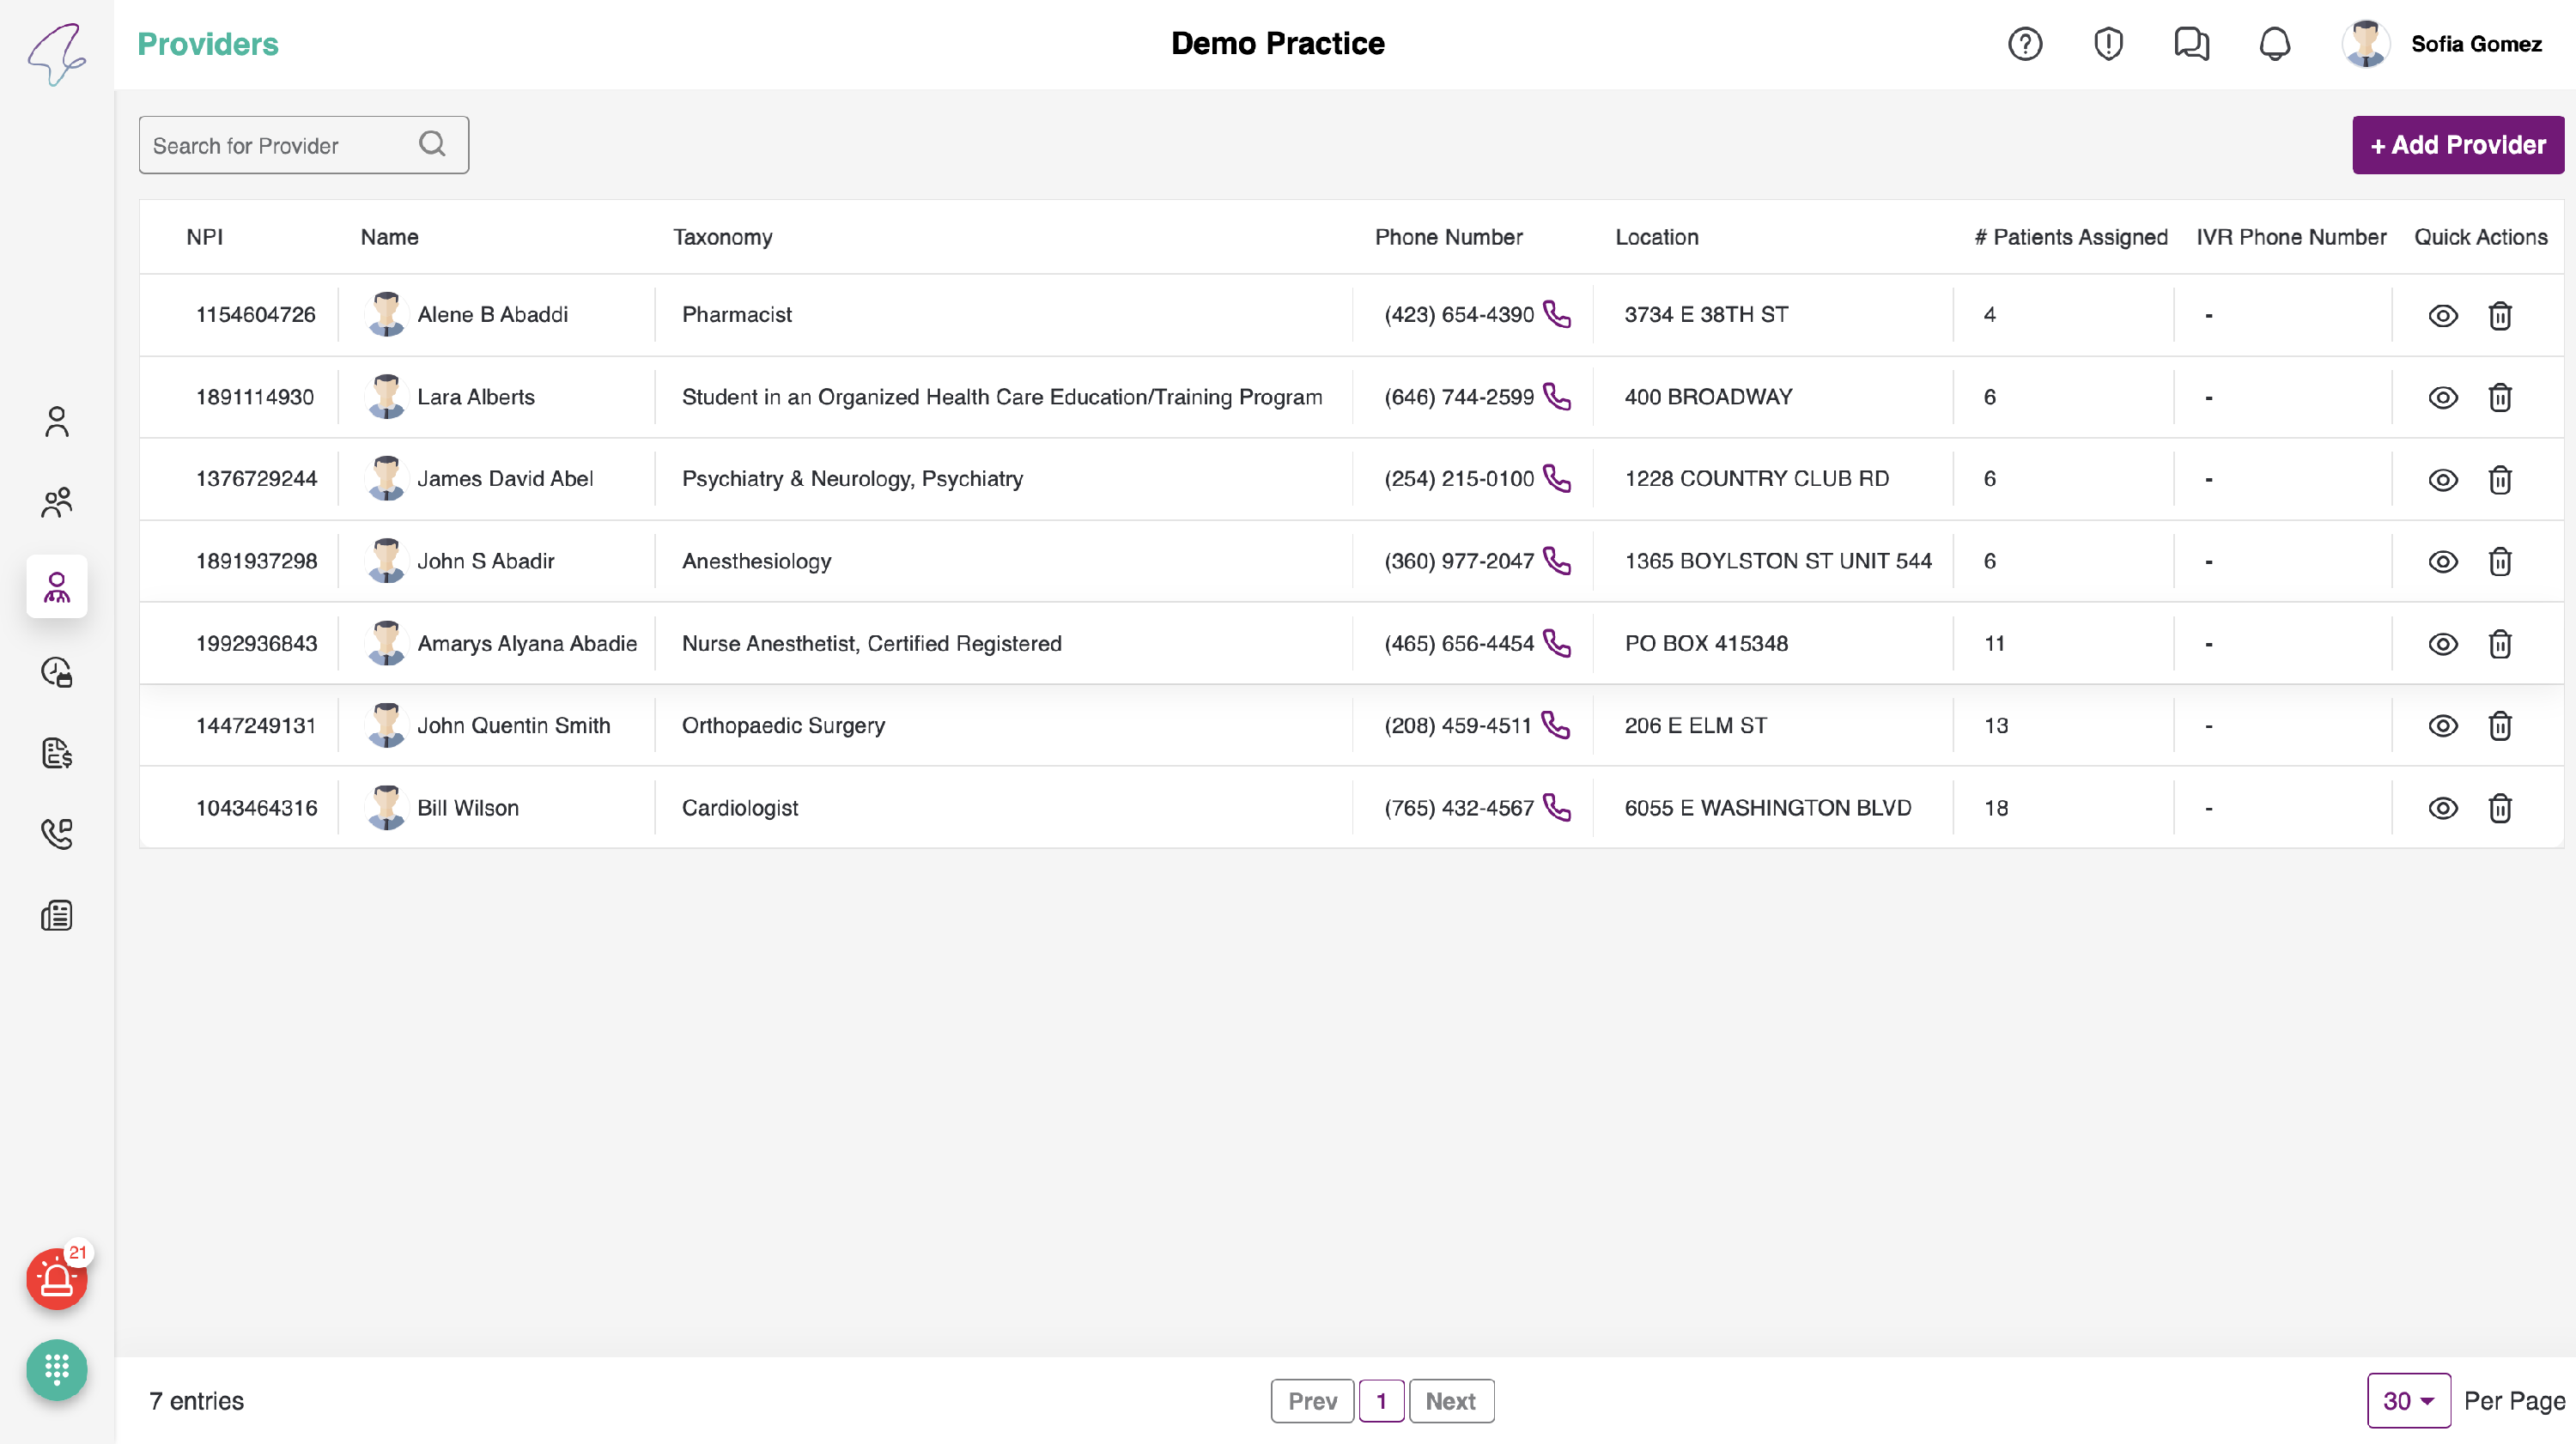
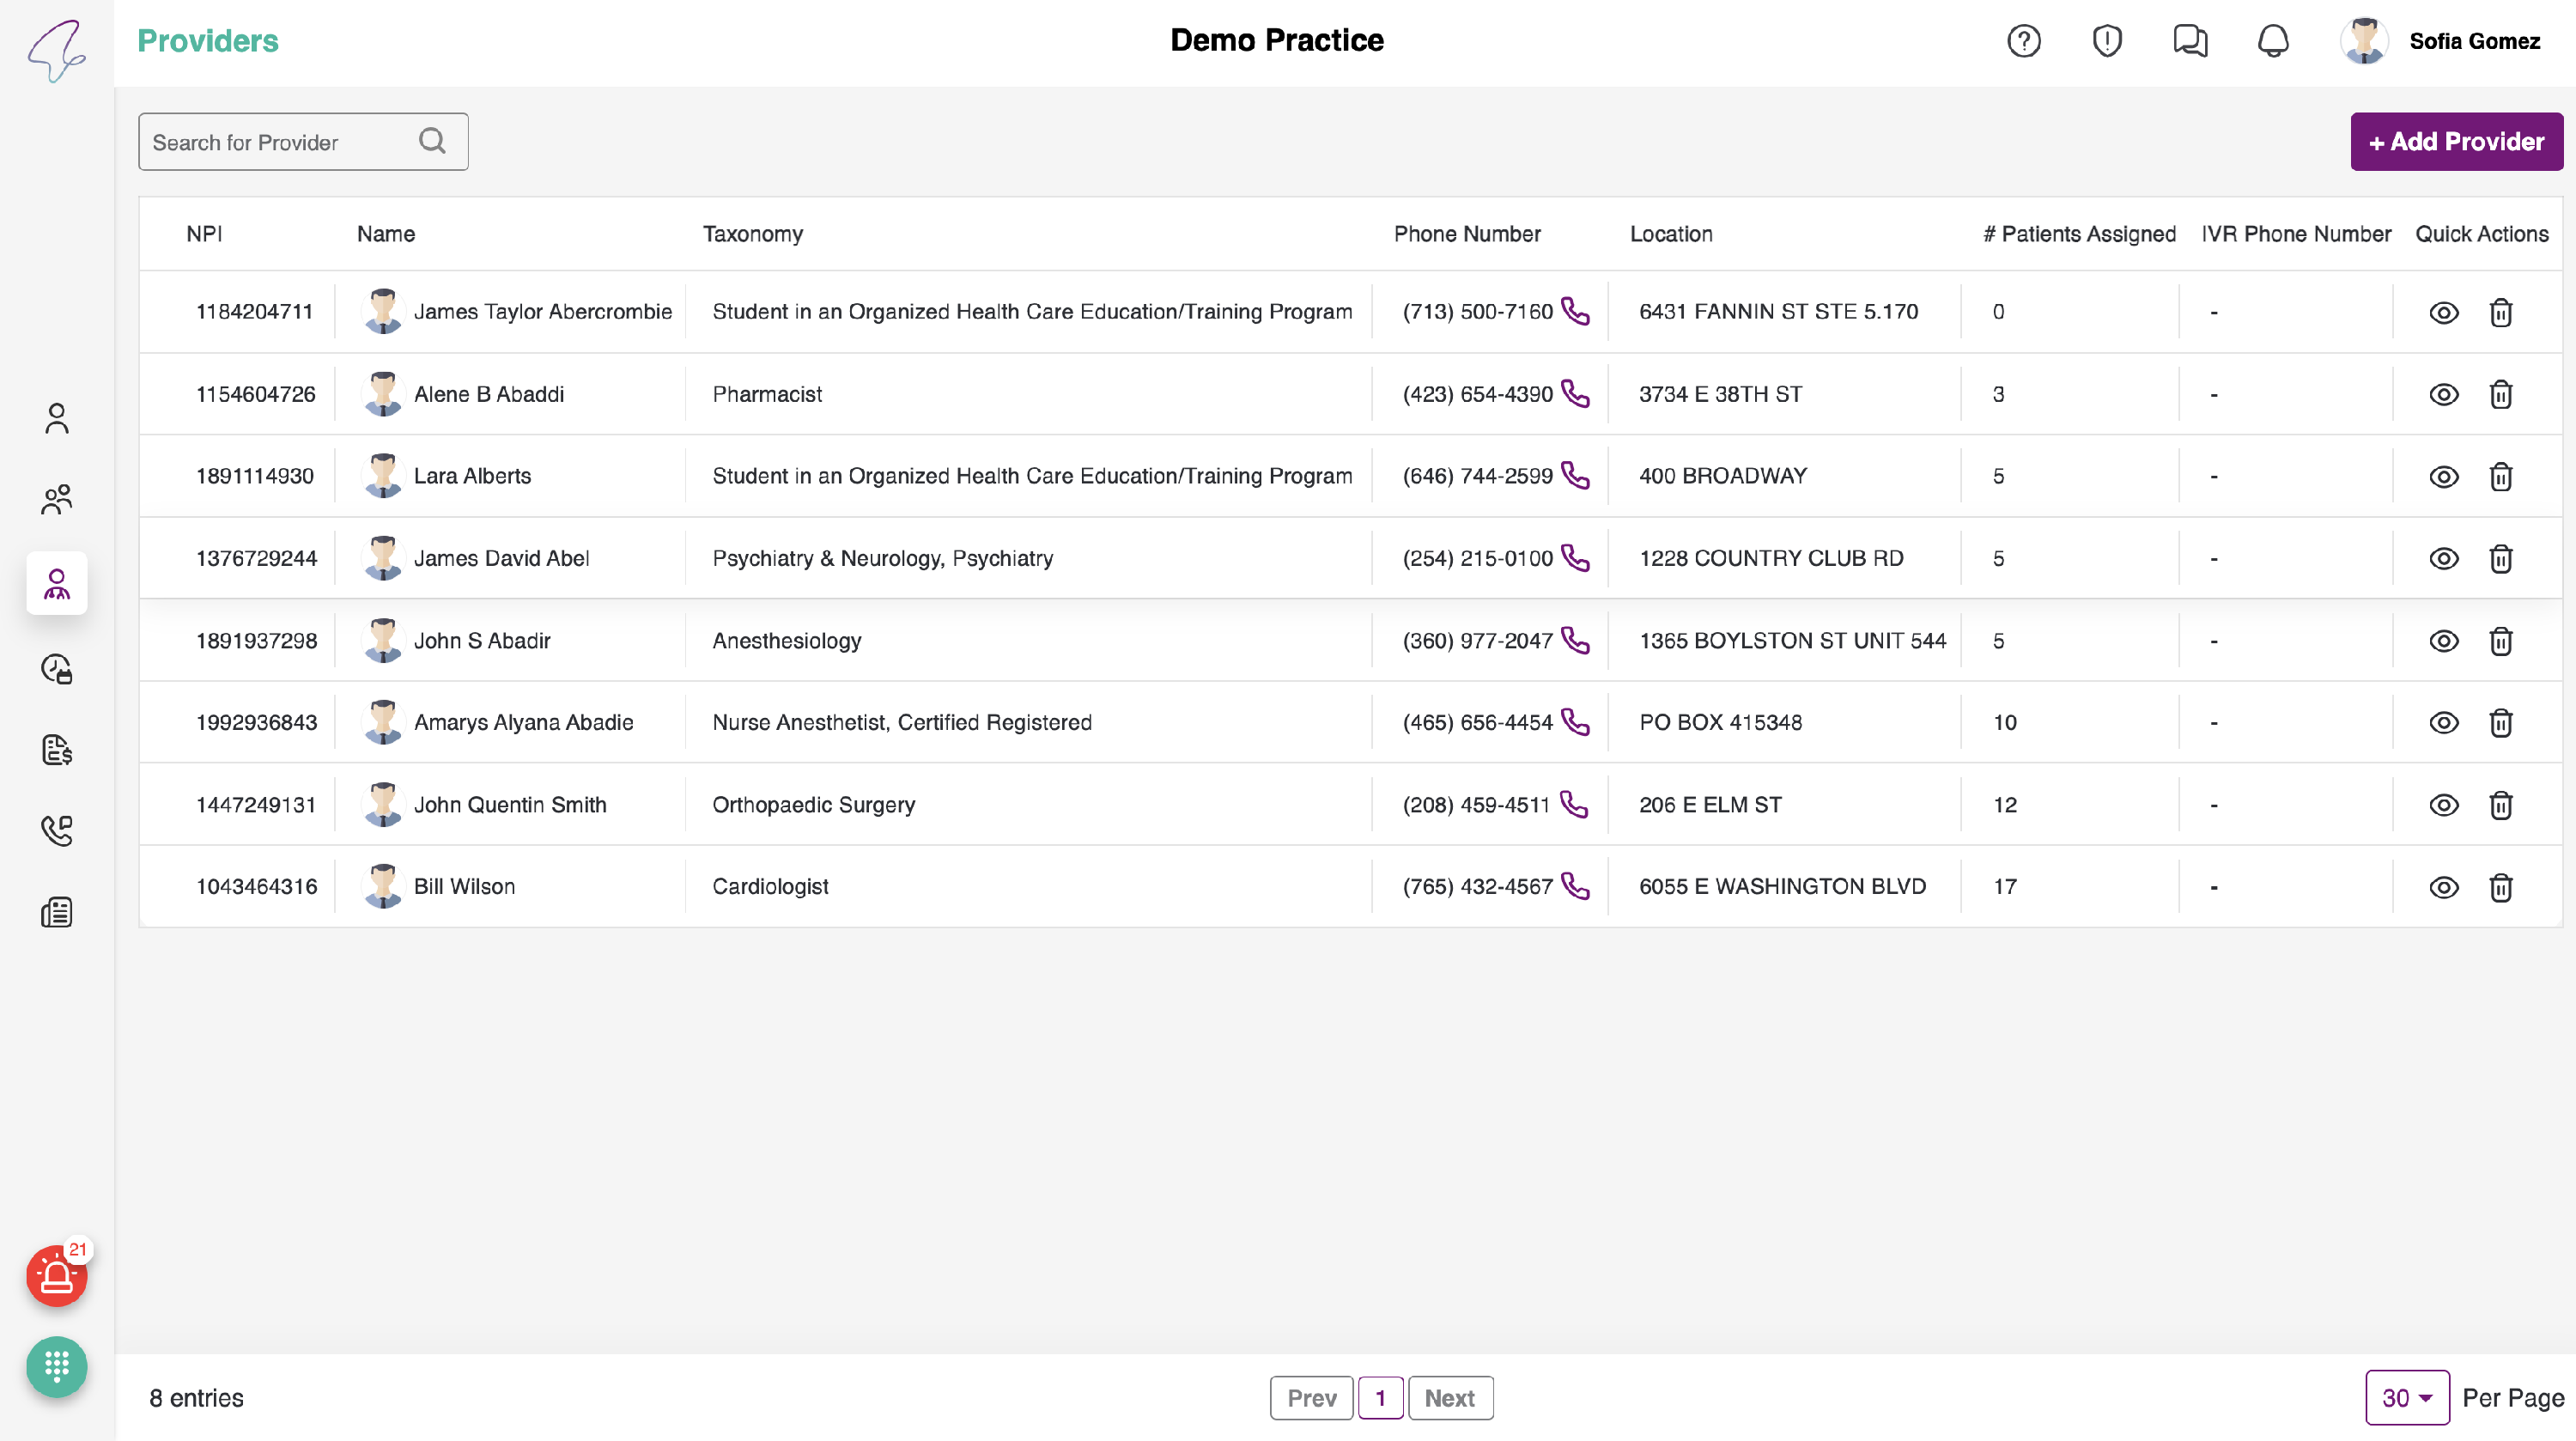
- On the Dashboard, locate the Providers tab on the side nav bar.
- Click on 'Add Provider' to add a new provider to a center.
- You can view the phone icon beside the Mobile number of the Providers, this is to call them directly on their cell.
- The Add provider page contains a form with the following fields:
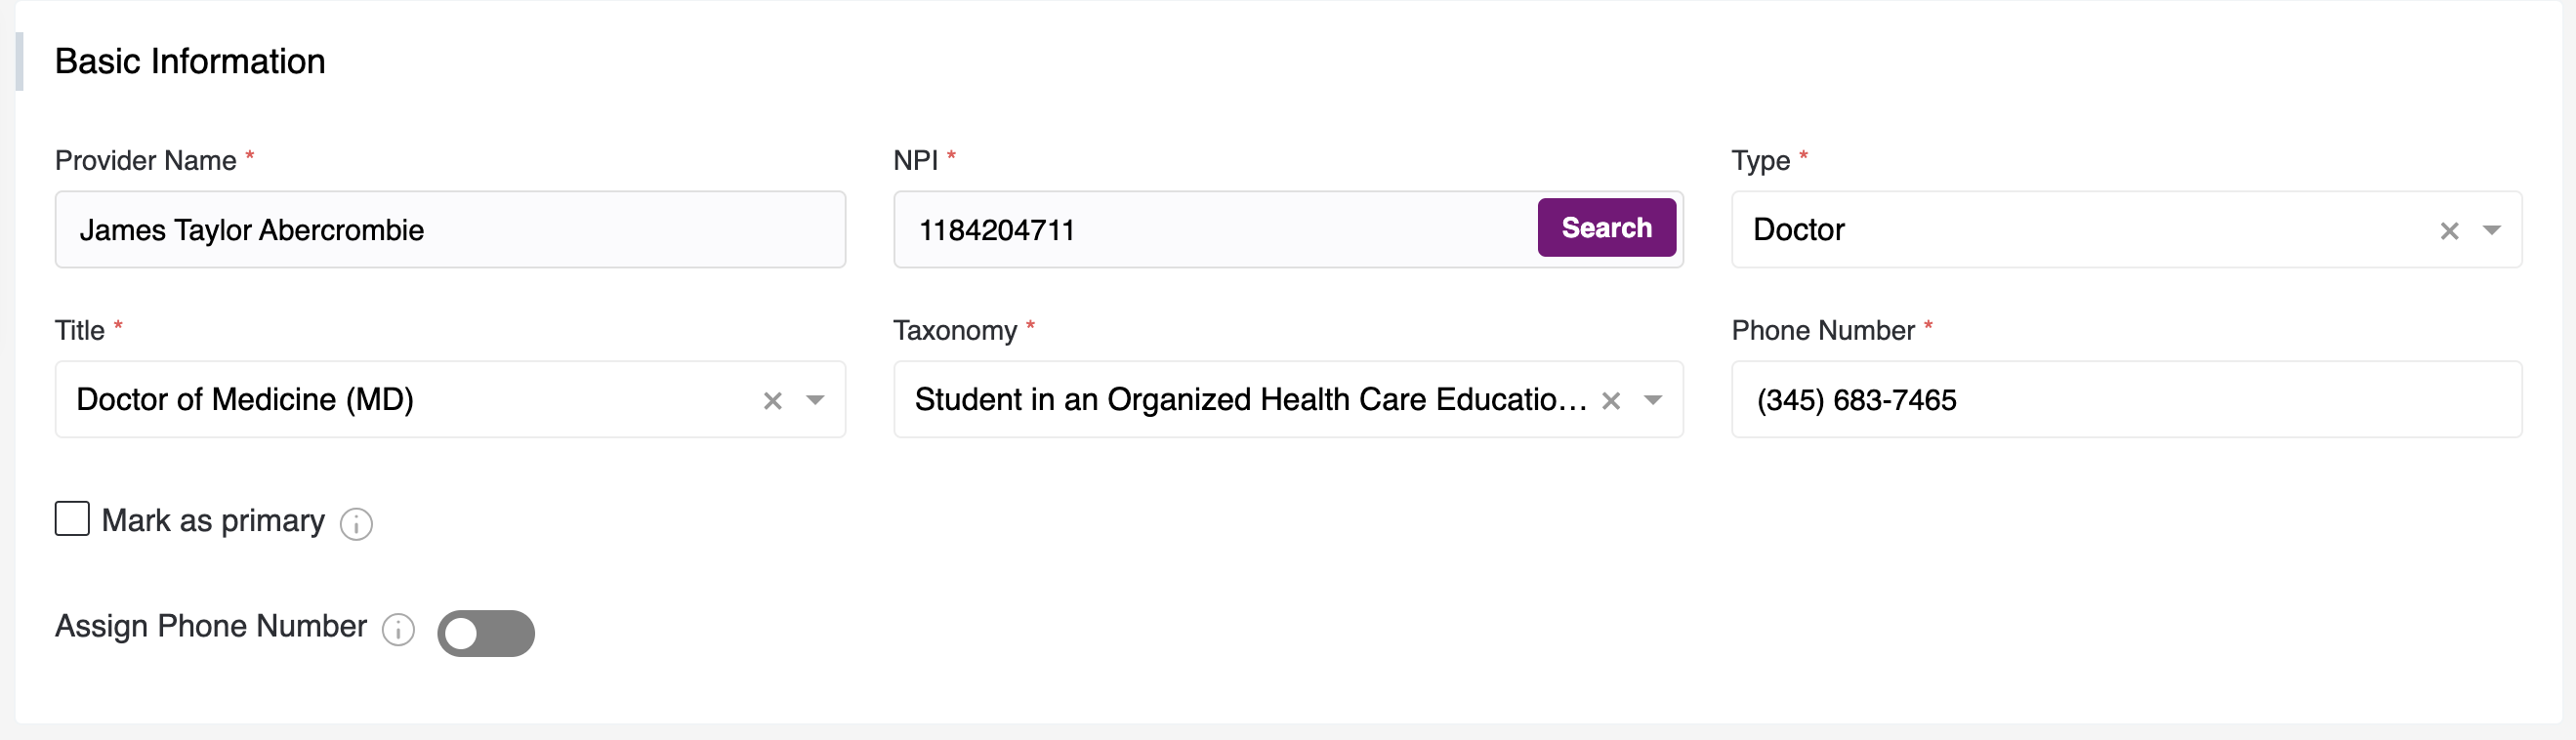
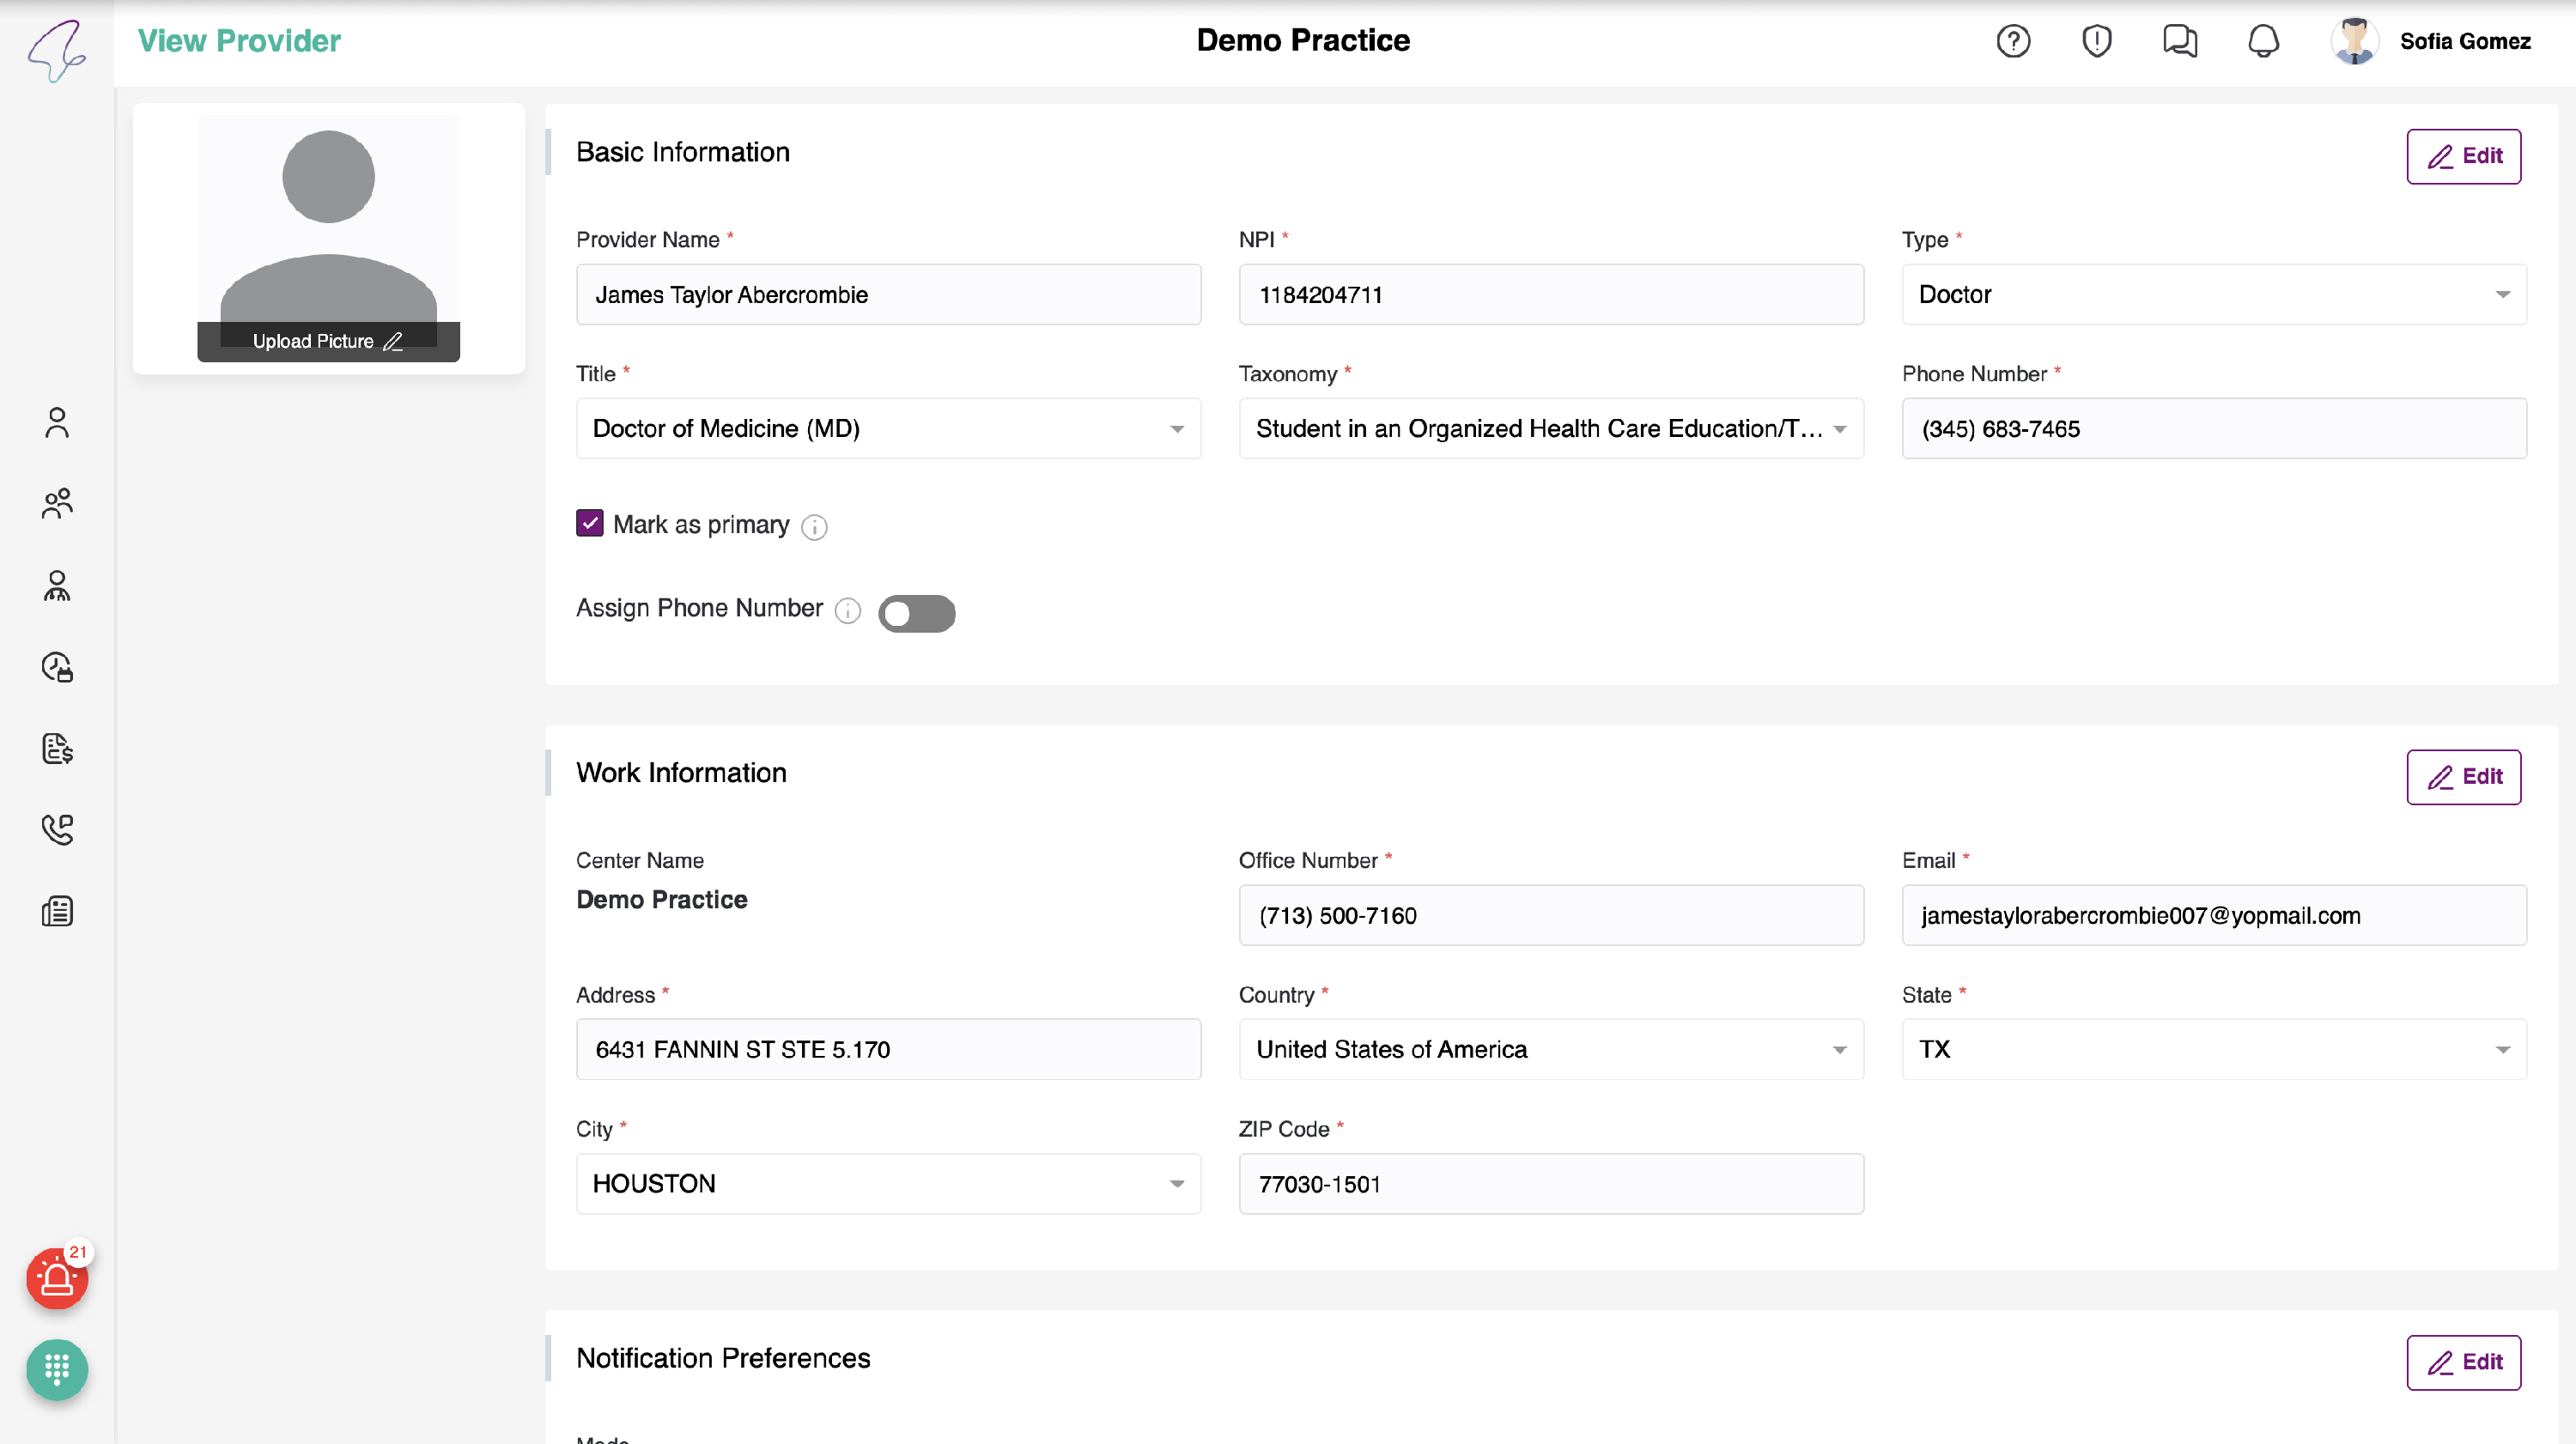
Basic Information
- Add a photo to display it as the provider's profile picture.
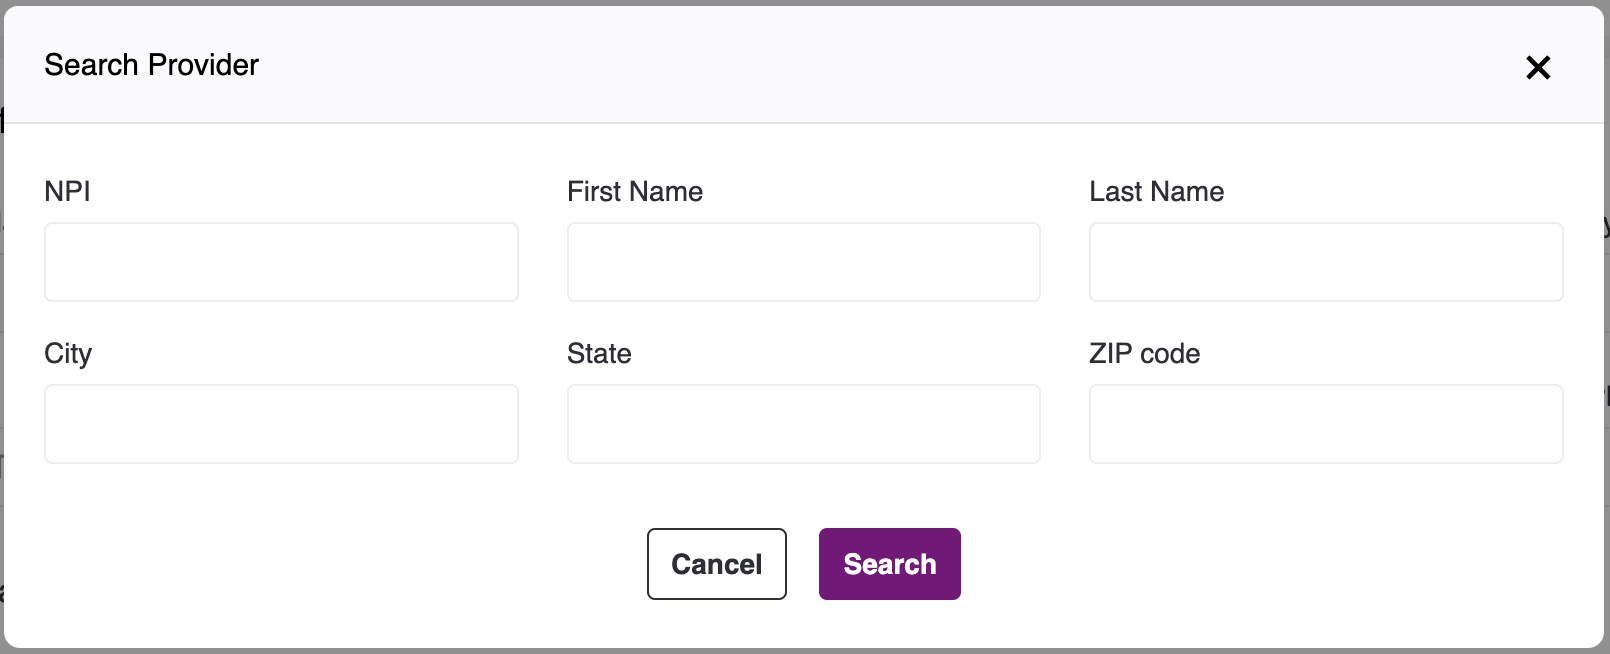
- Click on 'Search NPI' button, you'll see a pop-up to search provider by NPI, First Name, Last Name, City, State and Zip code. After entering any of the field, click select. The below-mentioned details of provider will get populated, they can still be edited:
- Provider Name
- NPI
- Type
- Title
- Taxonomy
- Mobile Number
-
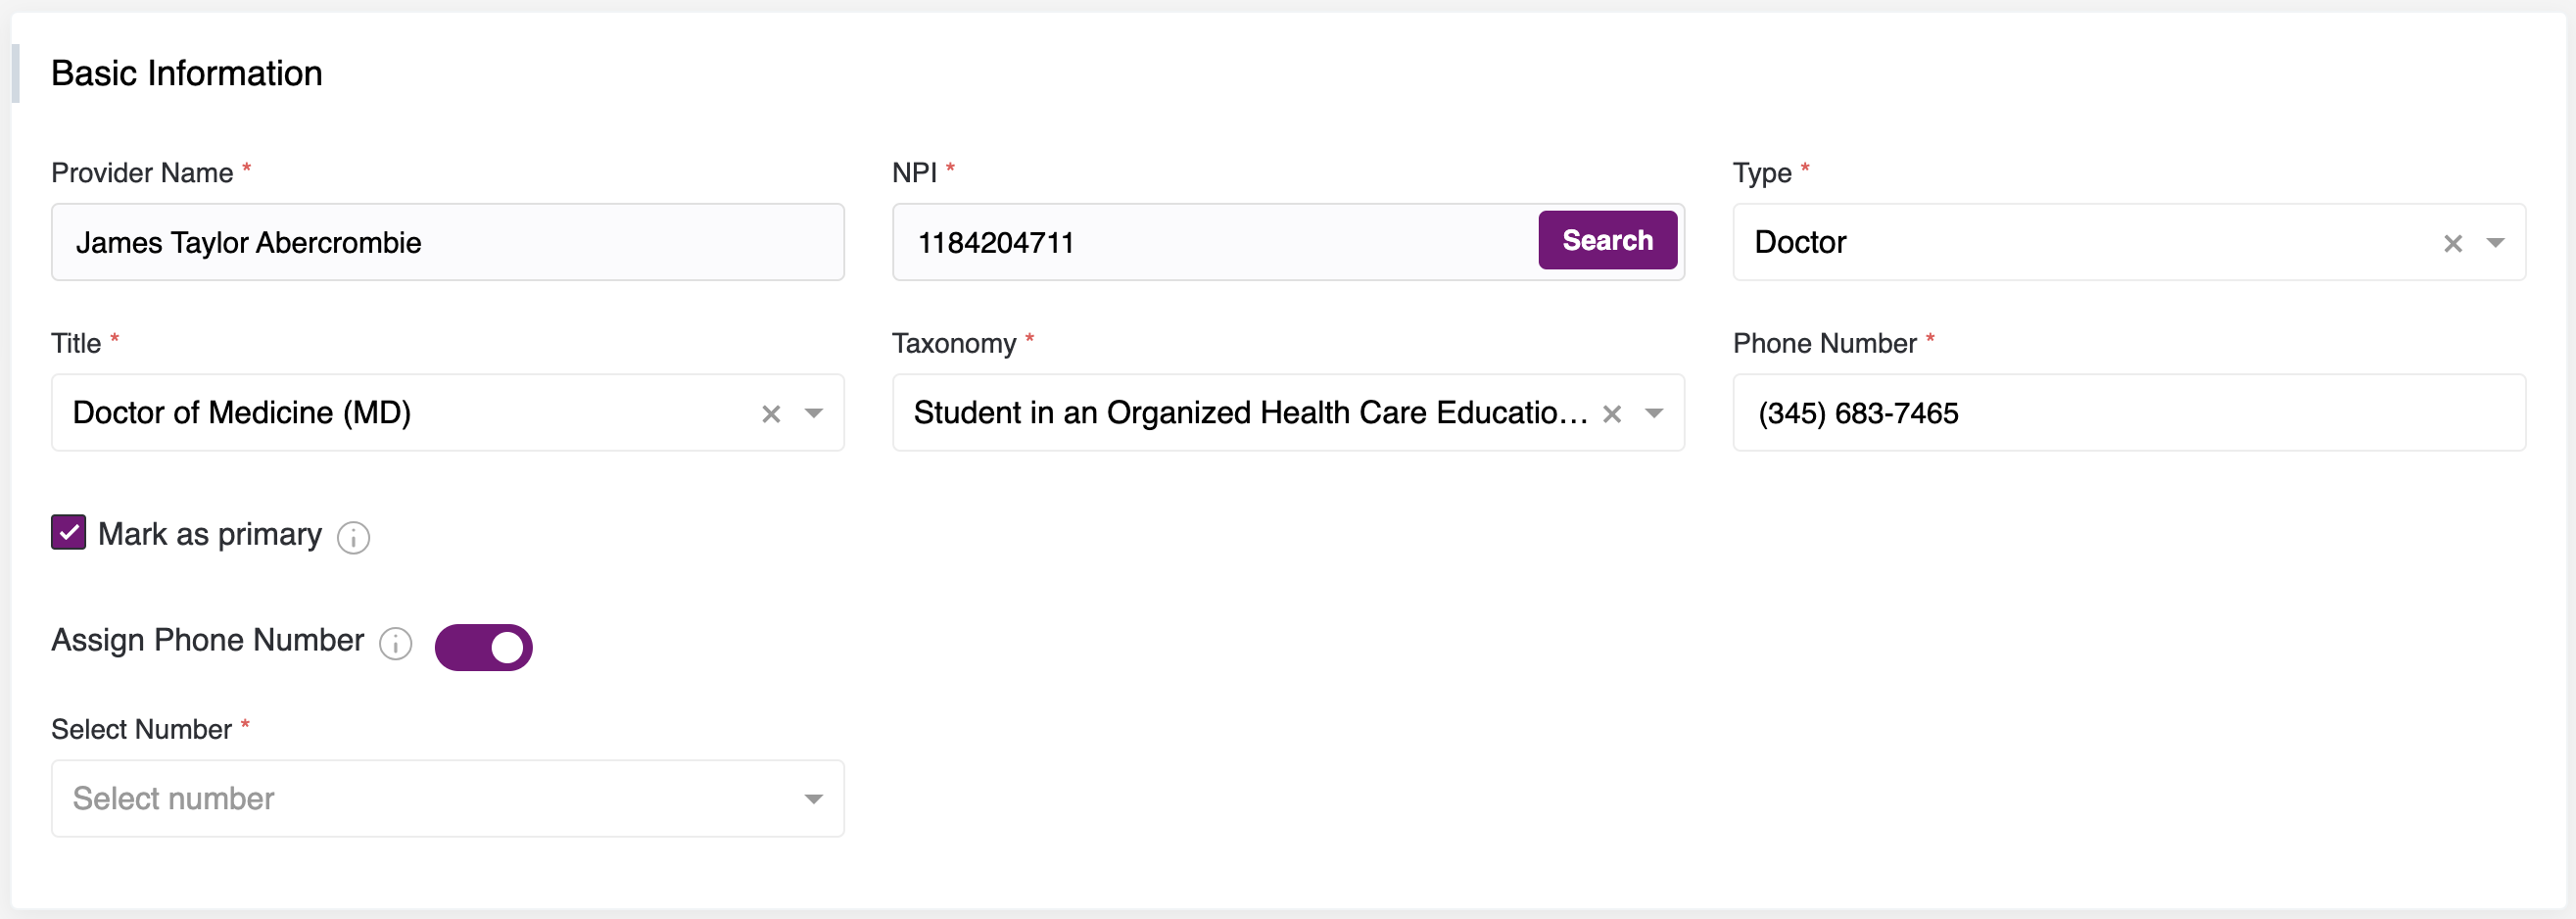
We also mark the provider as primary by checking the checkbox. This means that the patient which will be added in the future will have this provider in the patient care team as their primary provider until it is changed.
4. We also facilitate the IVR for the provider, allowing us to assign a phone number to the provider by enabling the toggle button. Once the toggle is enabled, a drop-down menu will appear where a number can be selected.


Work Information
- Following are the fields:
- Center Name
- Mobile Number
- Address Line 1
- Country
- State
- City
- Postal Code
- Center Name is auto-populated. And all the above fields are mandatory.
Notification Preferences
We can get notifications via
- SMS

Alert Preferences
We can get notifications via
- Critical Alerts.
- User Updates.
- Patient Updates.
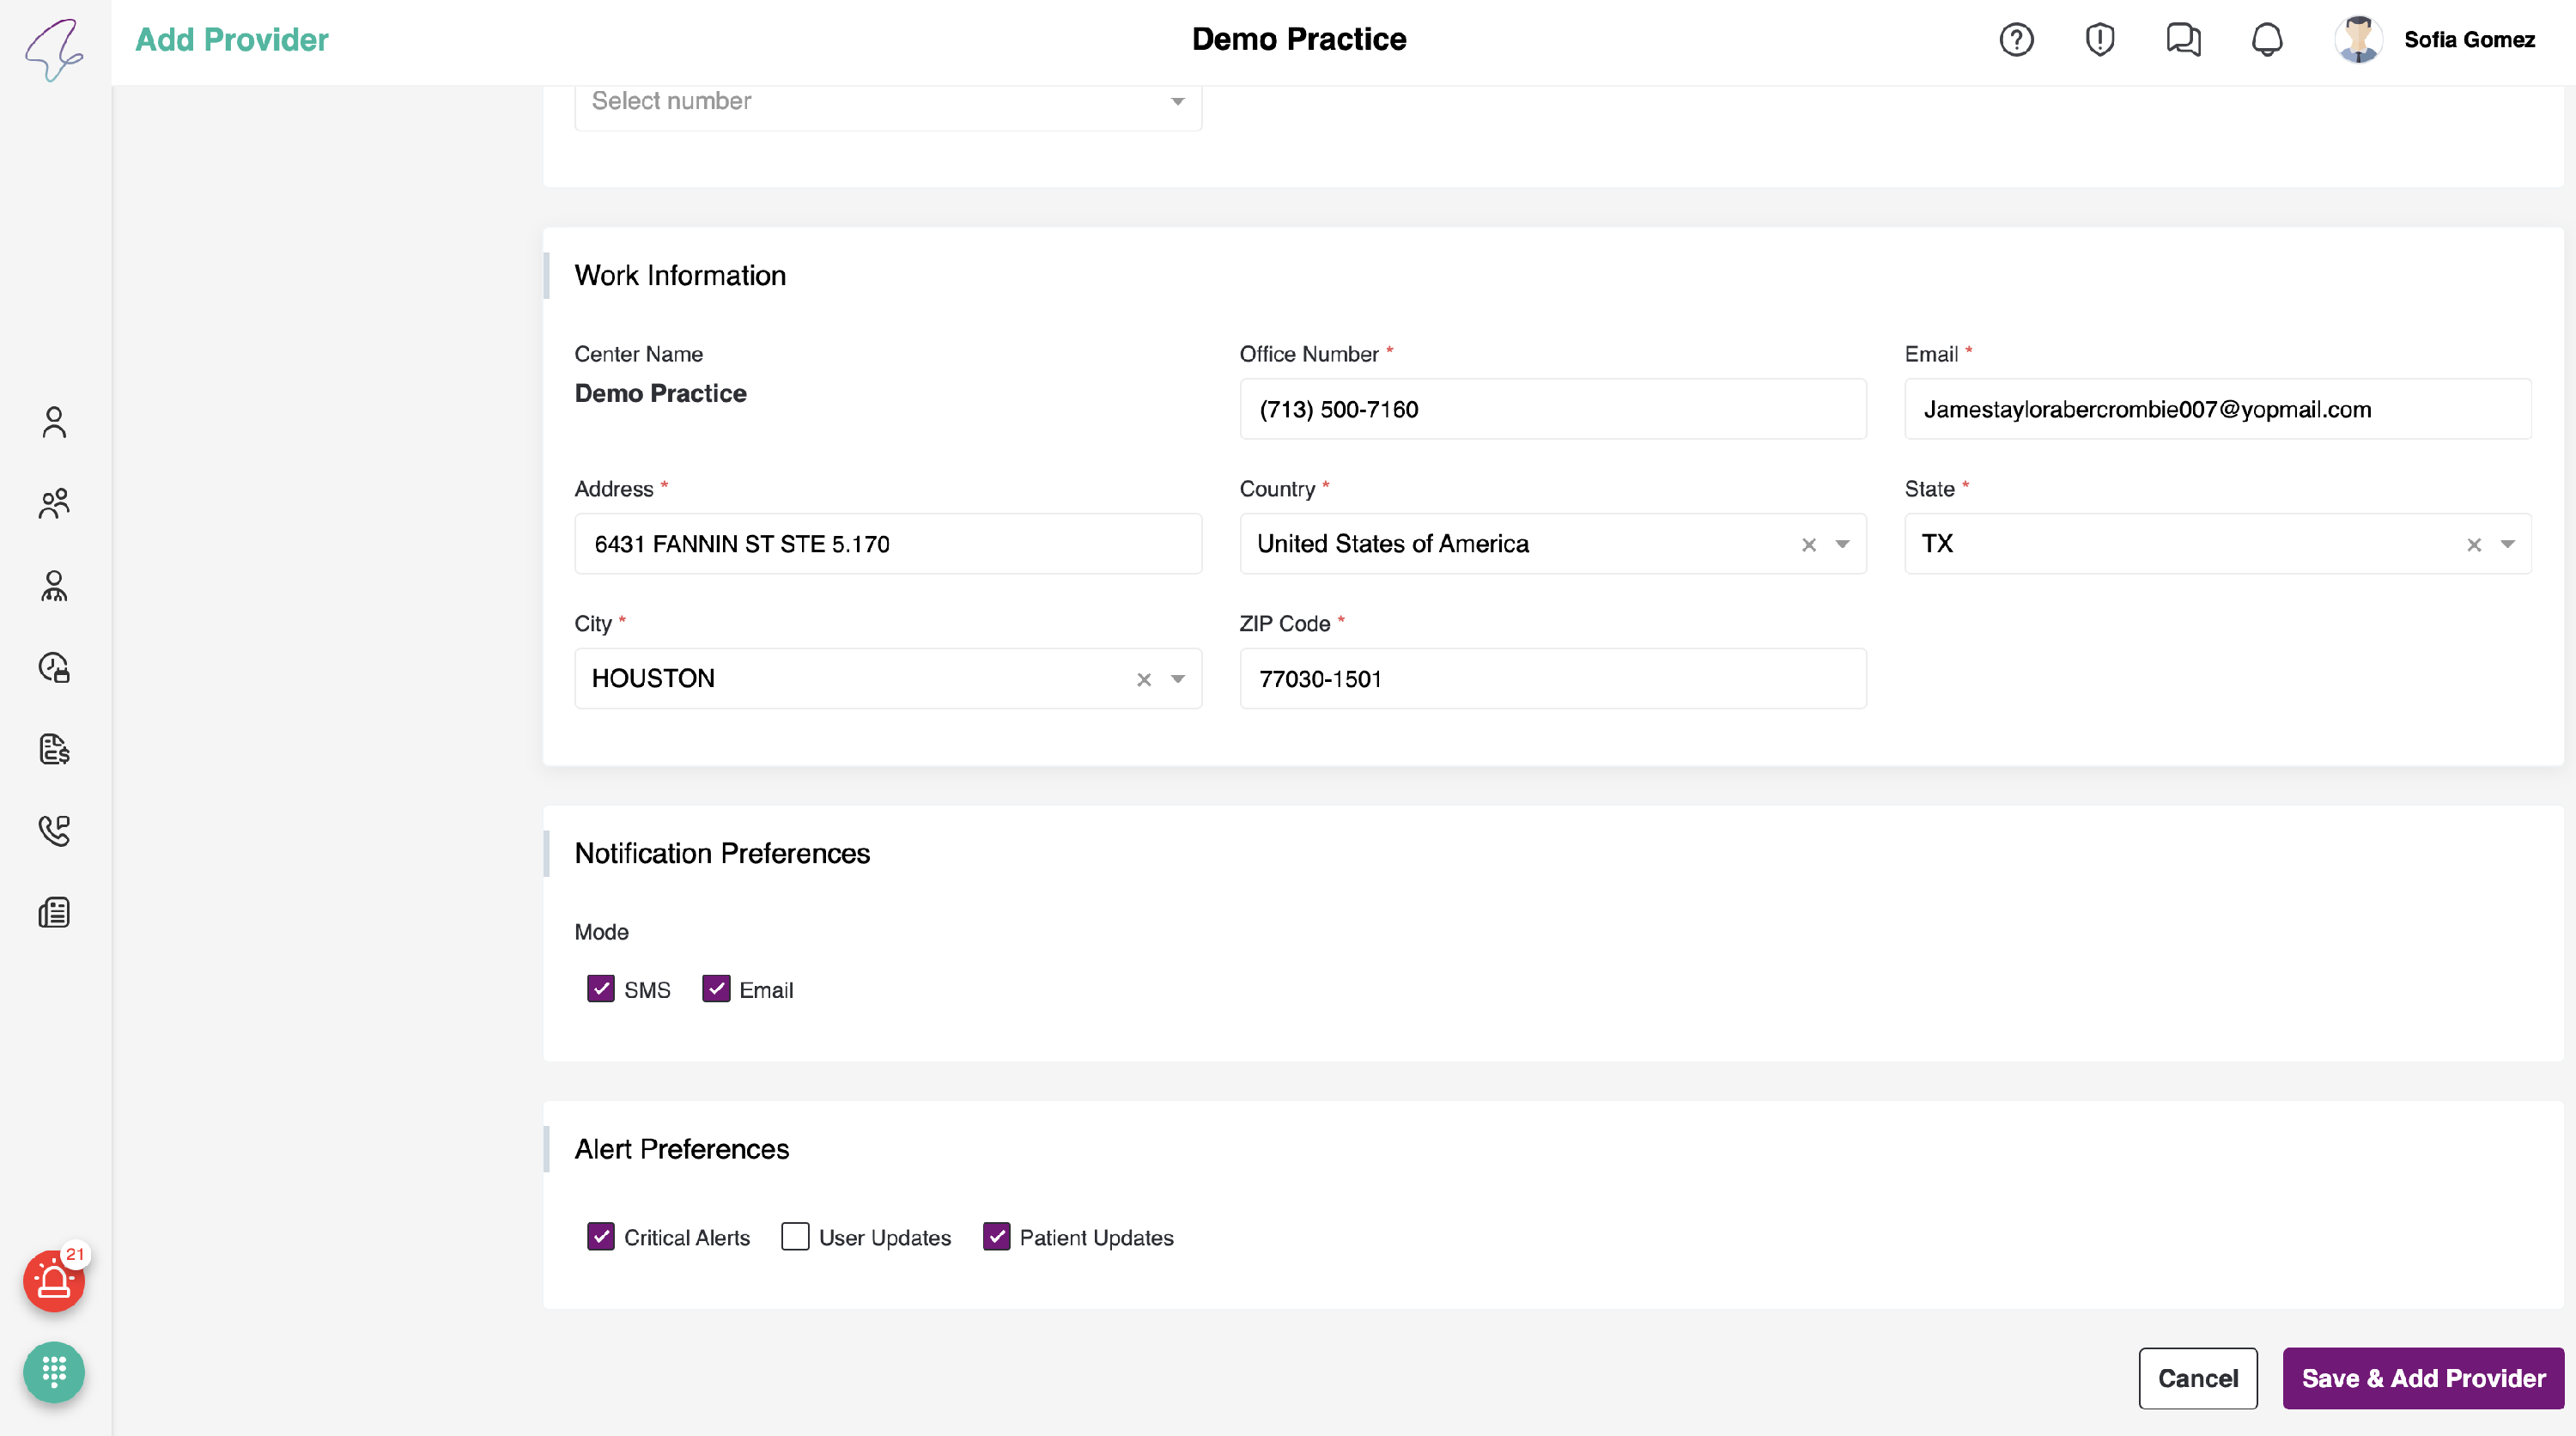
- After you enter all the details, click on 'Save & Add Provider', to save the details and add provider.
- Provider added can be seen in the dashboard - Provider Listing.
View/Edit Provider Profile:
To view the Provider Profile, please click on the eye icon of the required provider record in the list of provider
- Upon clicking on the eye icon, you will be navigated to the provider profile of that record. All the sections will be disabled mode, If you would like to edit any of the sections, then click on the edit button, which is on the top right corner of each section.
-
Once the necessary changes have been made, click the "Save Changes" button to apply them. If you wish to revert the changes, click the "Cancel" button.
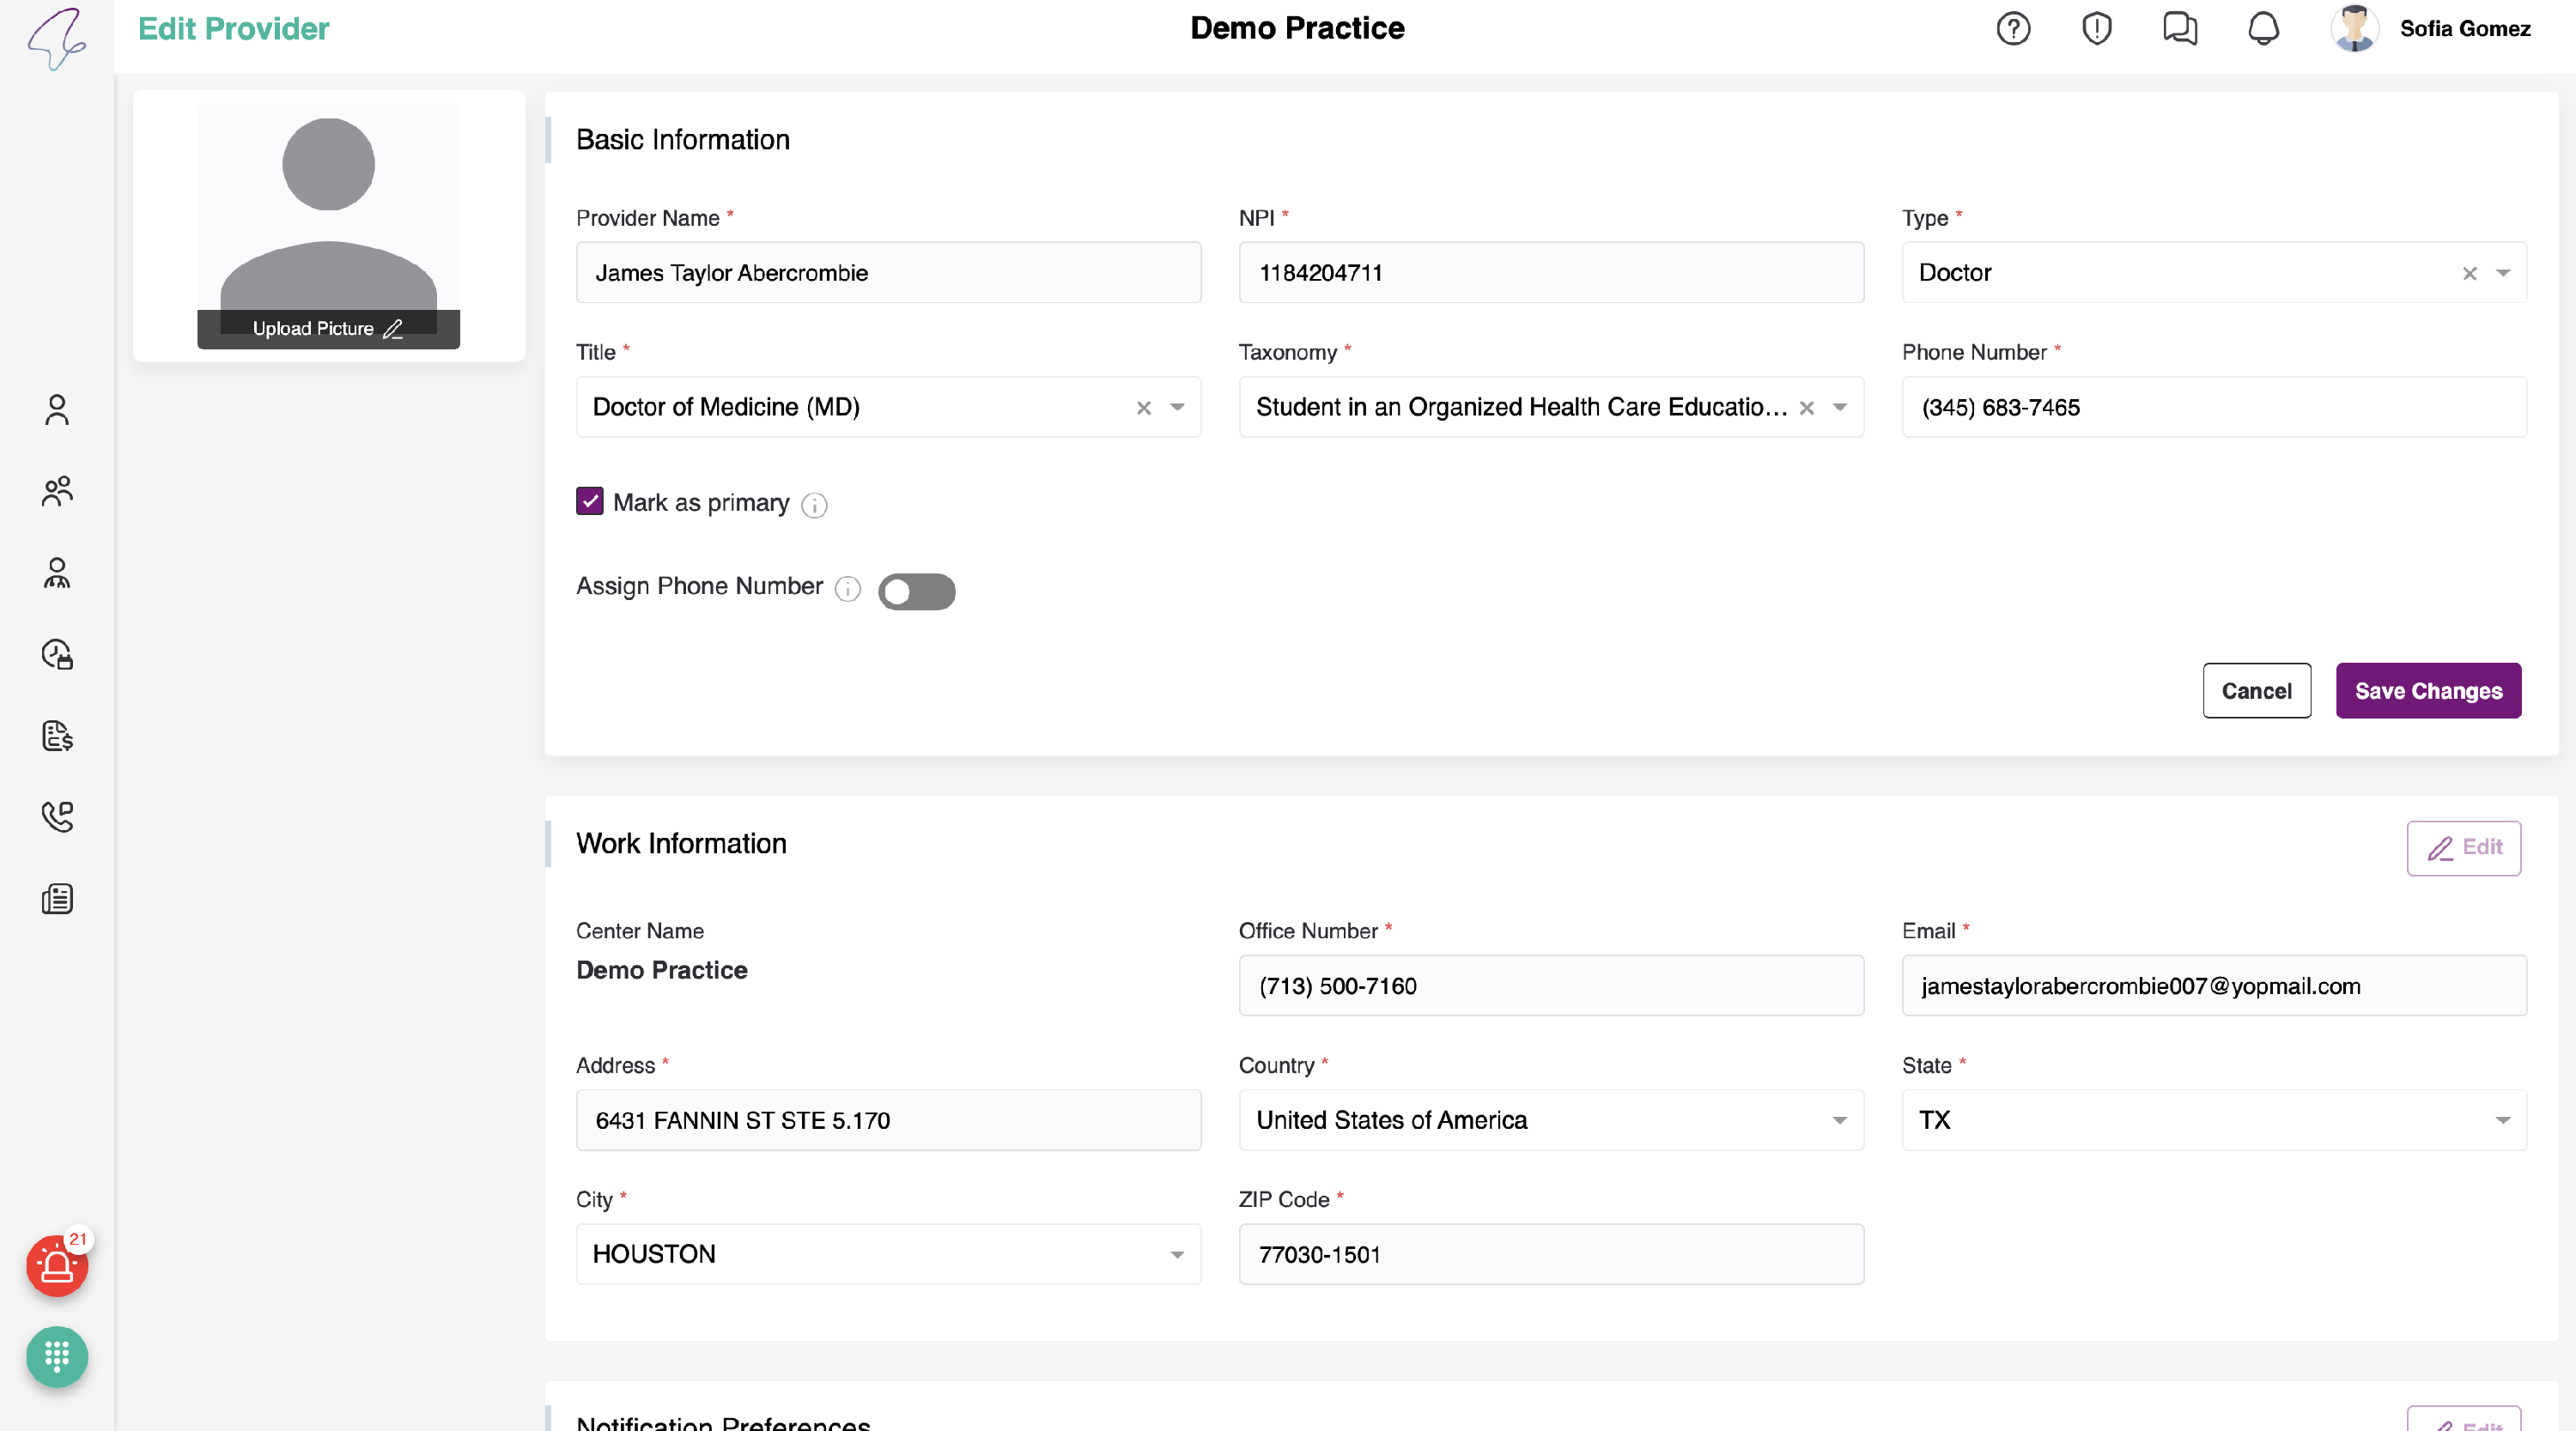
-
Upon clicking the "Cancel" button, a pop-up will appear to verify that you want to cancel the changes you made.
- All the sections in the View/Edit Provider are editable, and you cannot save the changes without answering the mandatory fields.

