
Add Center
Table of Contents
- Network Listing Overview
- Center Listing Page
- Add Center Workflow
- 3.1 Center Details
- 3.2 Contact & Address
- 3.3 Business Hours
- 3.4 Help & Support Info
- 3.5 Billing Type Options
- 3.6 Minimum Service Time Inputs
- Center Settings & Preferences
- 4.1 Patient Details Preference
- 4.2 Voicemail Greeting
- 4.3 Stream Chat & VOIP
- 4.4 RPM Device Ordering
- Twilio Number Setup
- Practice Manager Setup
- Billing Admin Setup
-
Final Submission & Center Management
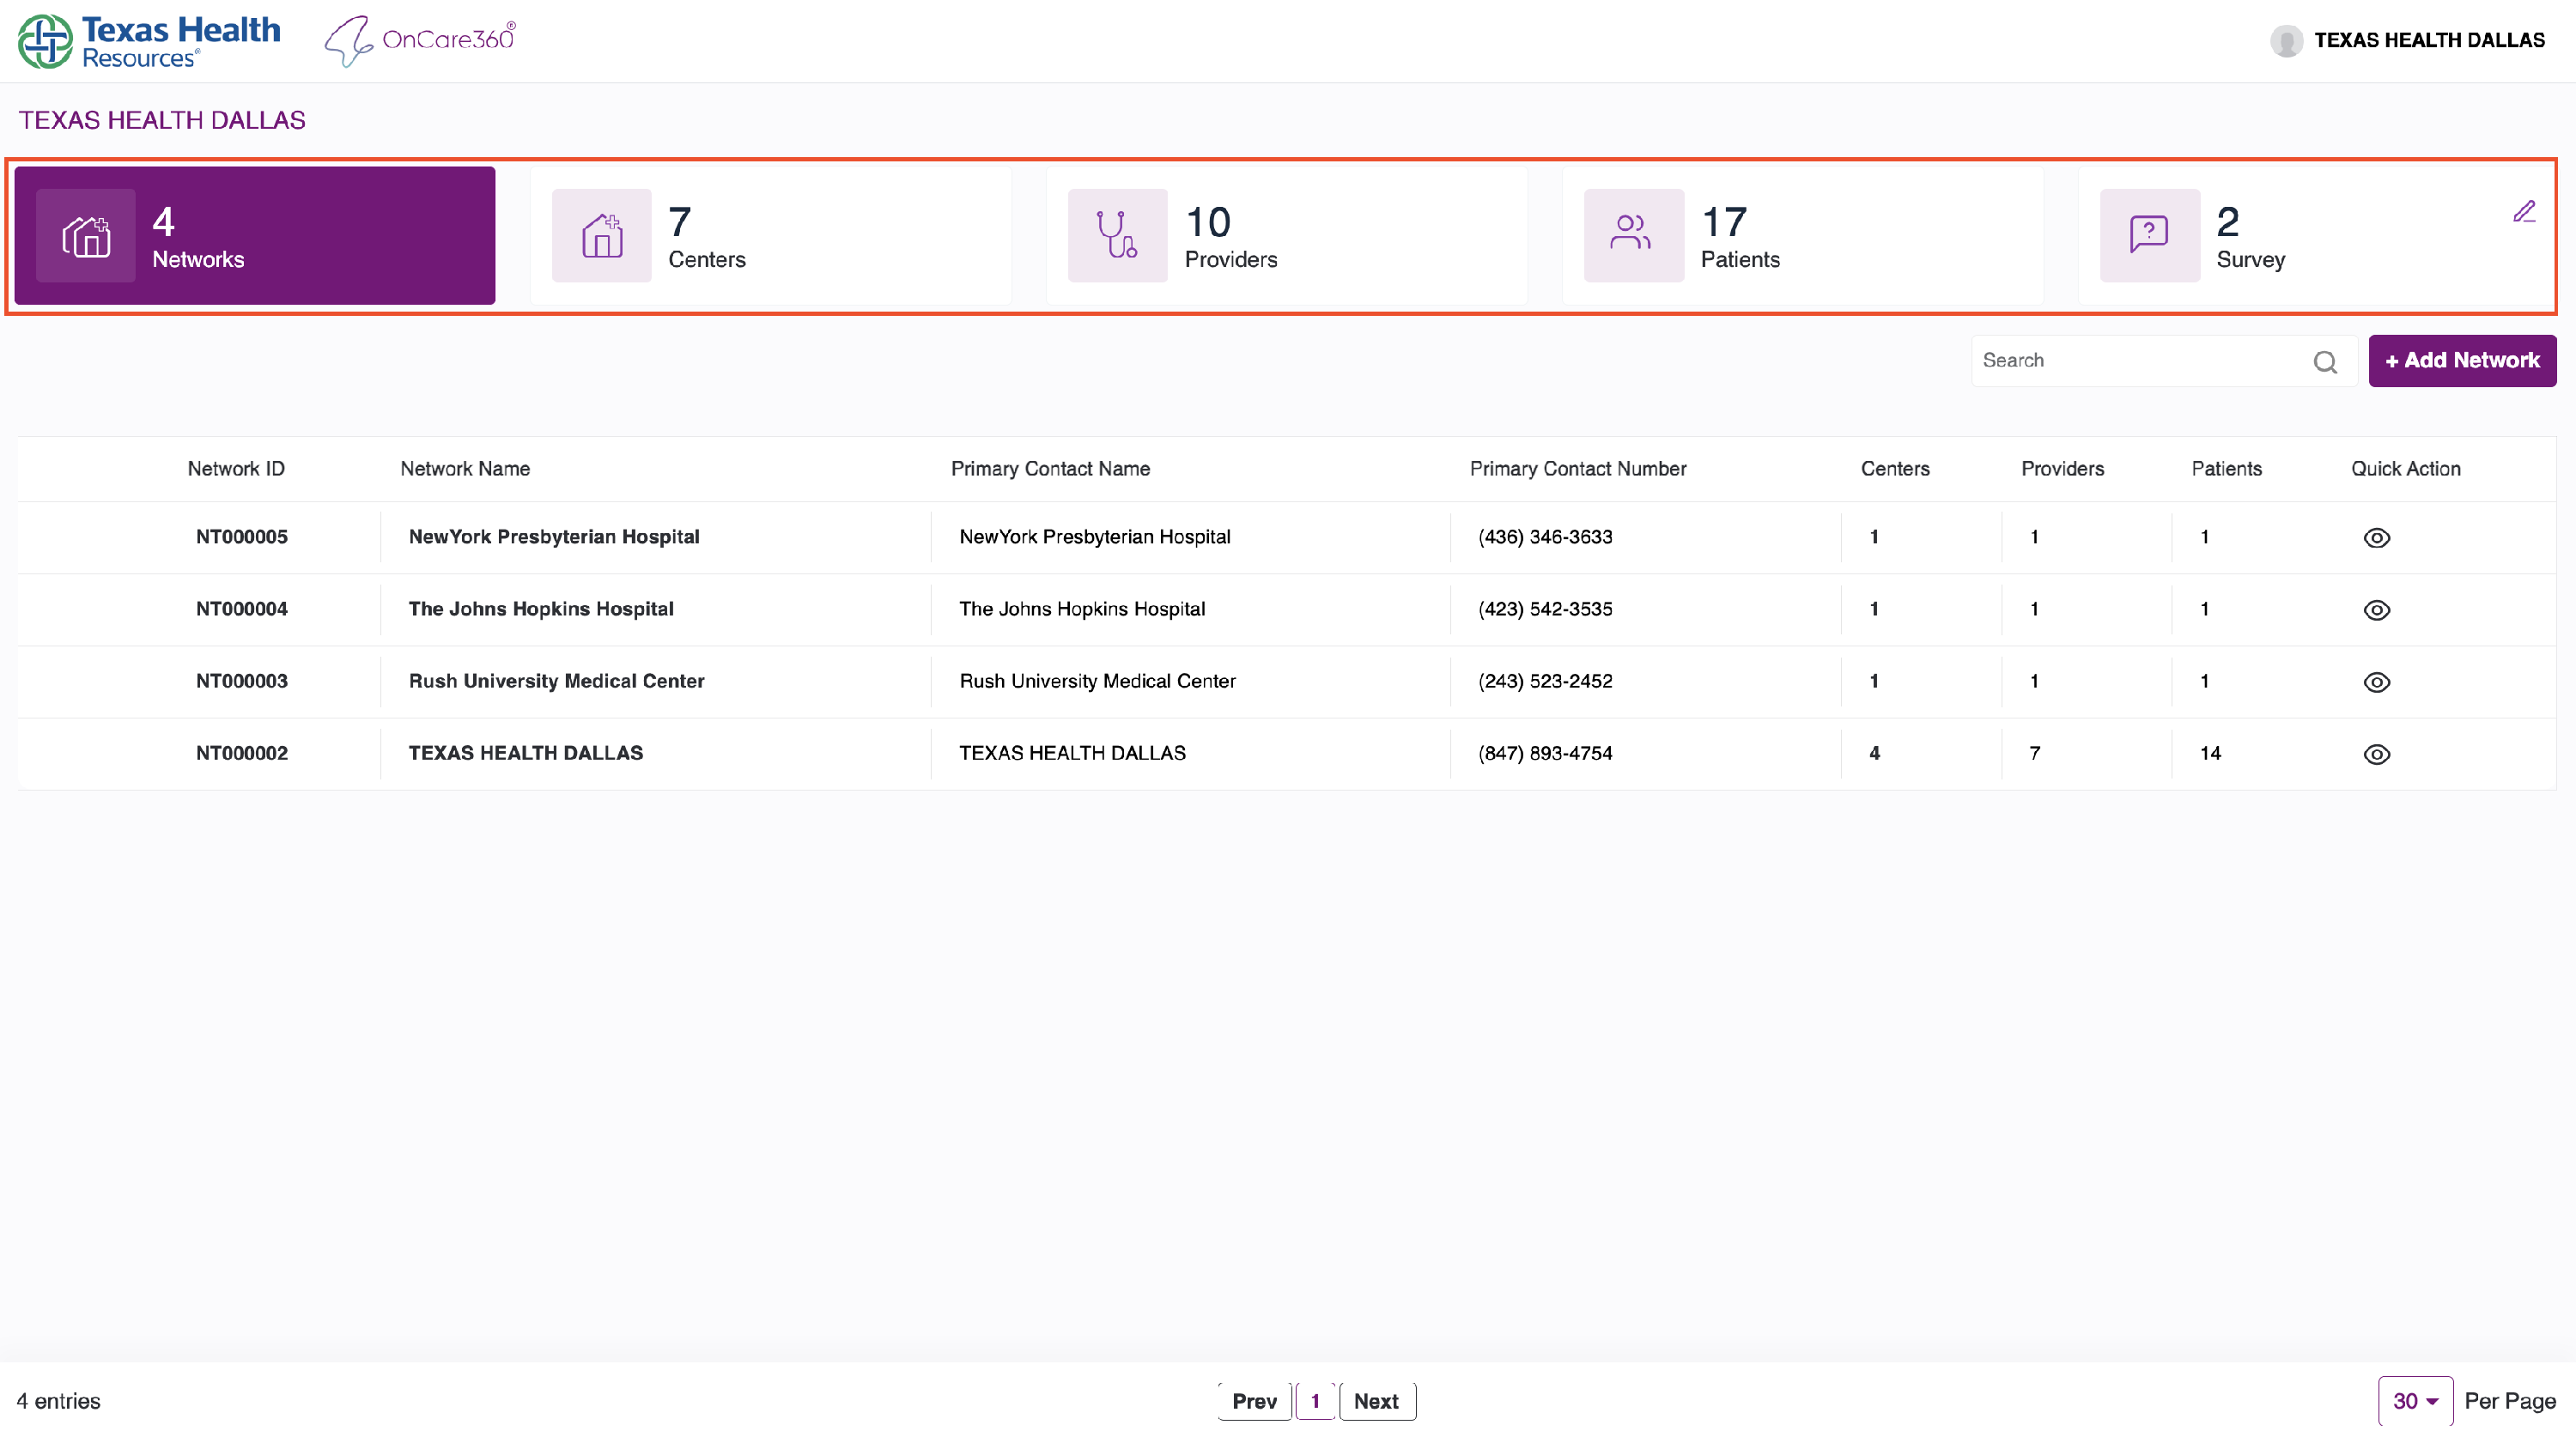
1. Network Listing Overview
After logging into the platform:
- You will land on the Network Listing page, where you can manage all your networks.
- The top-left section shows the Customer/Admin name.

You’ll see the following metrics:
- Networks: Total networks associated with this account.
- Centers: Number of active centers.
- Providers: Assigned provider count.
- Patients: Total number of enrolled patients.
- Survey: No of Surveys available for the customer.
You can search networks by:
- Network ID
- Network Name
- Contact Name or Number

Use the Add Network button to create new networks.
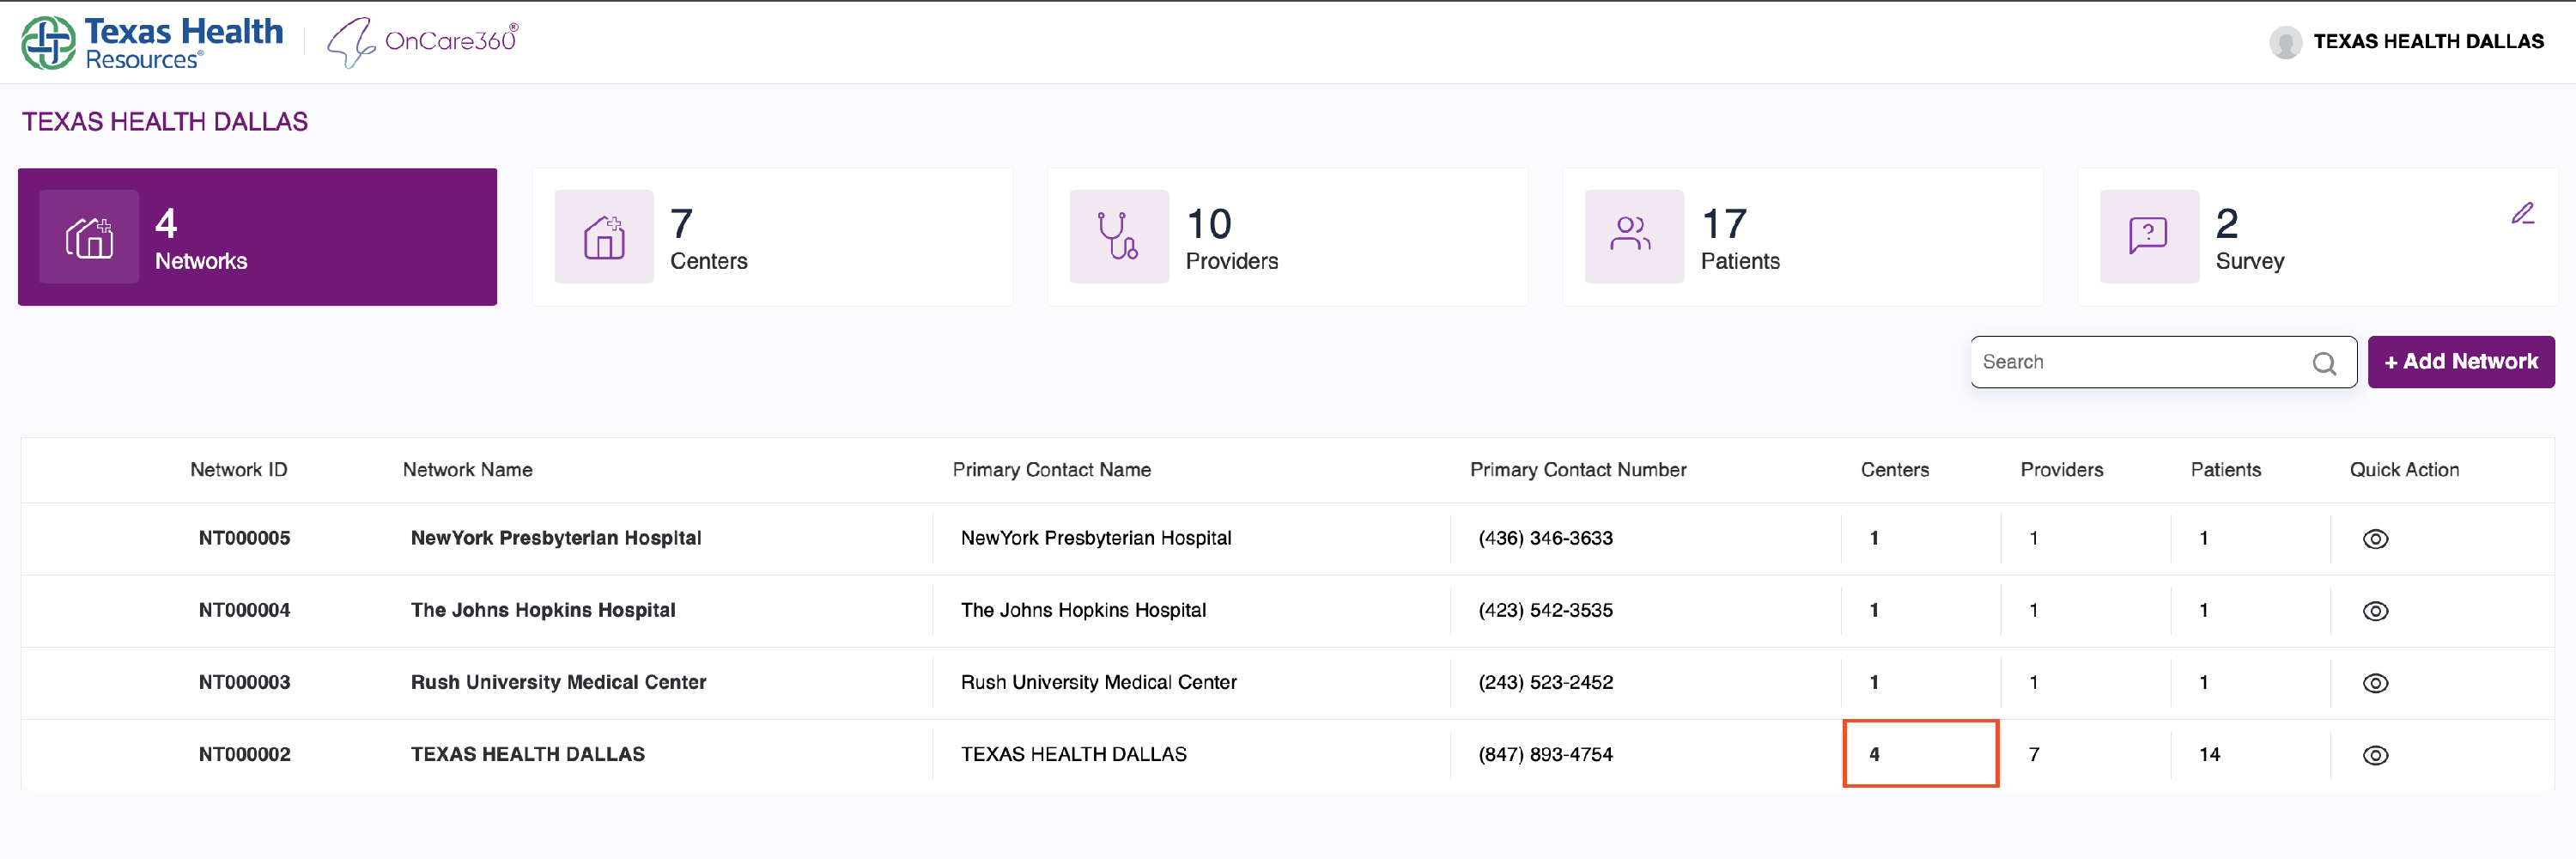
Each row in the network table shows:
- Network name
-
Center, provider, and patient counts
Click on the center count to navigate to the Center Listing Page.
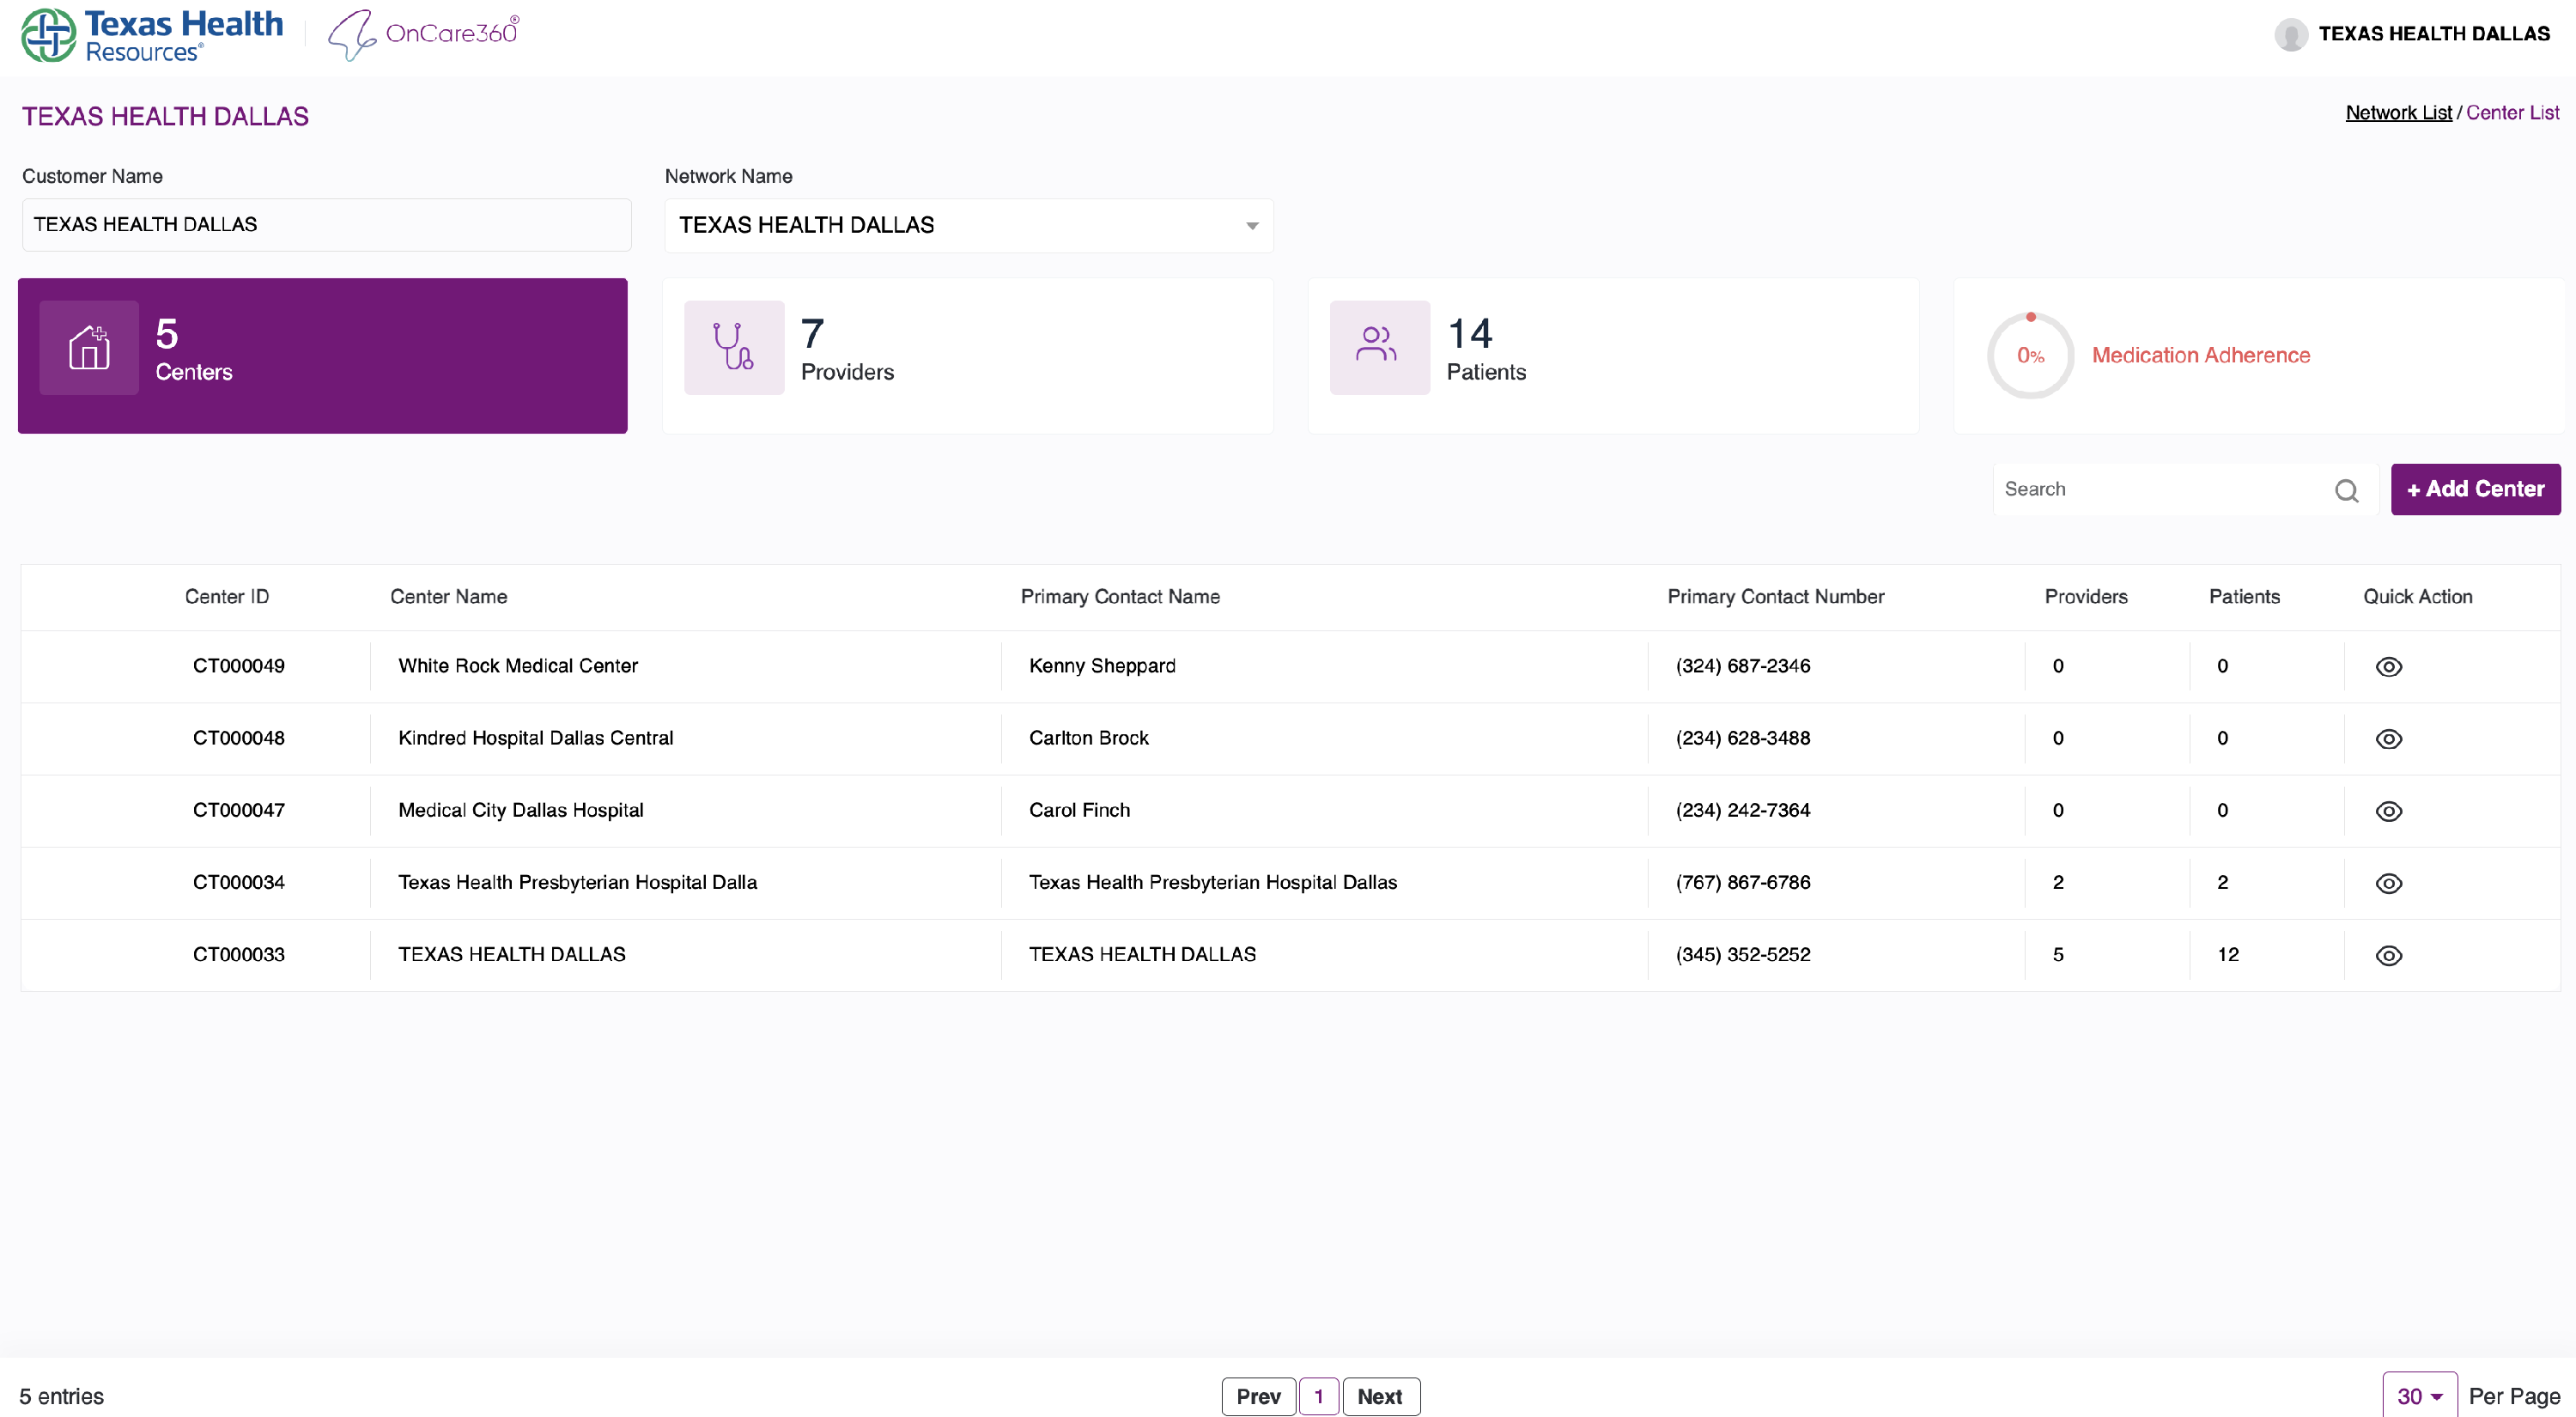
2. Center Listing Page
Displays all centers for the selected network.
- Change networks from the network dropdown.
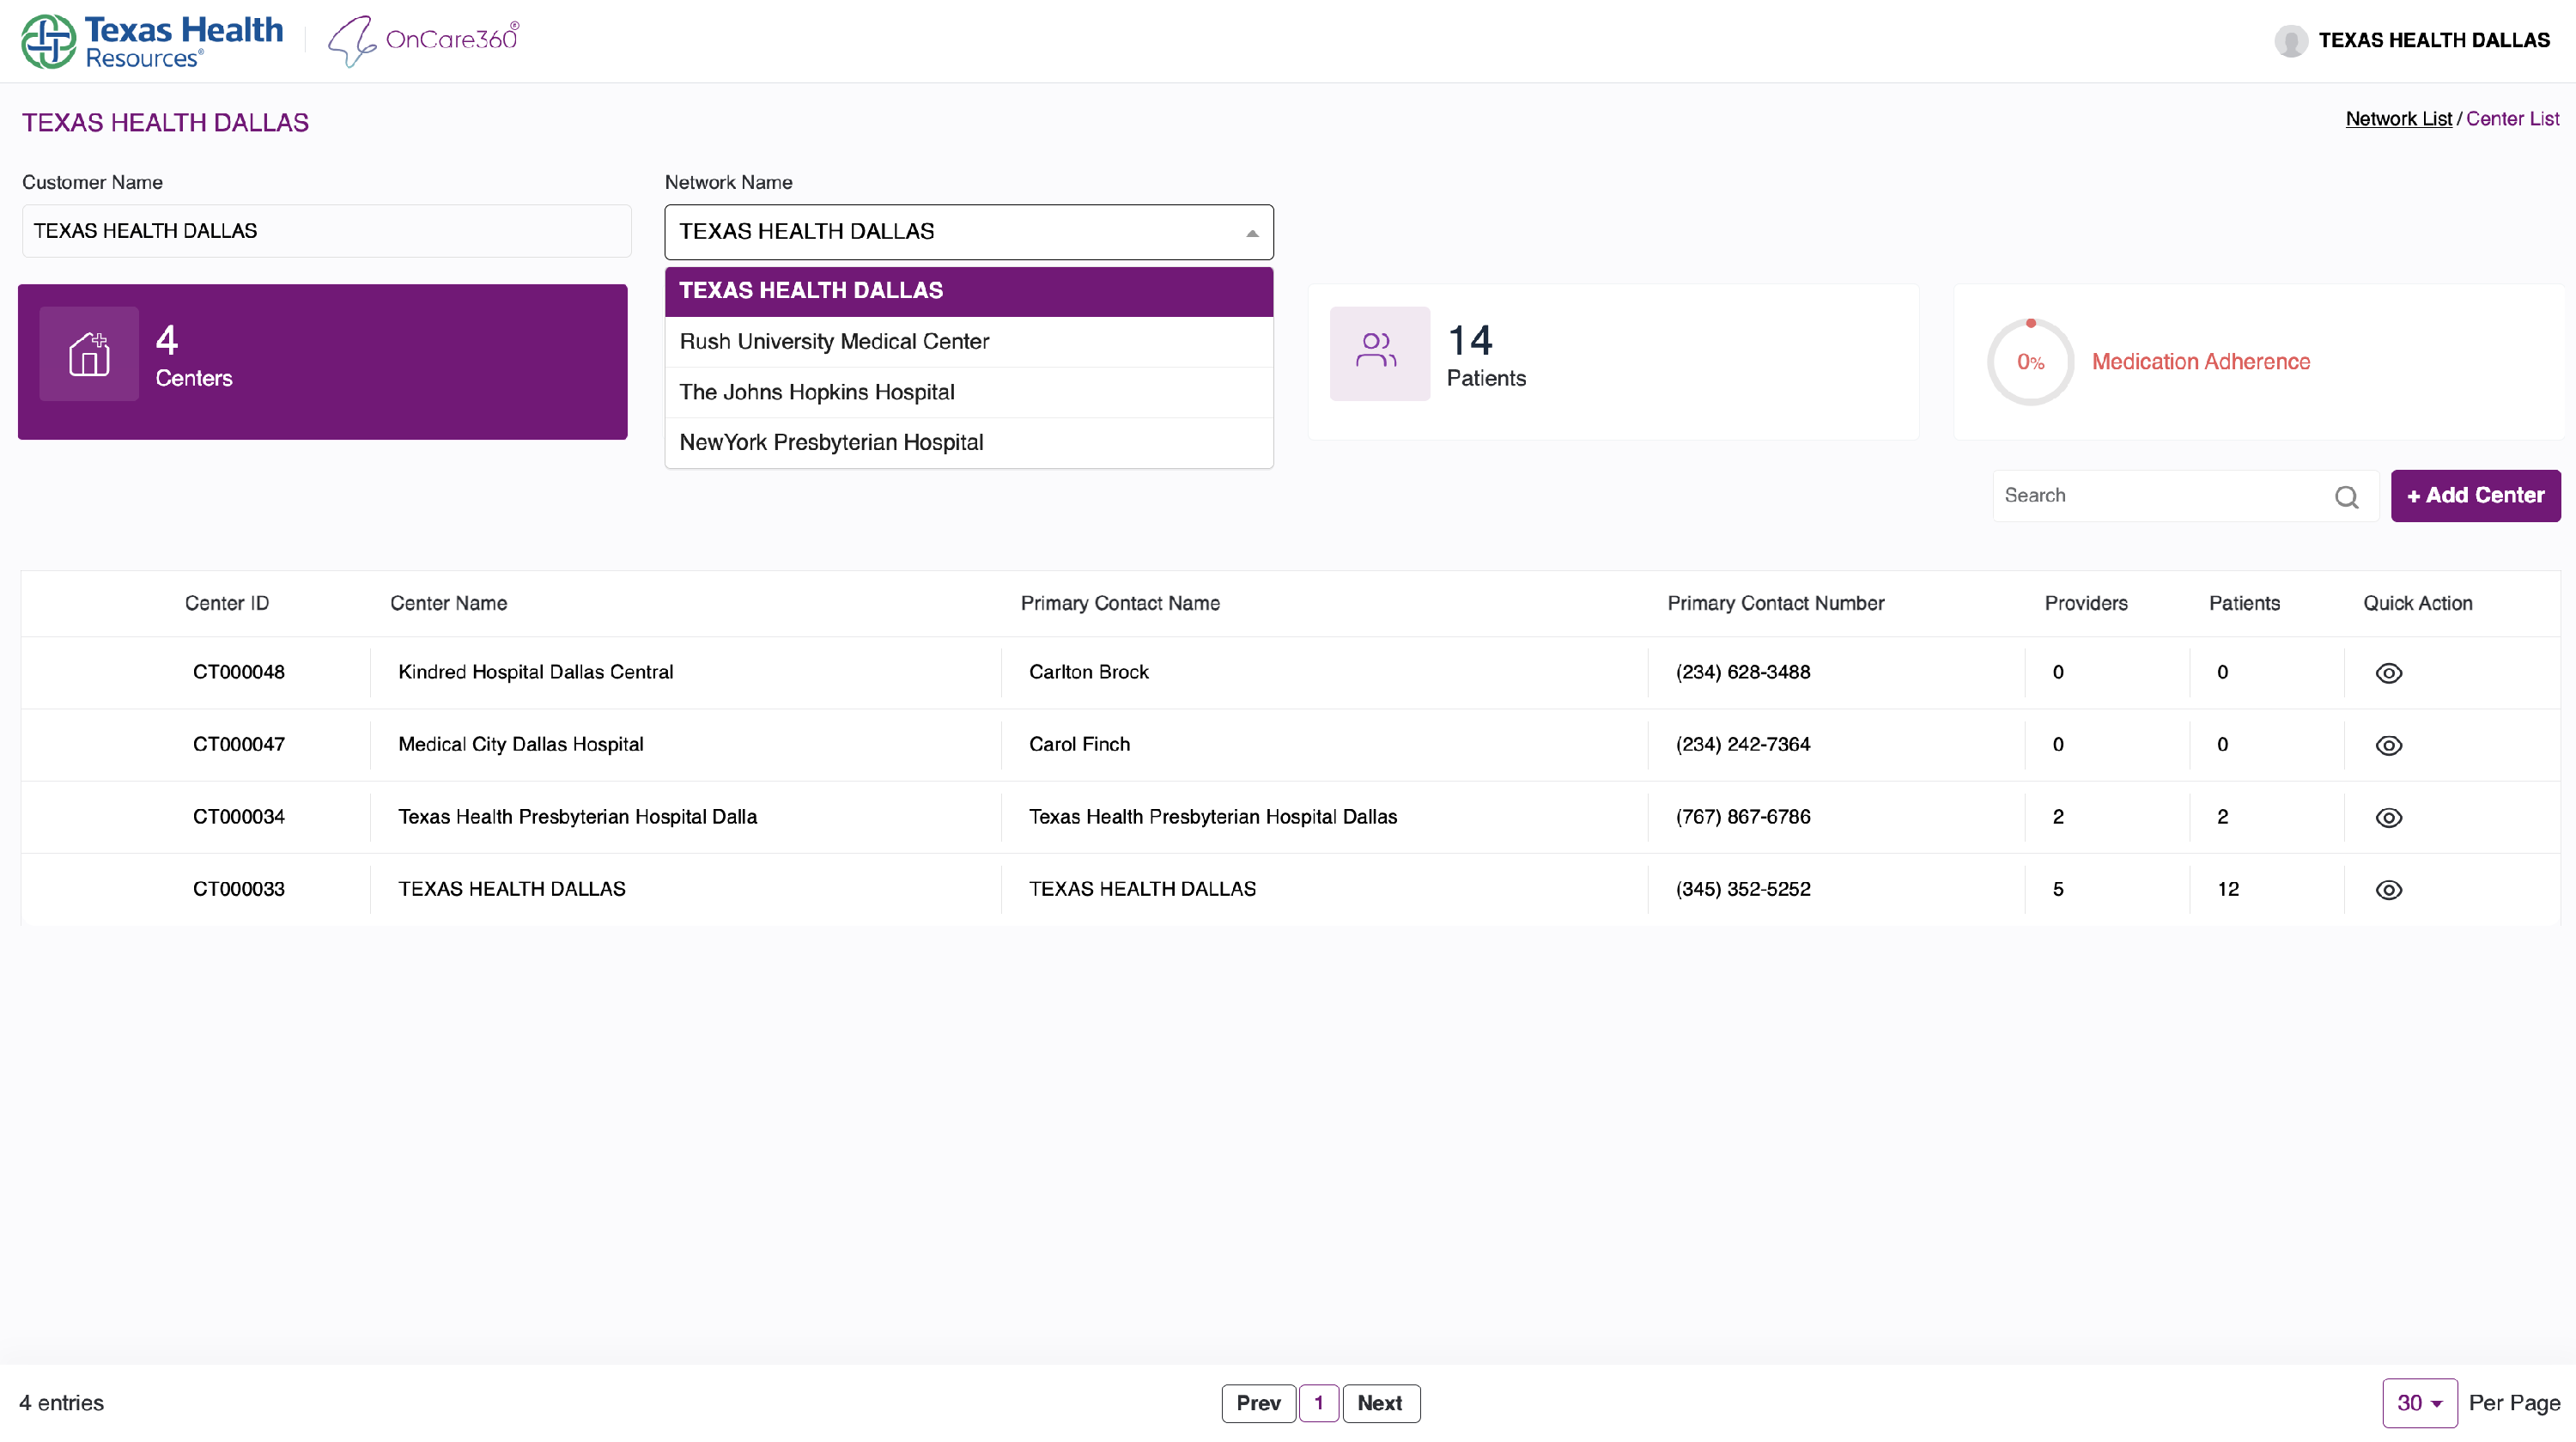
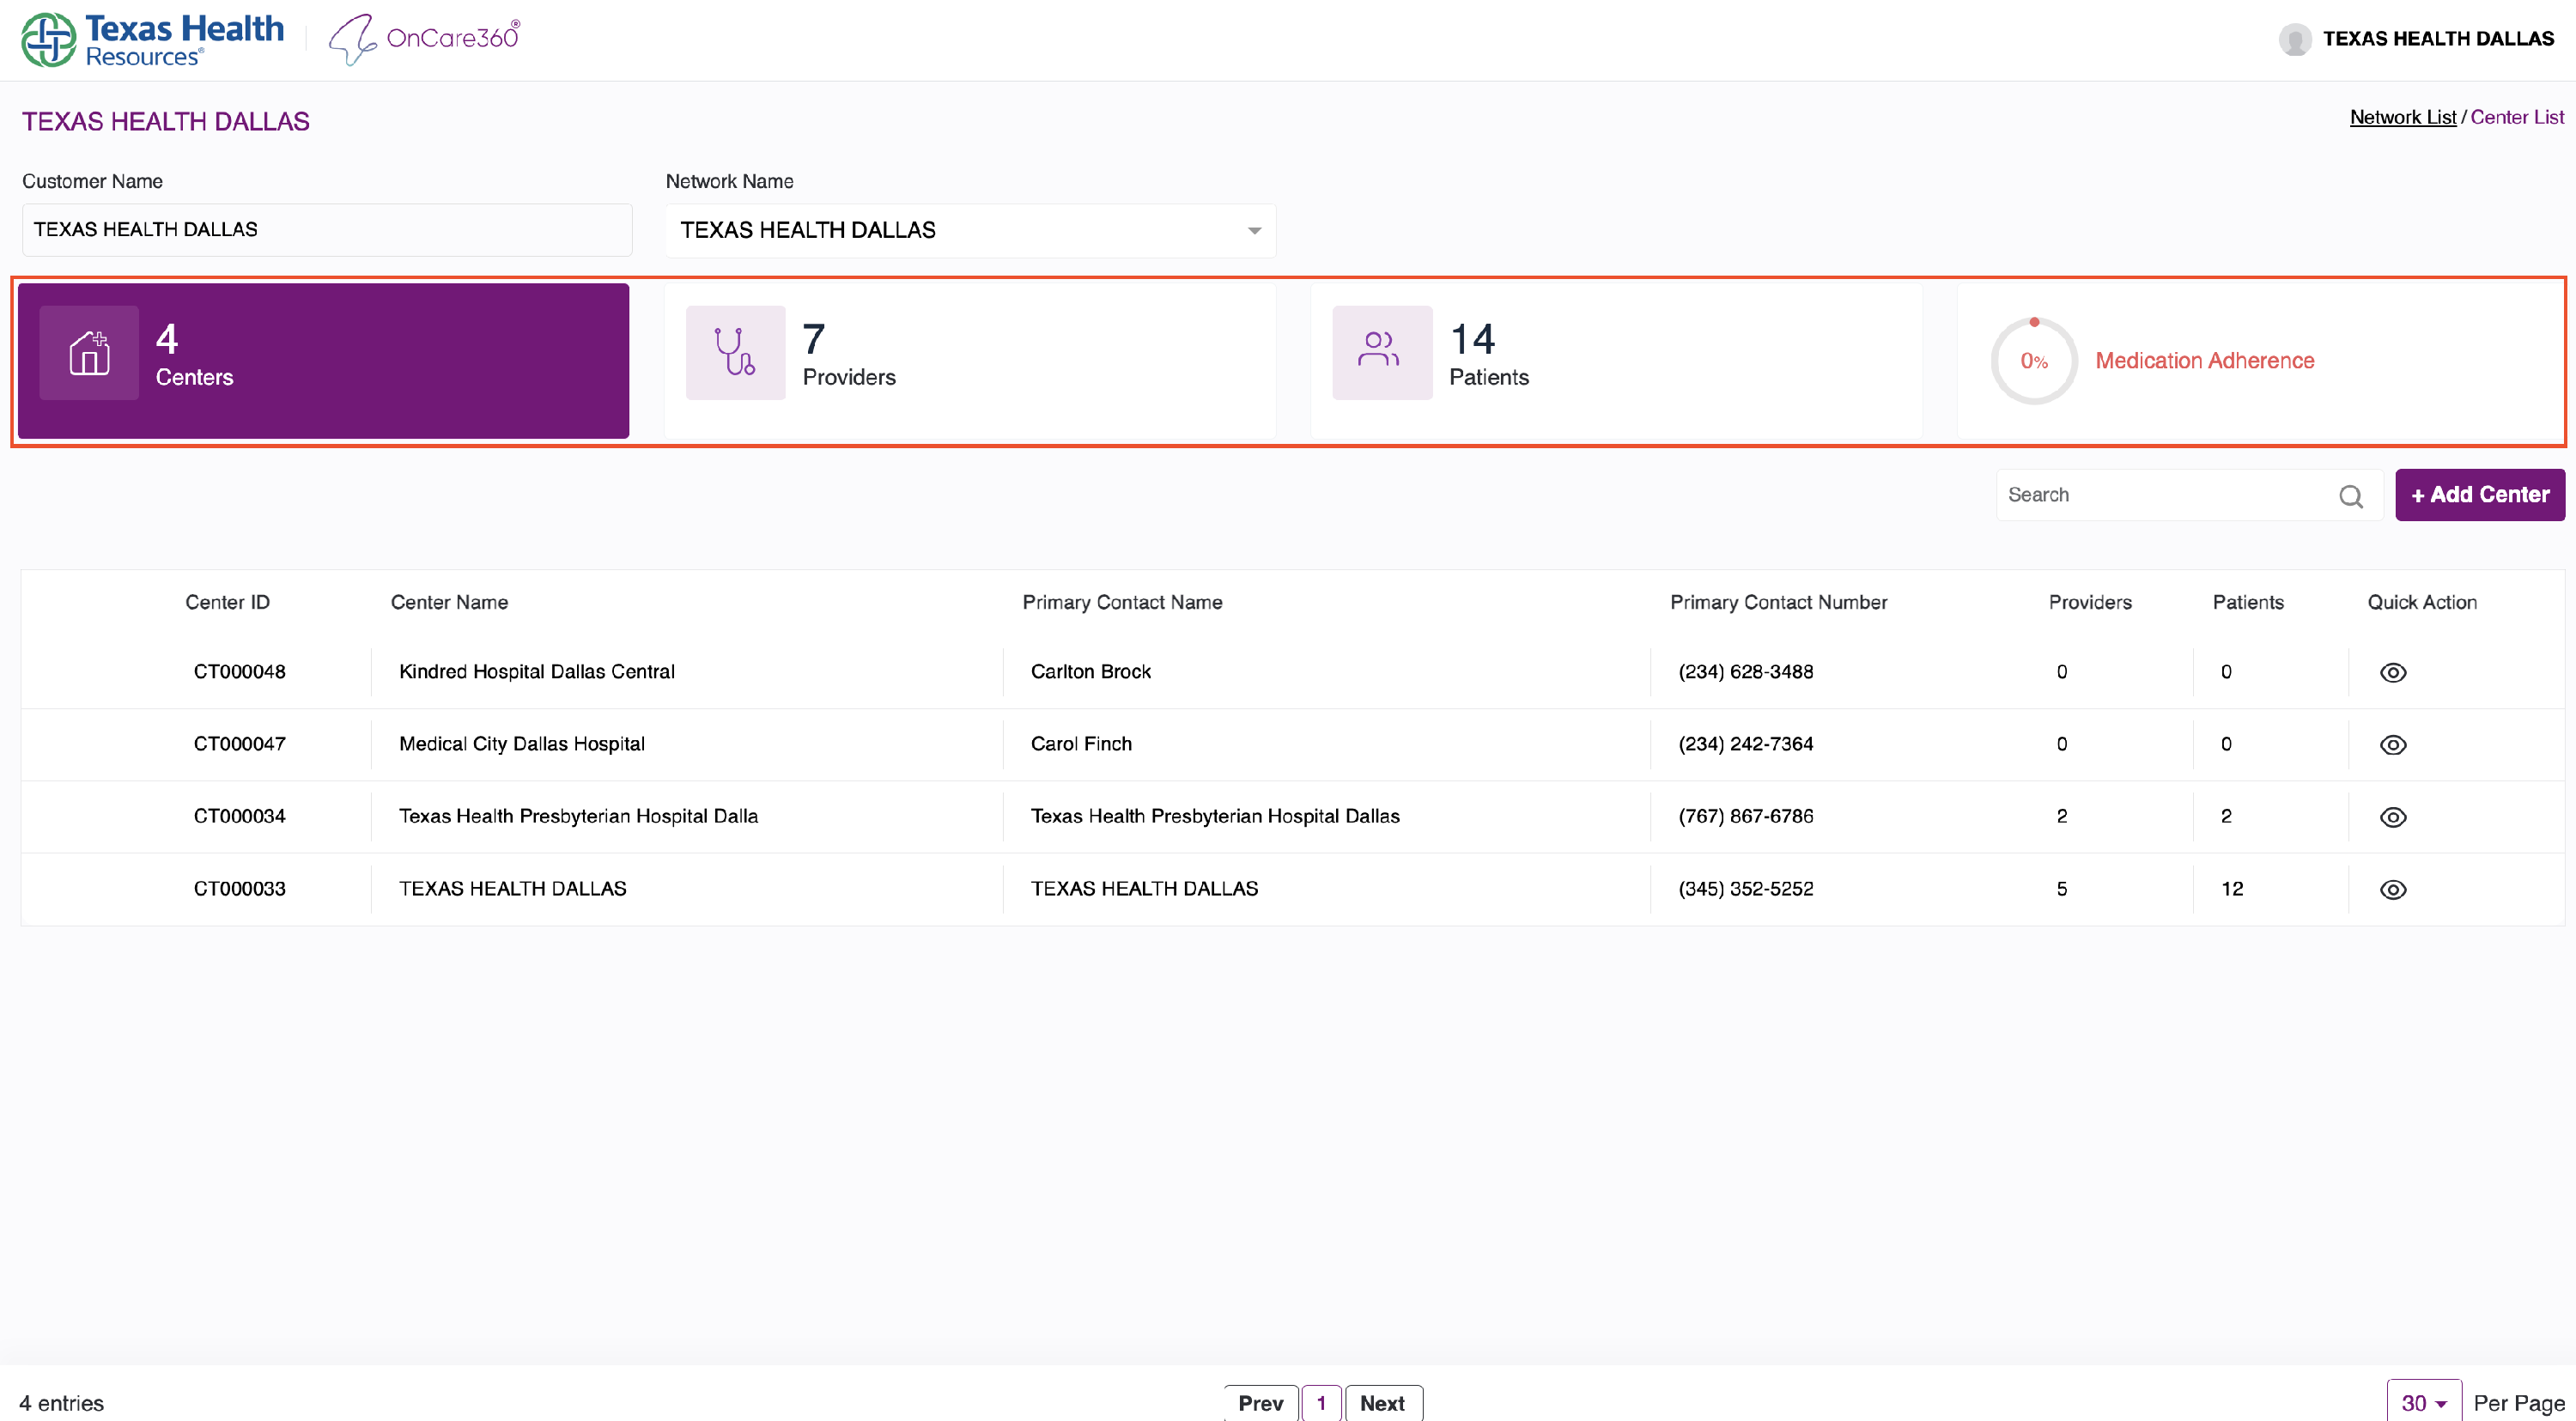
Center-level data includes:
- Centers
- Providers
- Patients
- Medication Adherence (based on patient compliance)
Note: Medication adherence is calculated based on the number of doses taken/missed.
You can search center by:
- Center ID
- Center Name
- Contact Name or Number
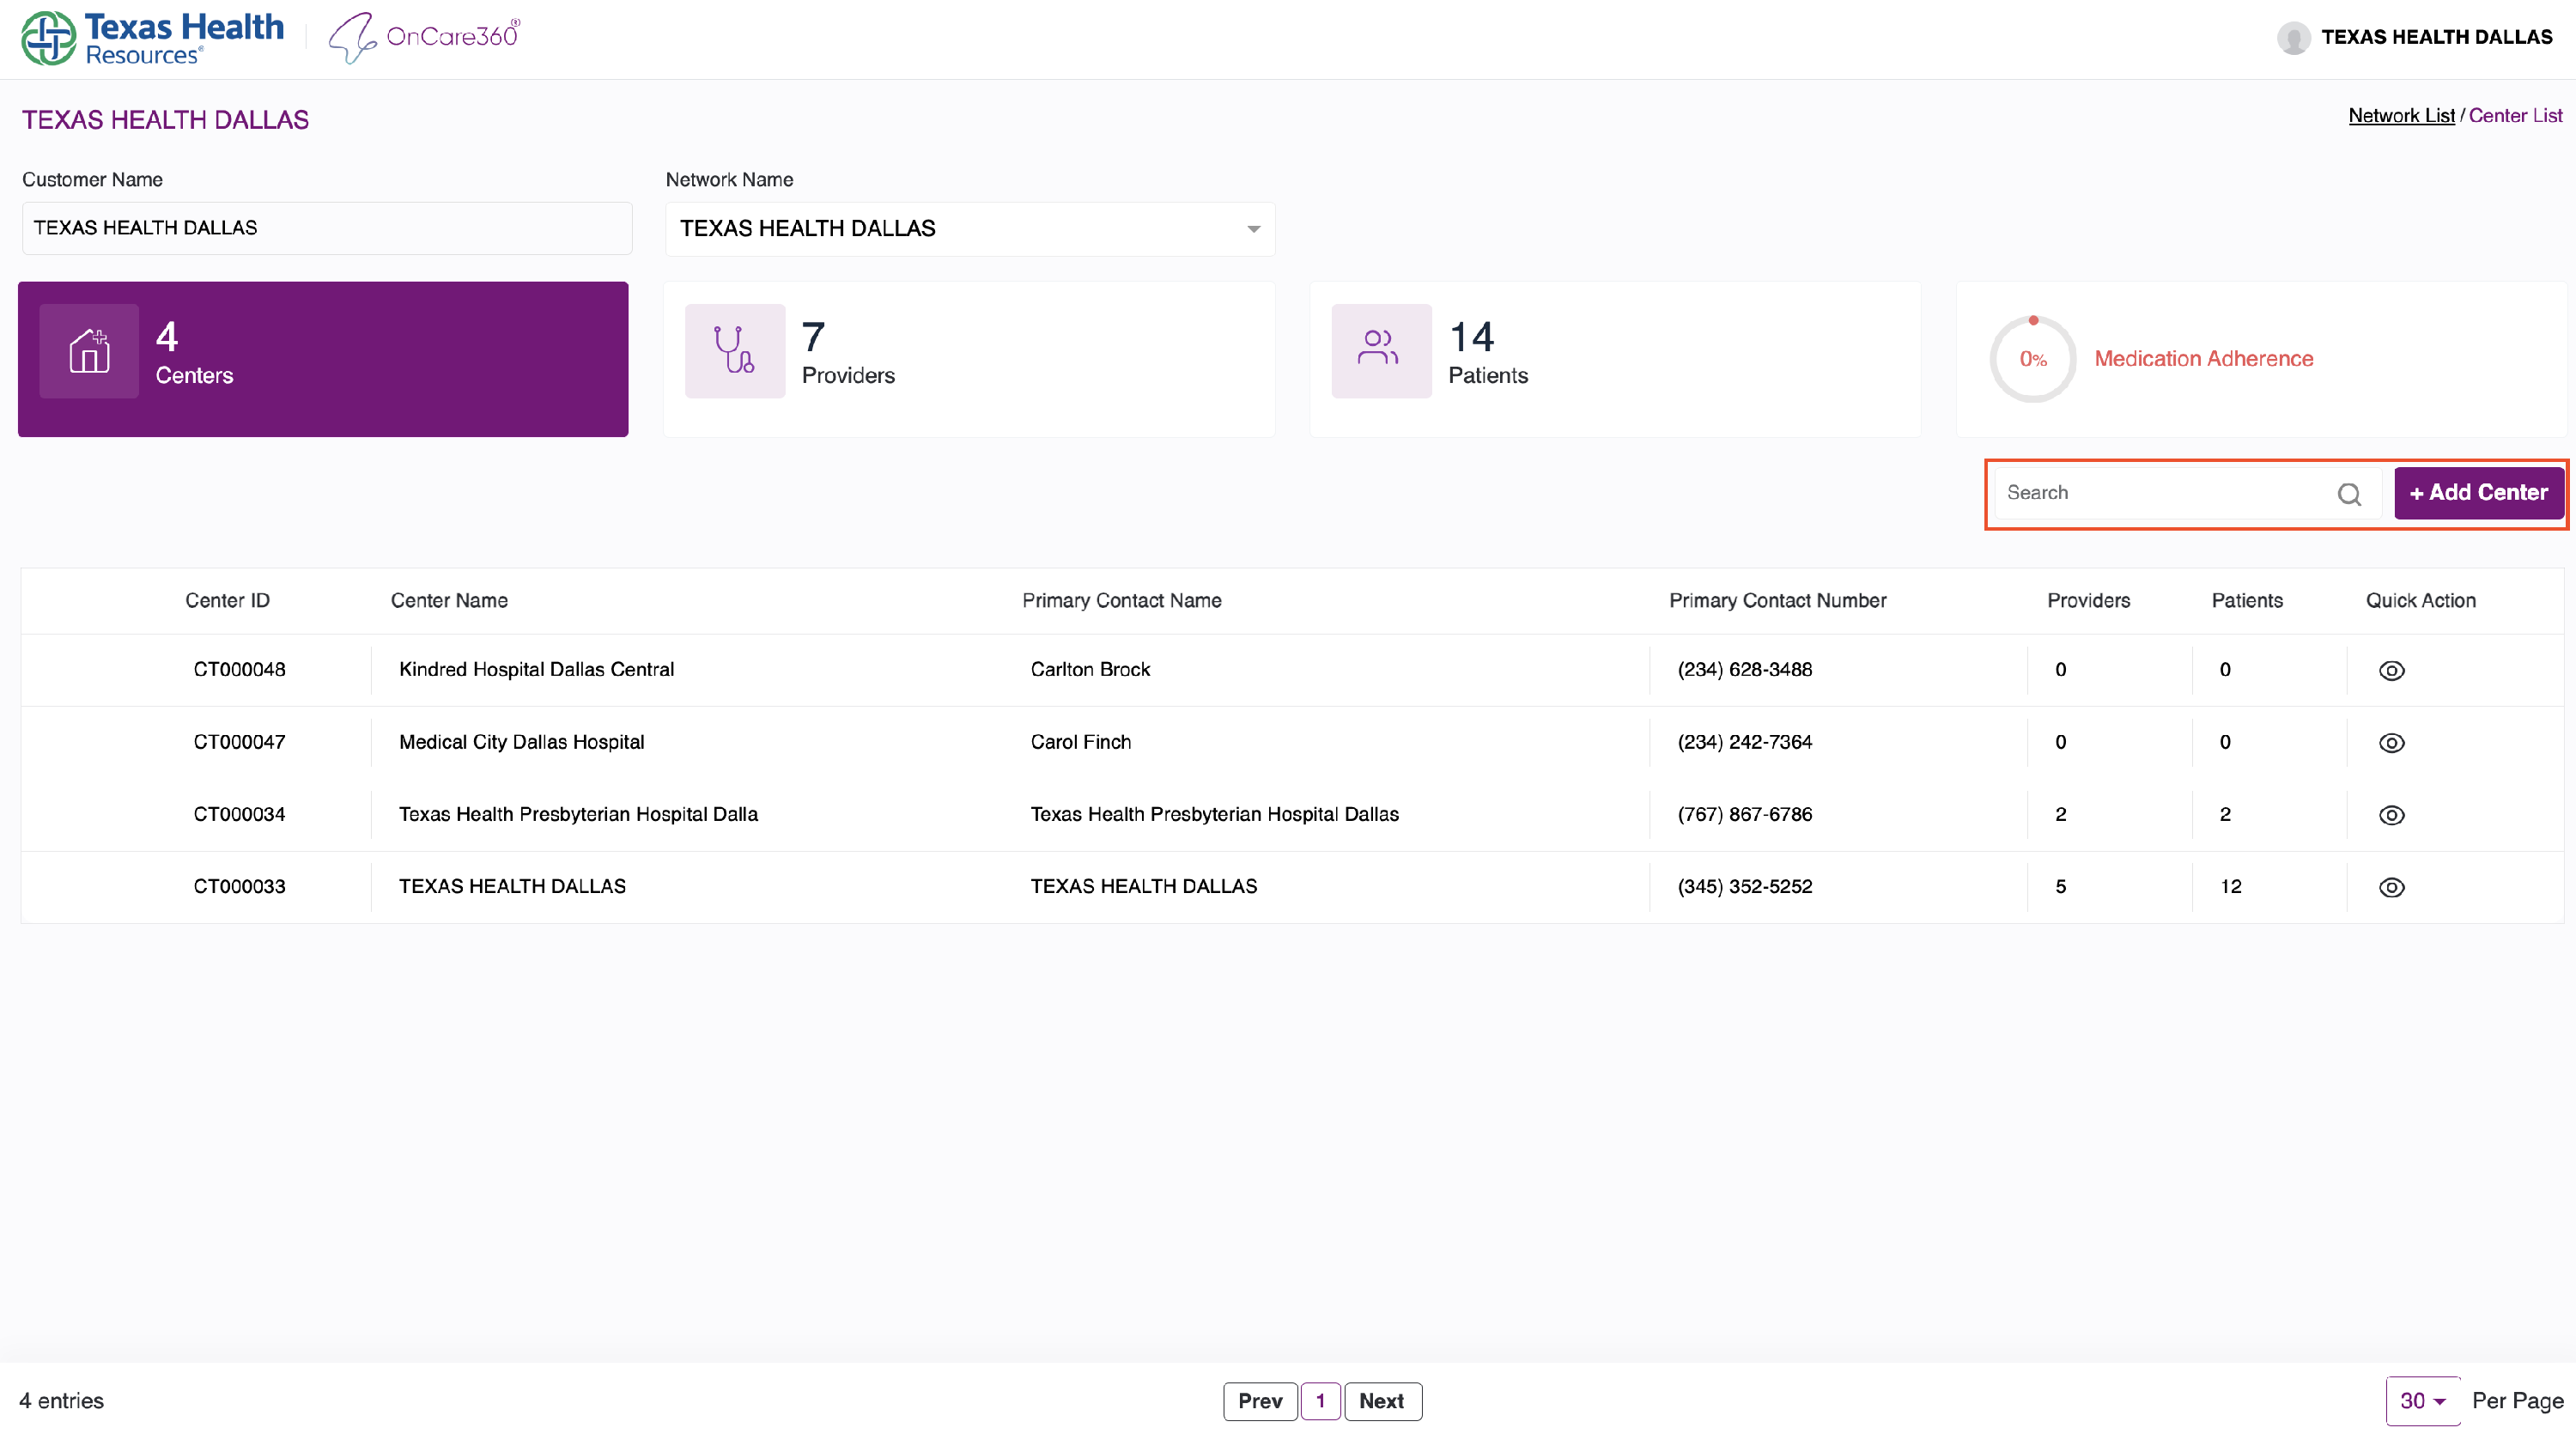
Click this to start the Add Center workflow.
3. Add Center Workflow
Clicking Add Center takes you to the Center Form.
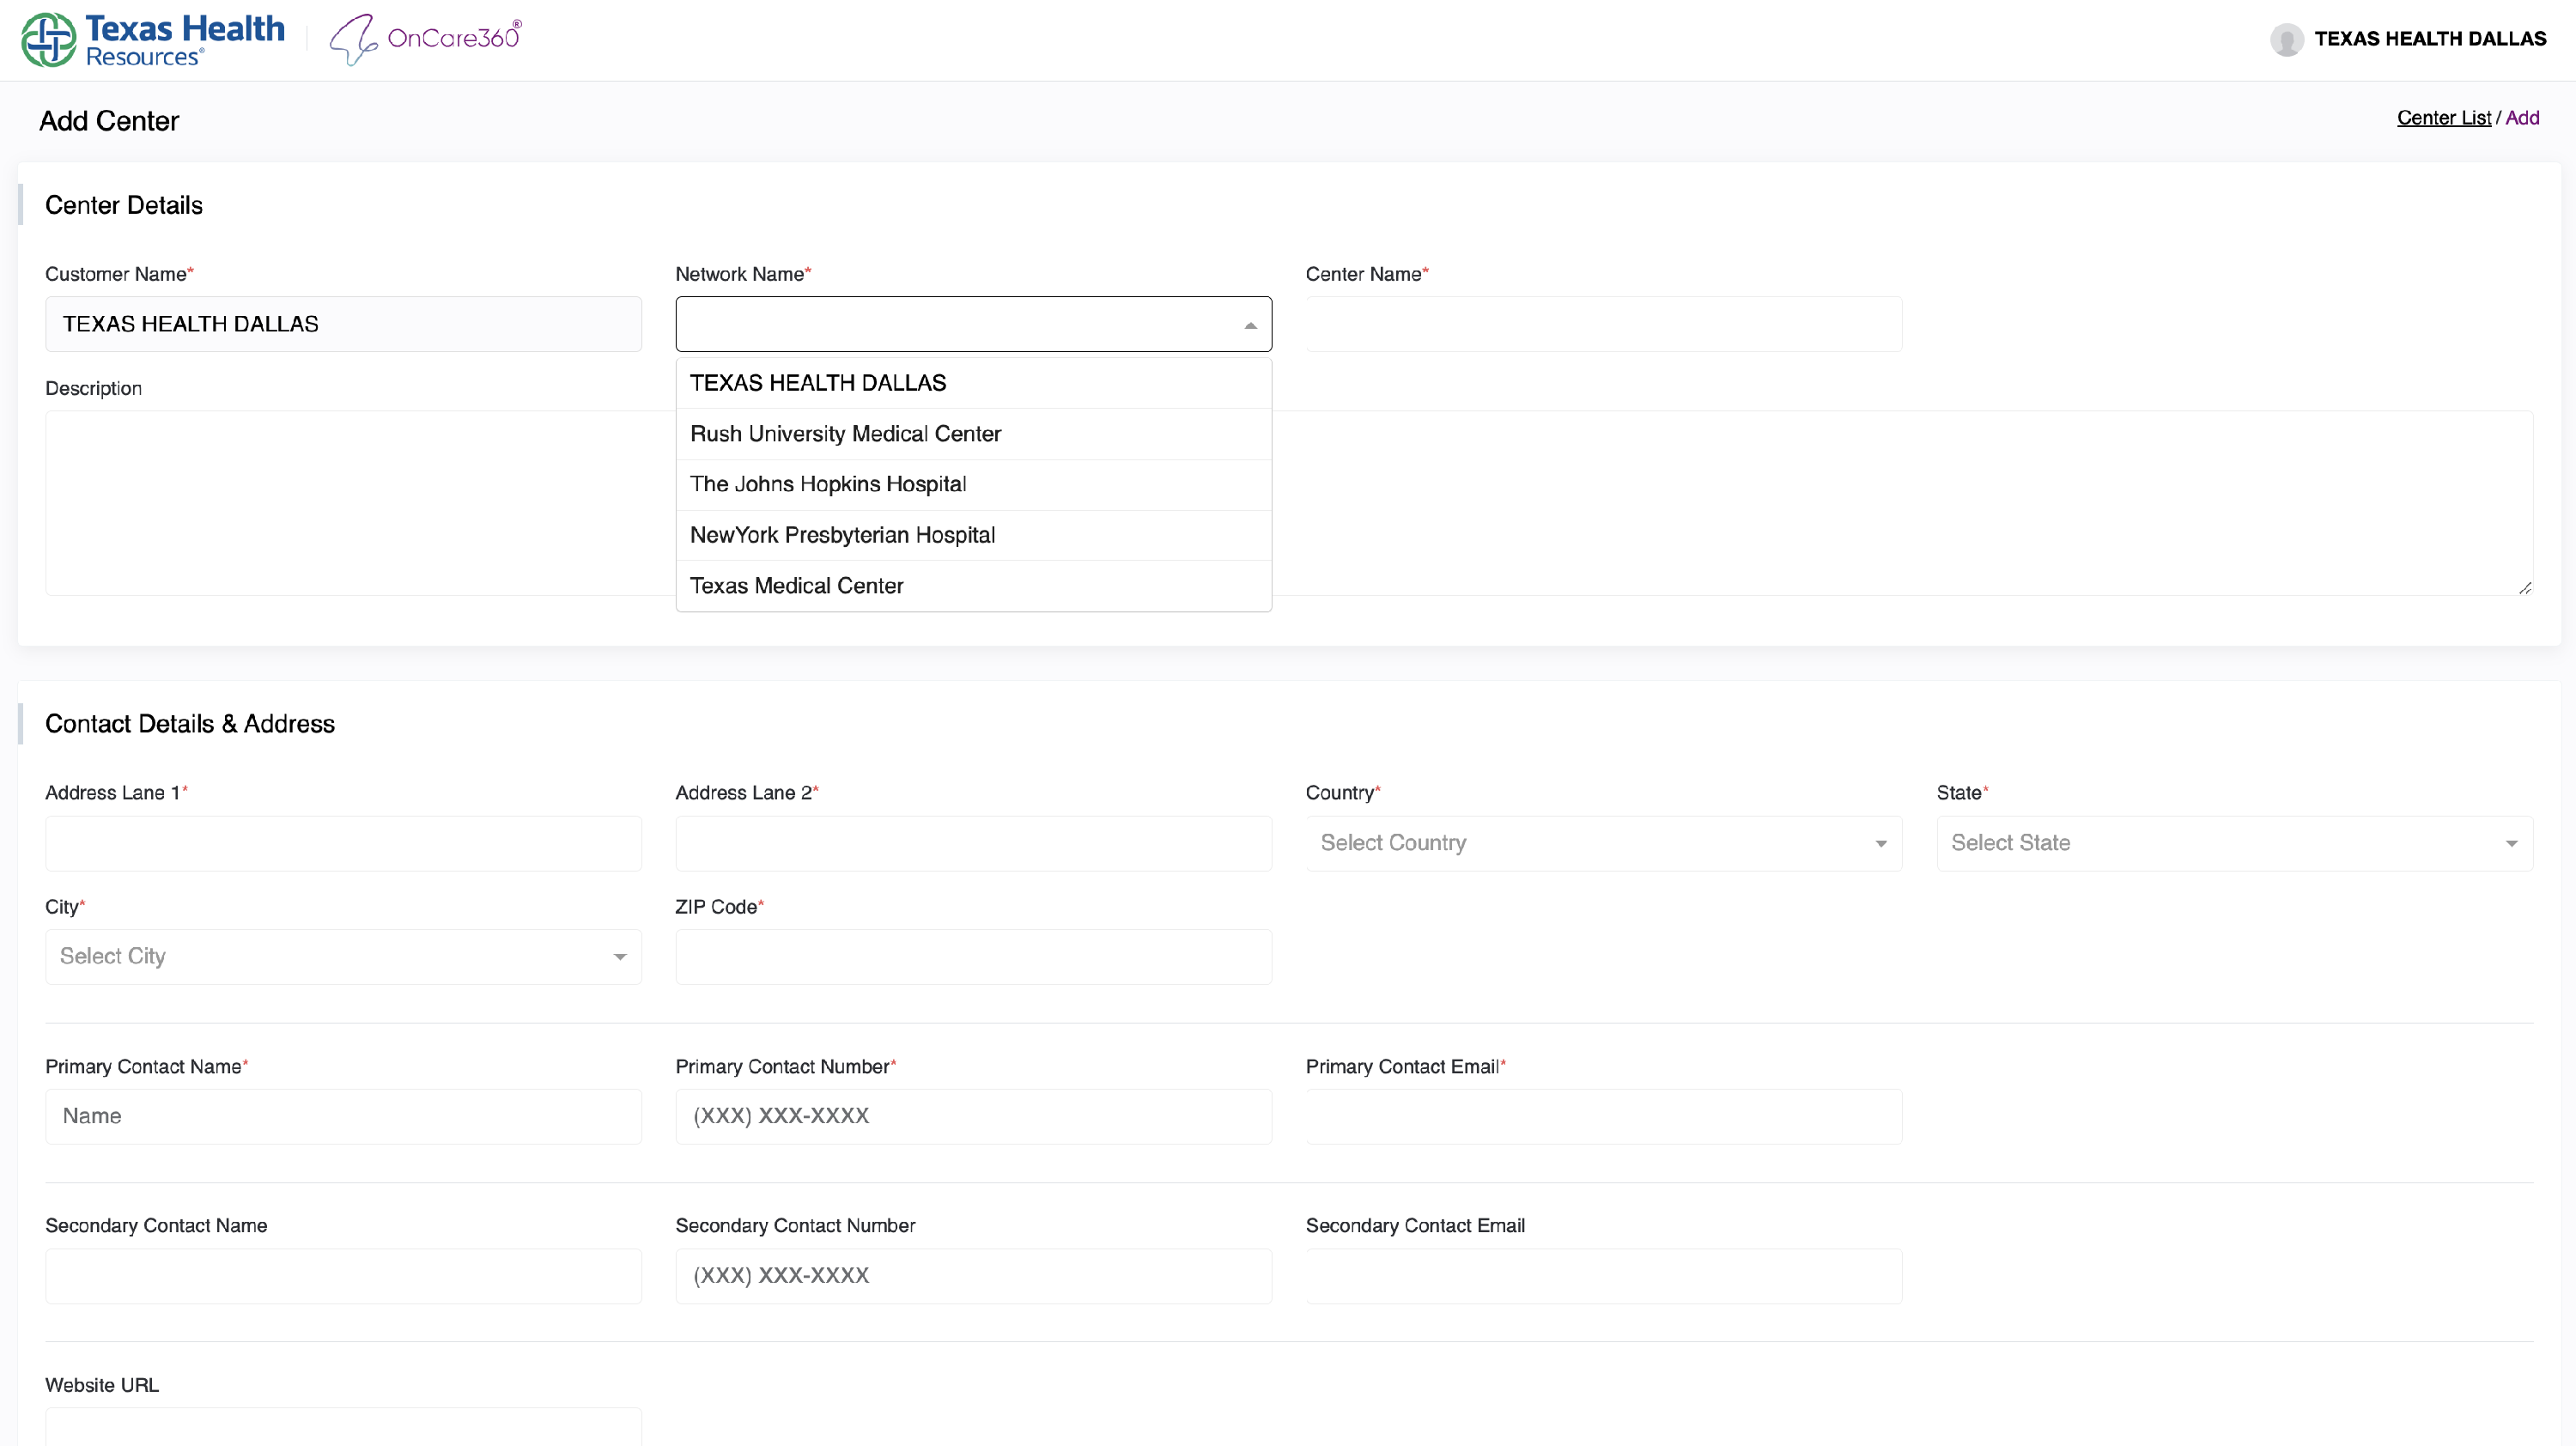
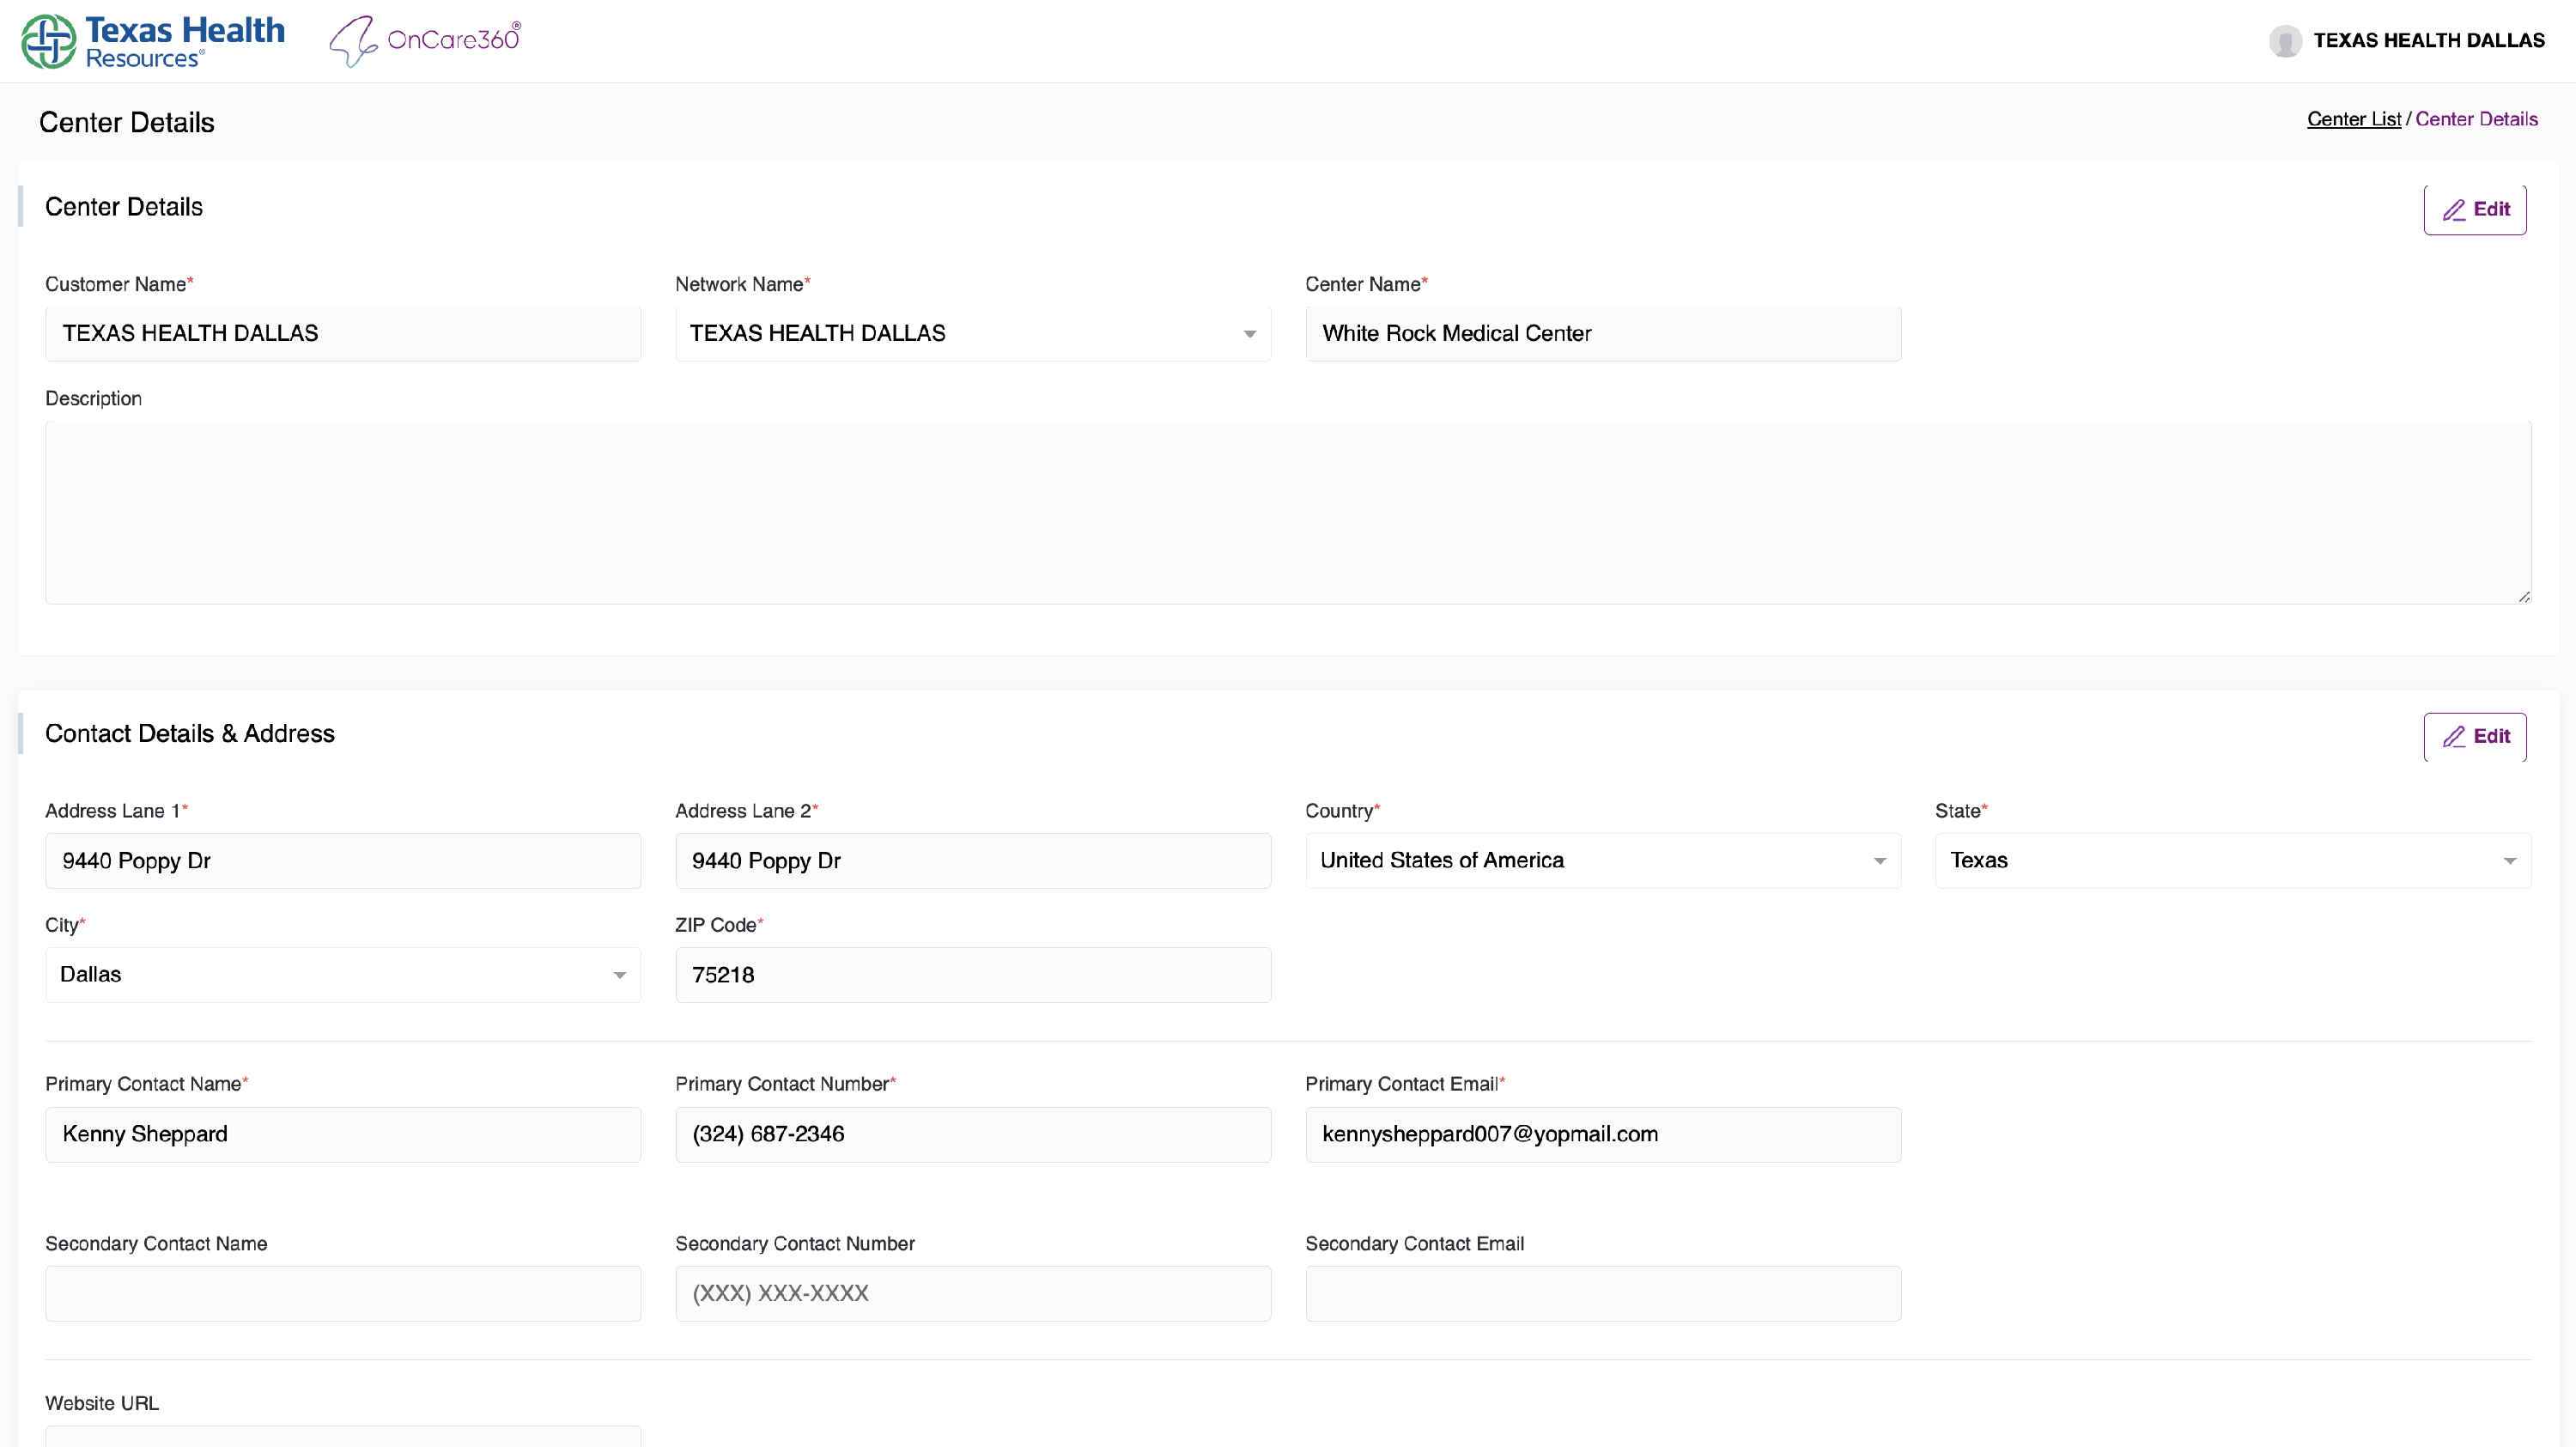
3.1 Center Details
- Network Dropdown: Select the appropriate network.
- Center Name: Must be unique.
Note: Avoid using generic names; include location or service type for clarity.
3.2 Contact & Address
Provide:
- Full Address (including state and ZIP)
- Primary Contact Name
- Primary Contact Number
- Primary Email (must be unique, not used in any other center)
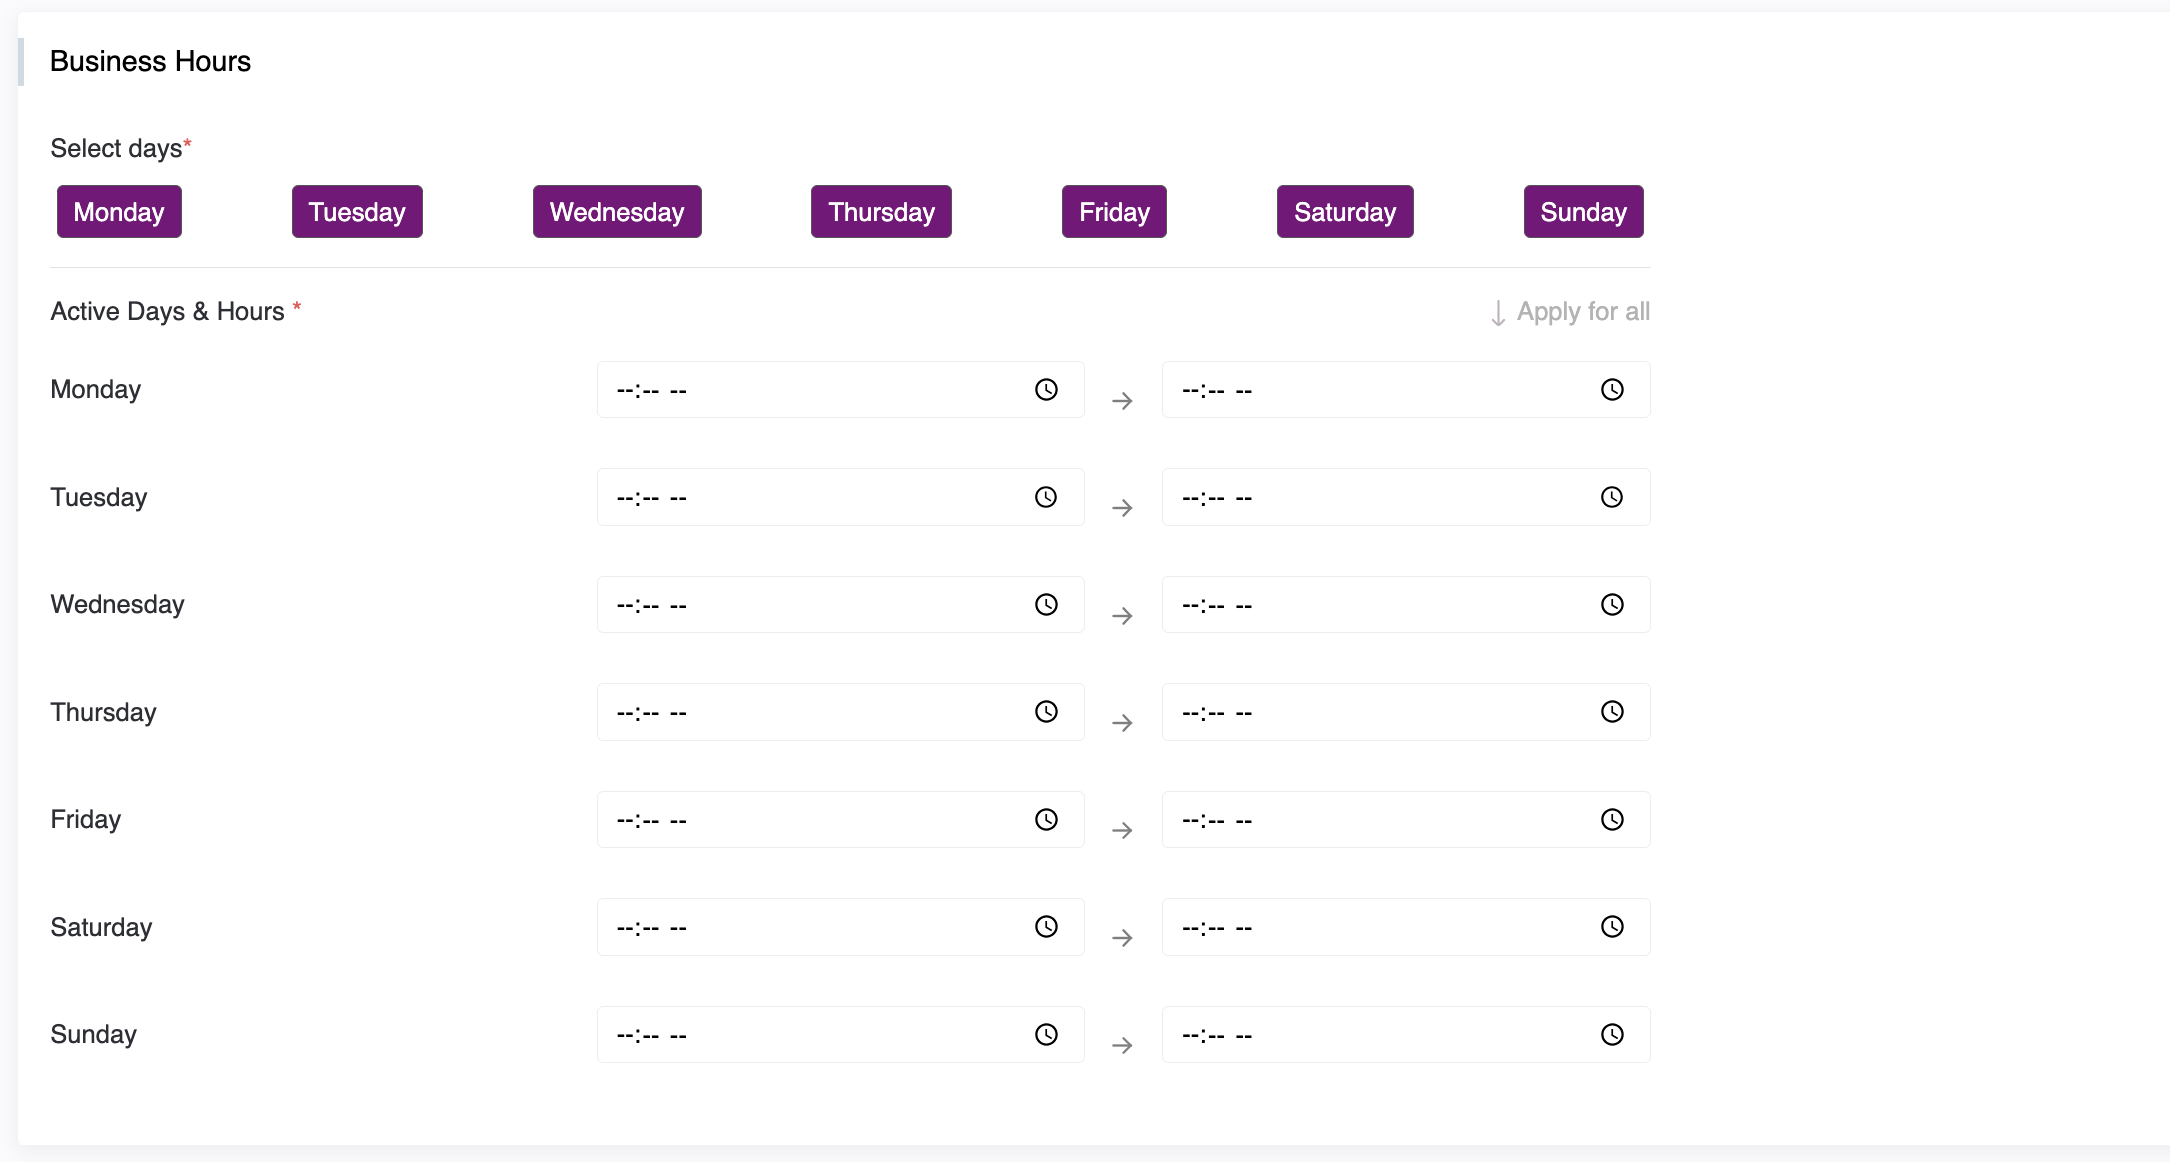
3.3 Business Hours
- Define working days
- Set opening & closing times for each selected day.
- Once you fill in any of the selected days, you have an apply all option by clicking on that text you which timing will apply the timing to all the selected dates
Note: This defines when care teams are available to interact with patients.
3.4 Help & Support Info
Required fields:
- Support Email
-
Support Contact Number
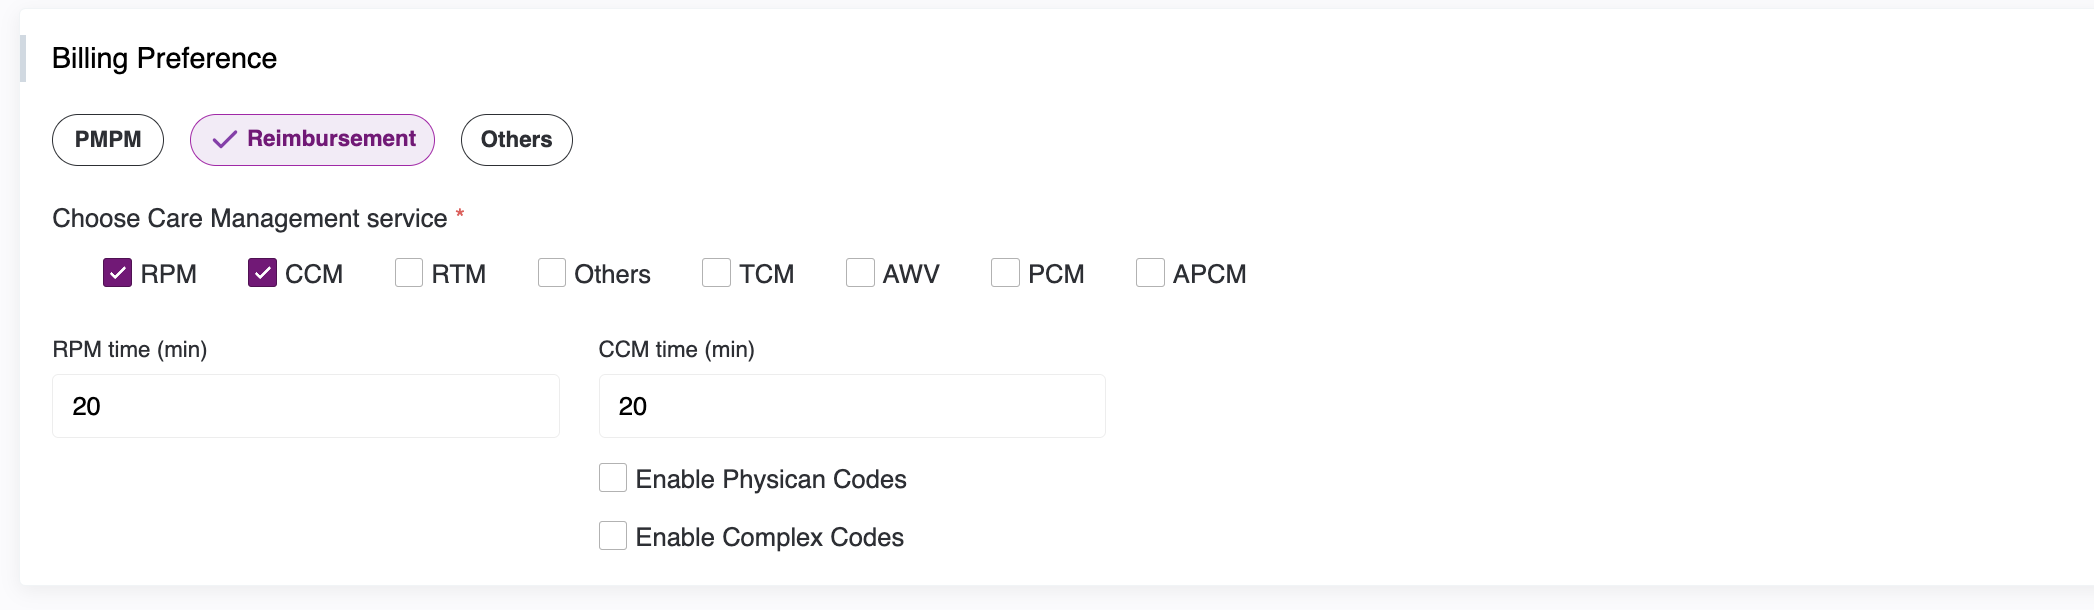
3.5 Billing Type Options
Three billing models are supported:
| Billing Type | Description |
|---|---|
| PMPM | Per Member Per Month billing |
| Reimbursement | Enable individual services like RPM, CCM, etc. |
| Others | Custom billing not tied to predefined categories |
- RPM – Remote Patient Monitoring
- CCM – Chronic Care Management
- RTM – Remote Therapeutic Monitoring
- TCM – Transitional Care Management
- PCM – Principal Care Management
- APCM – Advanced Primary Care Management
- AWV – Annual Wellness Visit


When you enable Chronic Care Management (CCM) as a service, you will be given two additional options related to billing:
- Physician Codes
- Complex Codes
You can enable both of these options by checking the corresponding checkboxes if your billing process requires them.
3.6 Minimum Service Time Inputs
For each enabled service, you can:
- Specify the minimum required service time.
- TCM includes an option to enable/disable SOAP Notes.
- APCM doesn't require service time input (non-time-based).

4. Center Settings & Preferences
4.1 Patient Details Preference
SSN Mandatory Toggle:
- ON: SSN is required for patient creation.
- OFF: SSN is optional.

4.2 Voicemail Greeting Upload
- Upload a custom voice message.
- Will play when a patient calls the center.

VOIP Greeting message:
You can customize the VOIP Greeting message from your center. By default, there is a standard text message. If you want to change it, you can edit the text to meet your specific requirements.

4.3 Stream Chat & VOIP
Stream Chat Toggle:
- Enabled by default.
- Once disabled, cannot be re-enabled.

VOIP Toggle:
- Enabled by default.
- Can be disabled and re-enabled as needed.

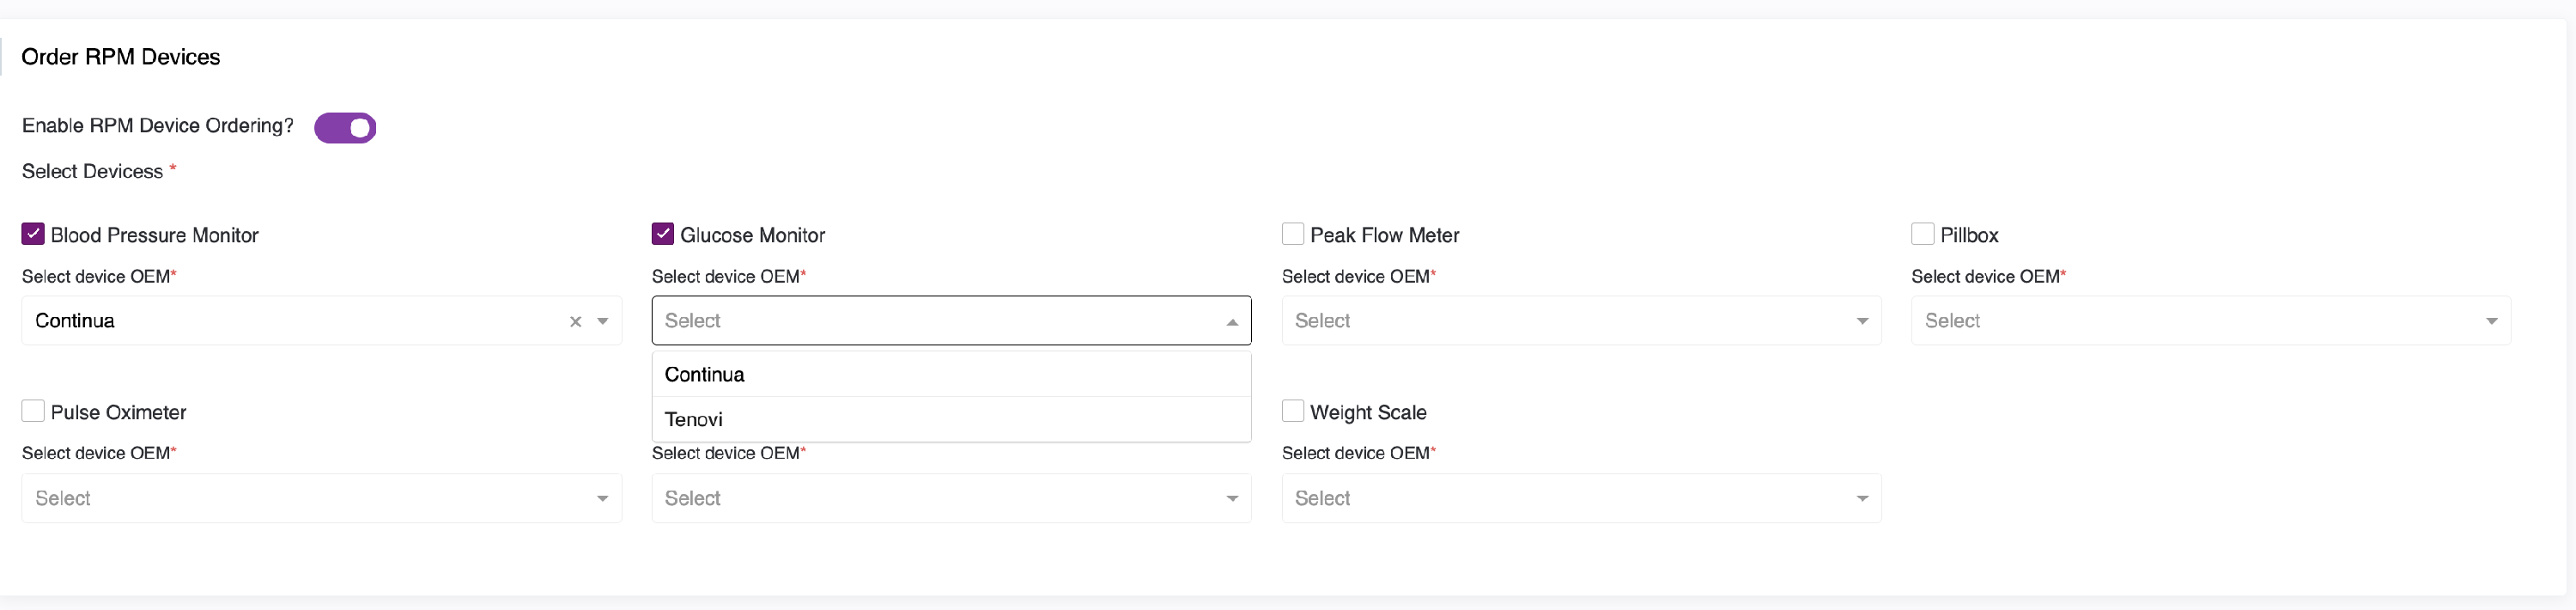
4.4 RPM Device Ordering
- To allow patients to order devices for Remote Patient Monitoring (RPM), you must enable this feature.
- Enabling this option makes it visible to the user in the provider portal.
- Once enabled, a list of available devices and their corresponding vendors will appear. You must select the desired devices and assign a vendor for each one.
Note: For each device you select, you must also select a vendor. All devices and vendors you select will be displayed to patients in their portal when they place an order.

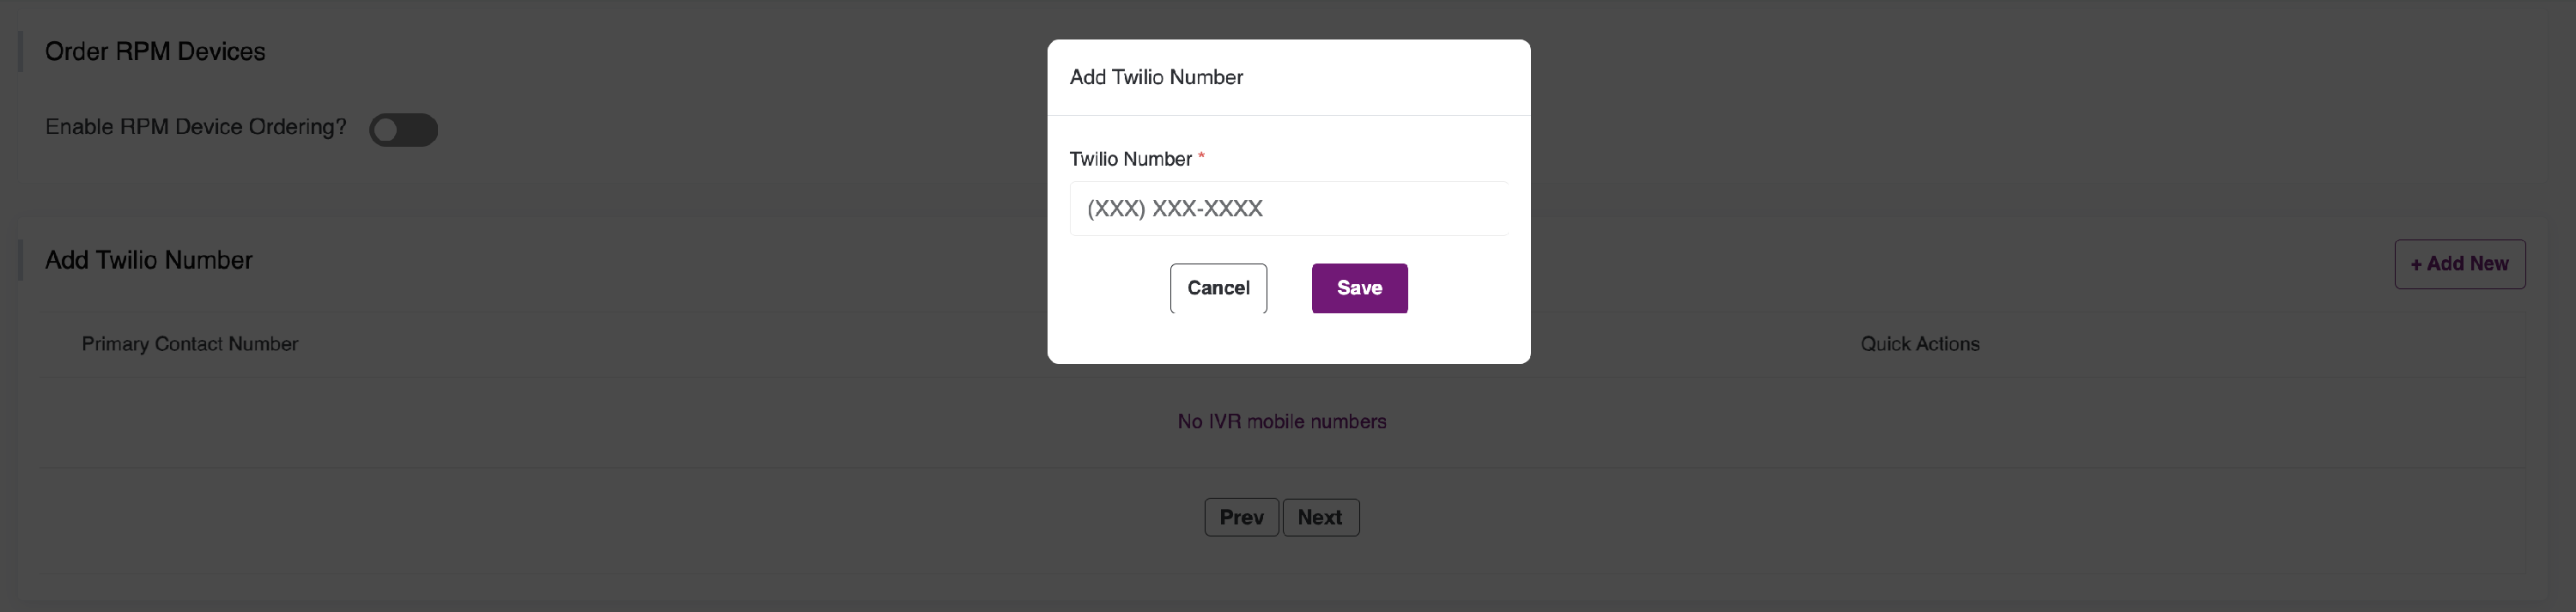
5. Twilio Number Setup
- Click Add New to open a popup.
- Enter phone number and click Save.
- Existing numbers will appear in a list.
- Click the delete icon to remove numbers.


6. Practice Manager Setup
- Click Add New to assign managers to the center.
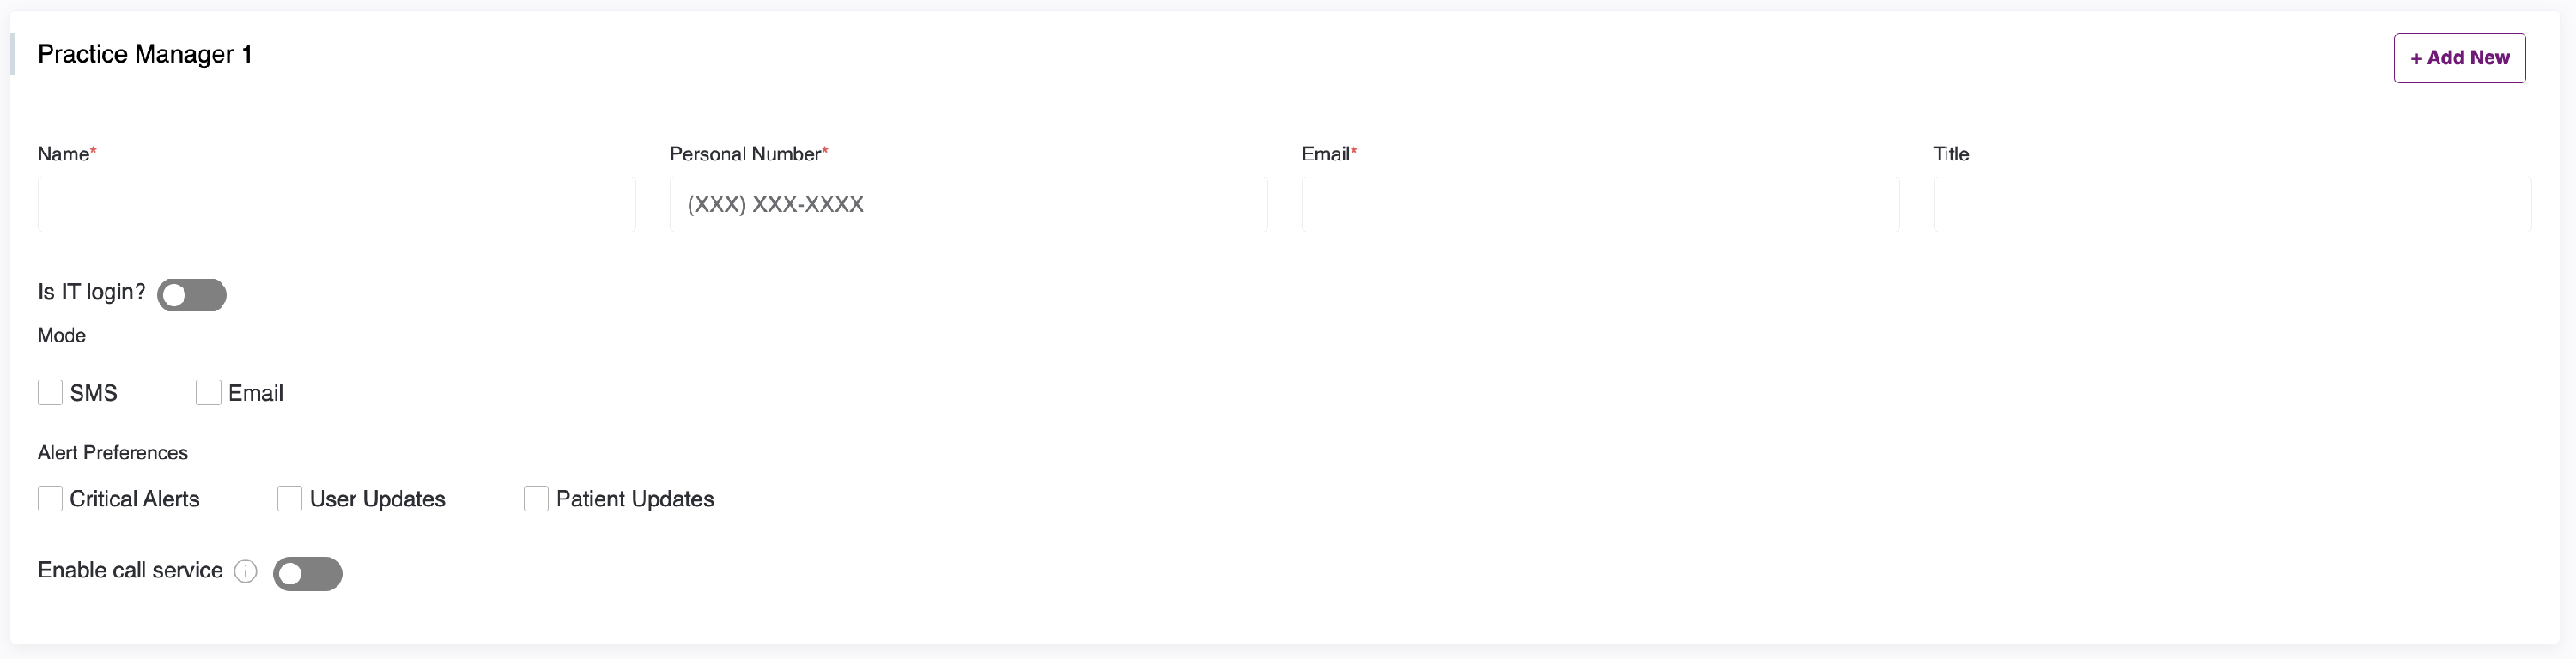
Provide:
- Name
- Email (must be unique within the same center)
- Phone number
Practice Manager Options
- Login Toggle: View-only access to the portal.
- Notification Preferences: Choose Email, SMS, or both.
- Alert Preferences: Pick alerts for critical events (e.g., device readings, updates).
-
Call Service Toggle: Enable/disable manager’s call access.
Email Rules:
- One email cannot be used for multiple managers in the same center.
- A manager can share an email across different centers.
- Email cannot be used as both a manager and billing admin.
7. Billing Admin Setup
- Click Add New.

Provide:
- Name
- Email (must be unique and not reused from manager emails)
- Contact Number
Email Rules:
- One email cannot be used for multiple billing admins in the same center.
- Email cannot be used as both a manager and billing admin.
8. Final Submission & Center Management
Submit Center
-
Once all details are filled, click Add Center at the bottom.
View Center
-
On the listing page, click the eye icon to view details in read-only mode.
Edit Center
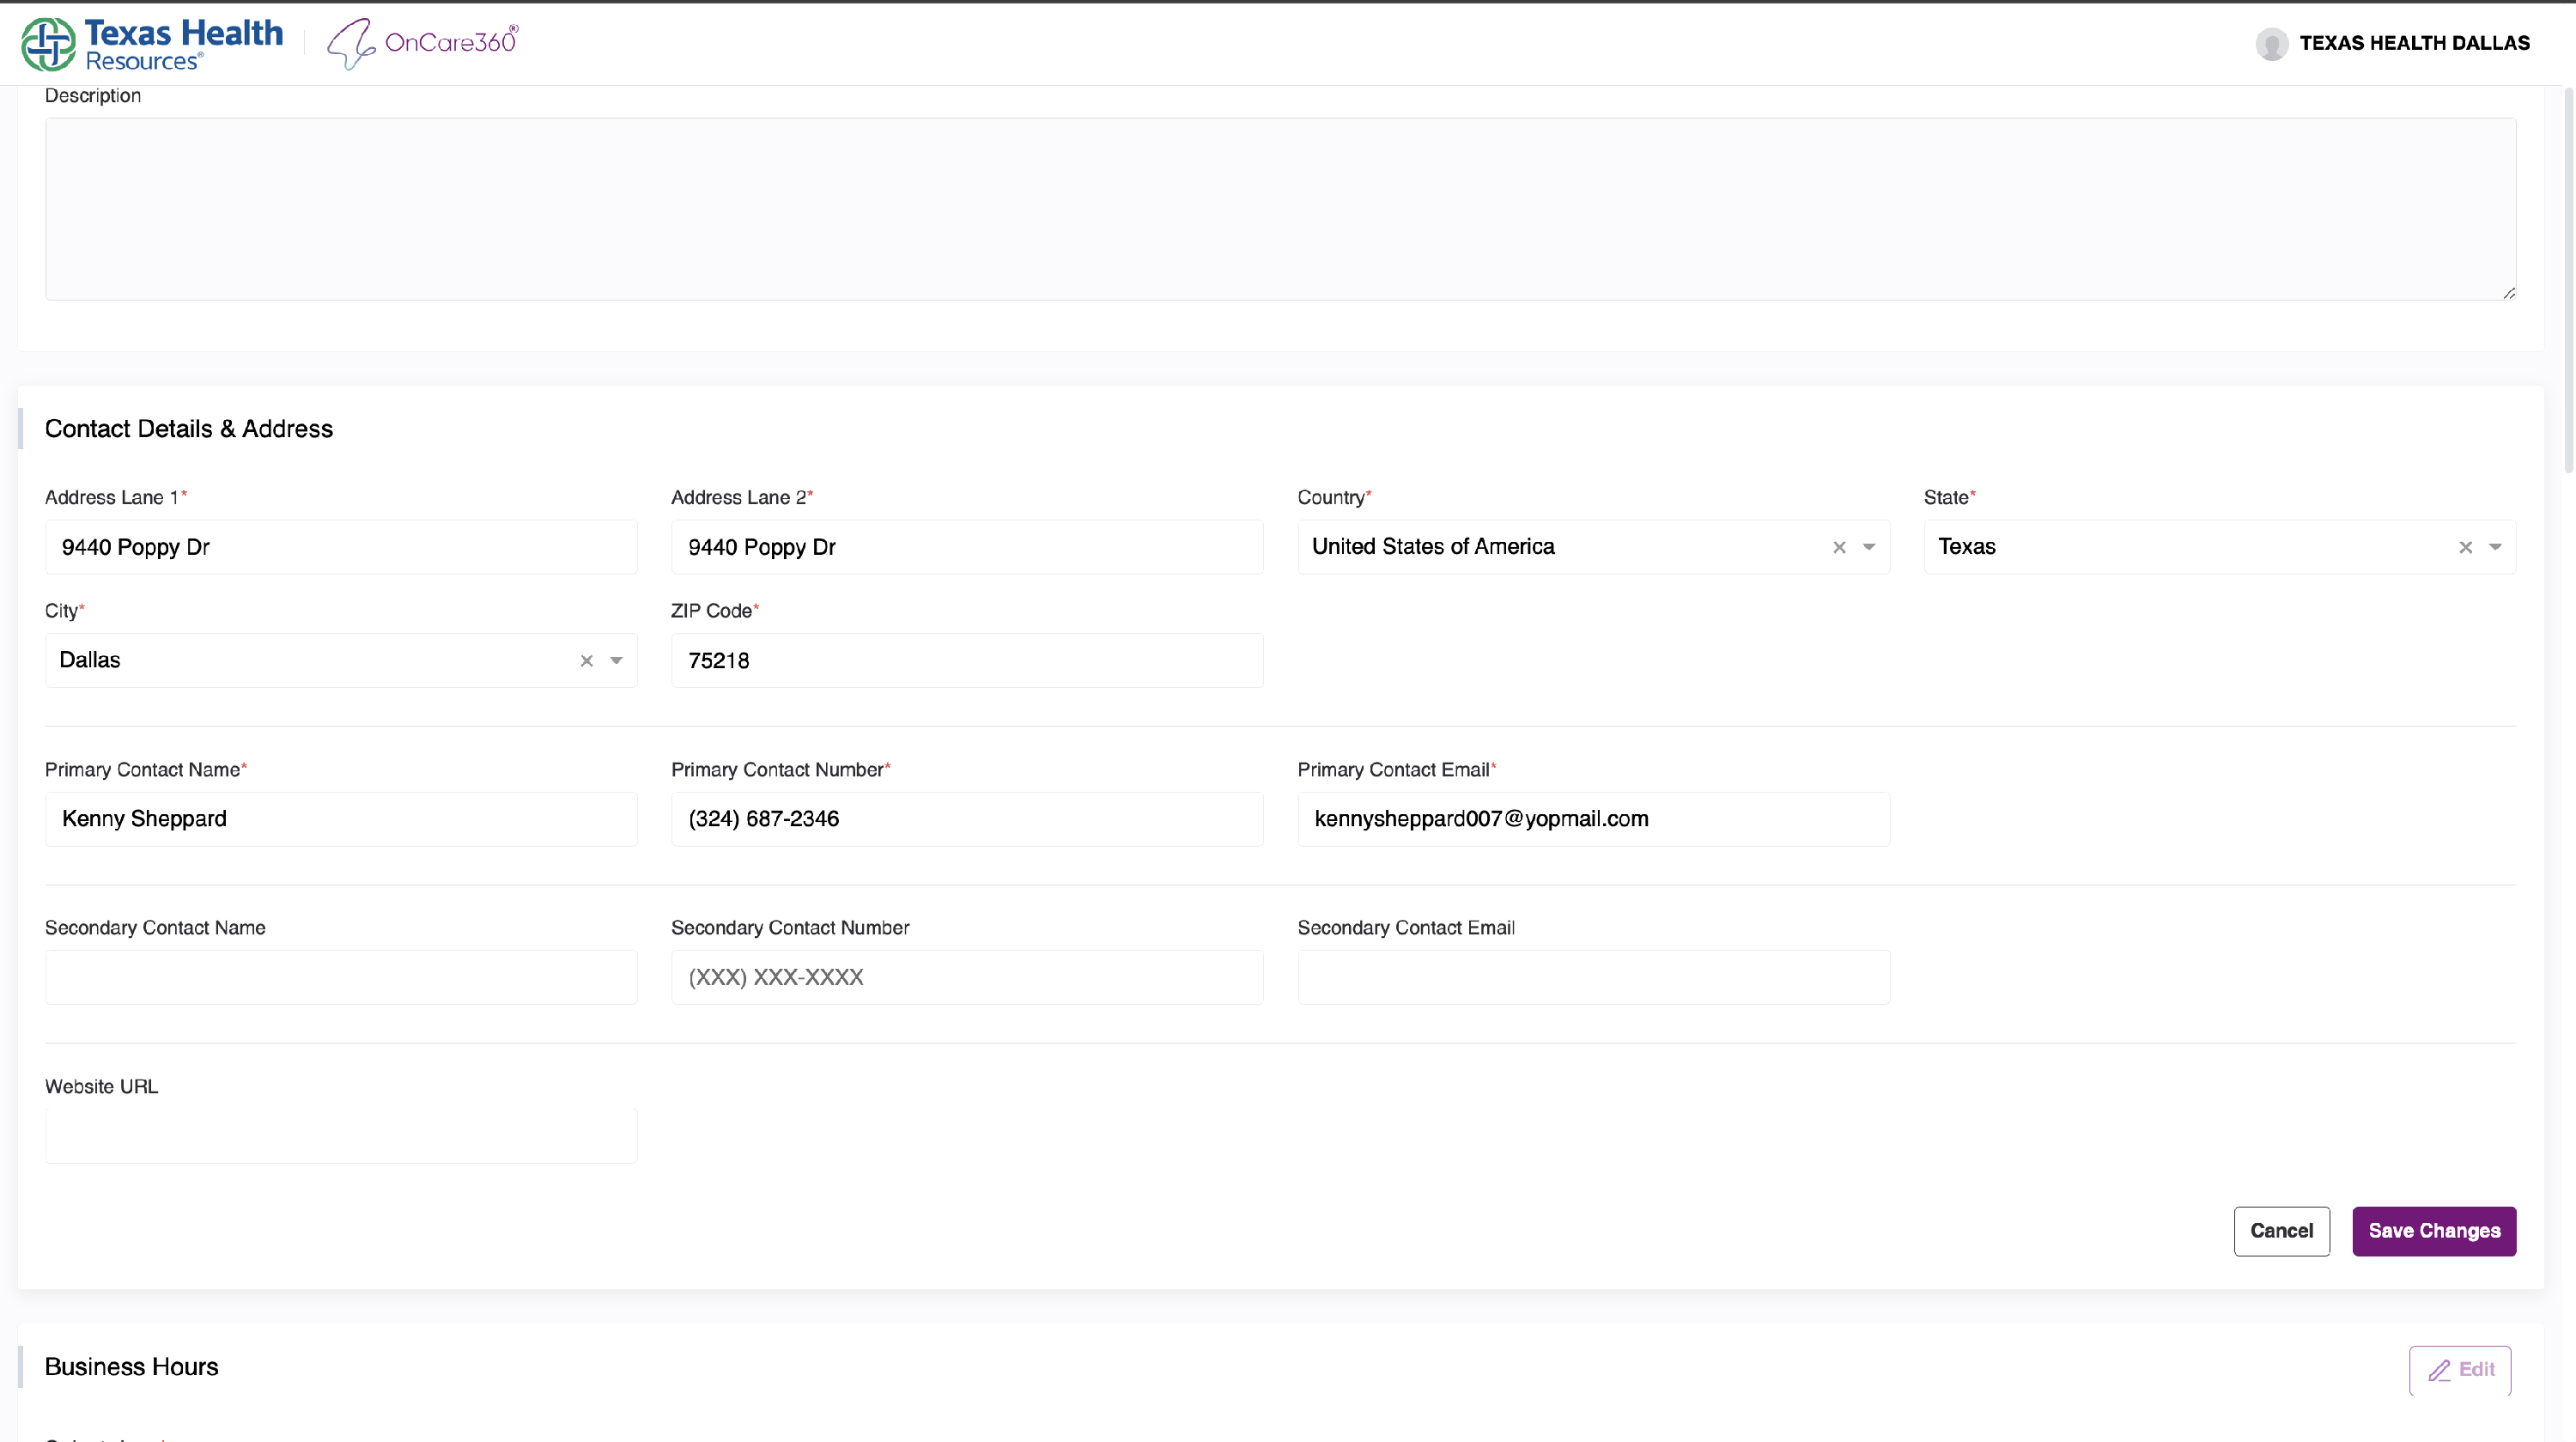
- Click Edit next to any section to update details.
-
Save changes or cancel them.
Return to Listing
- Use the “Center List” link in the top-right corner to go back.