
Add Network
Table of Contents
- Network Overview Page
- Add Network Workflow
- 2.1 Network Details
- 2.2 Contact Information
- 2.3 Optional Network Image
- Network Management
- 3.1 Viewing the Network
- 3.2 Editing the Network
-
Network Overview Page
Once logged in, you land on the Network Listing Page.

You’ll find 5 key info sections below the customer/admin name:
- Networks: Total number of networks linked to this customer-admin.
- Centers: Count of centers under those networks
- Providers: Number of available providers
- Patients: Total registered patients
- Survey: No of surveys for the customer-admin
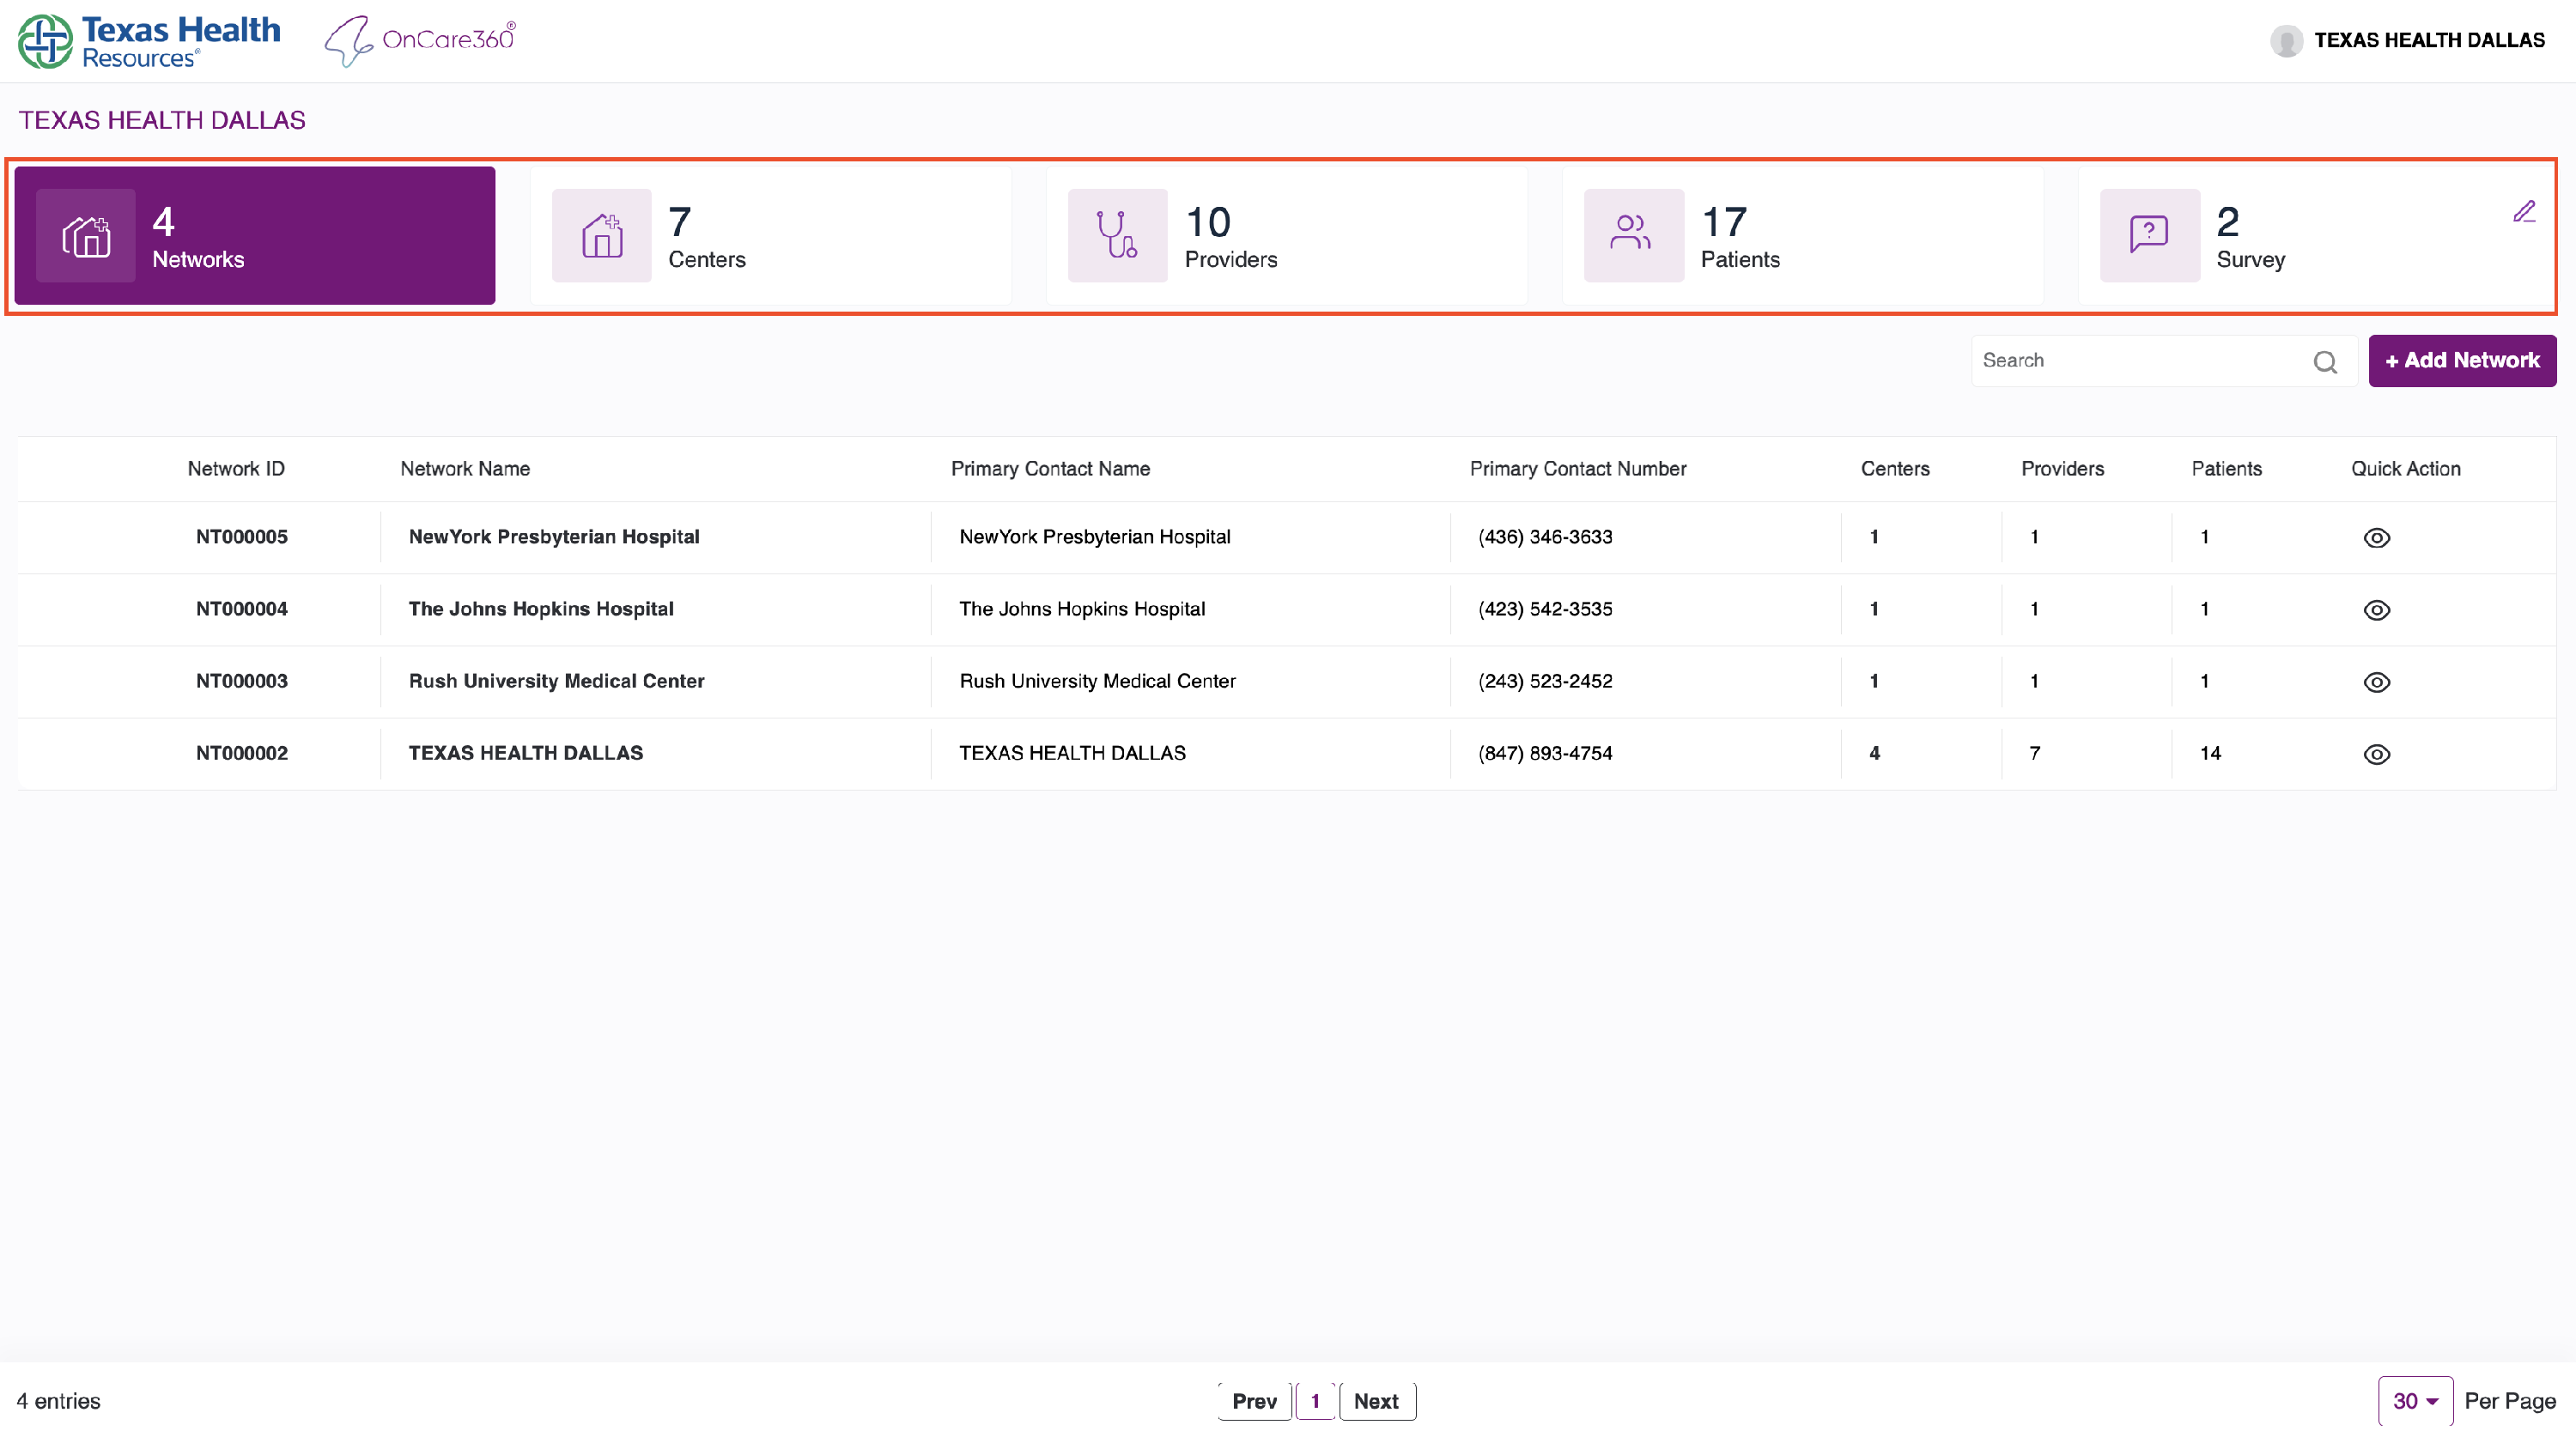
Search & Filter Networks
A search bar is provided below the network stats.
You can filter networks by:
- Network ID
- Network Name
- Contact Name
- Contact Number
Also available here is the ➕ Add Network button that starts the process.

2. Add Network Workflow
Clicking “Add Network” takes you to the Add Network Form.
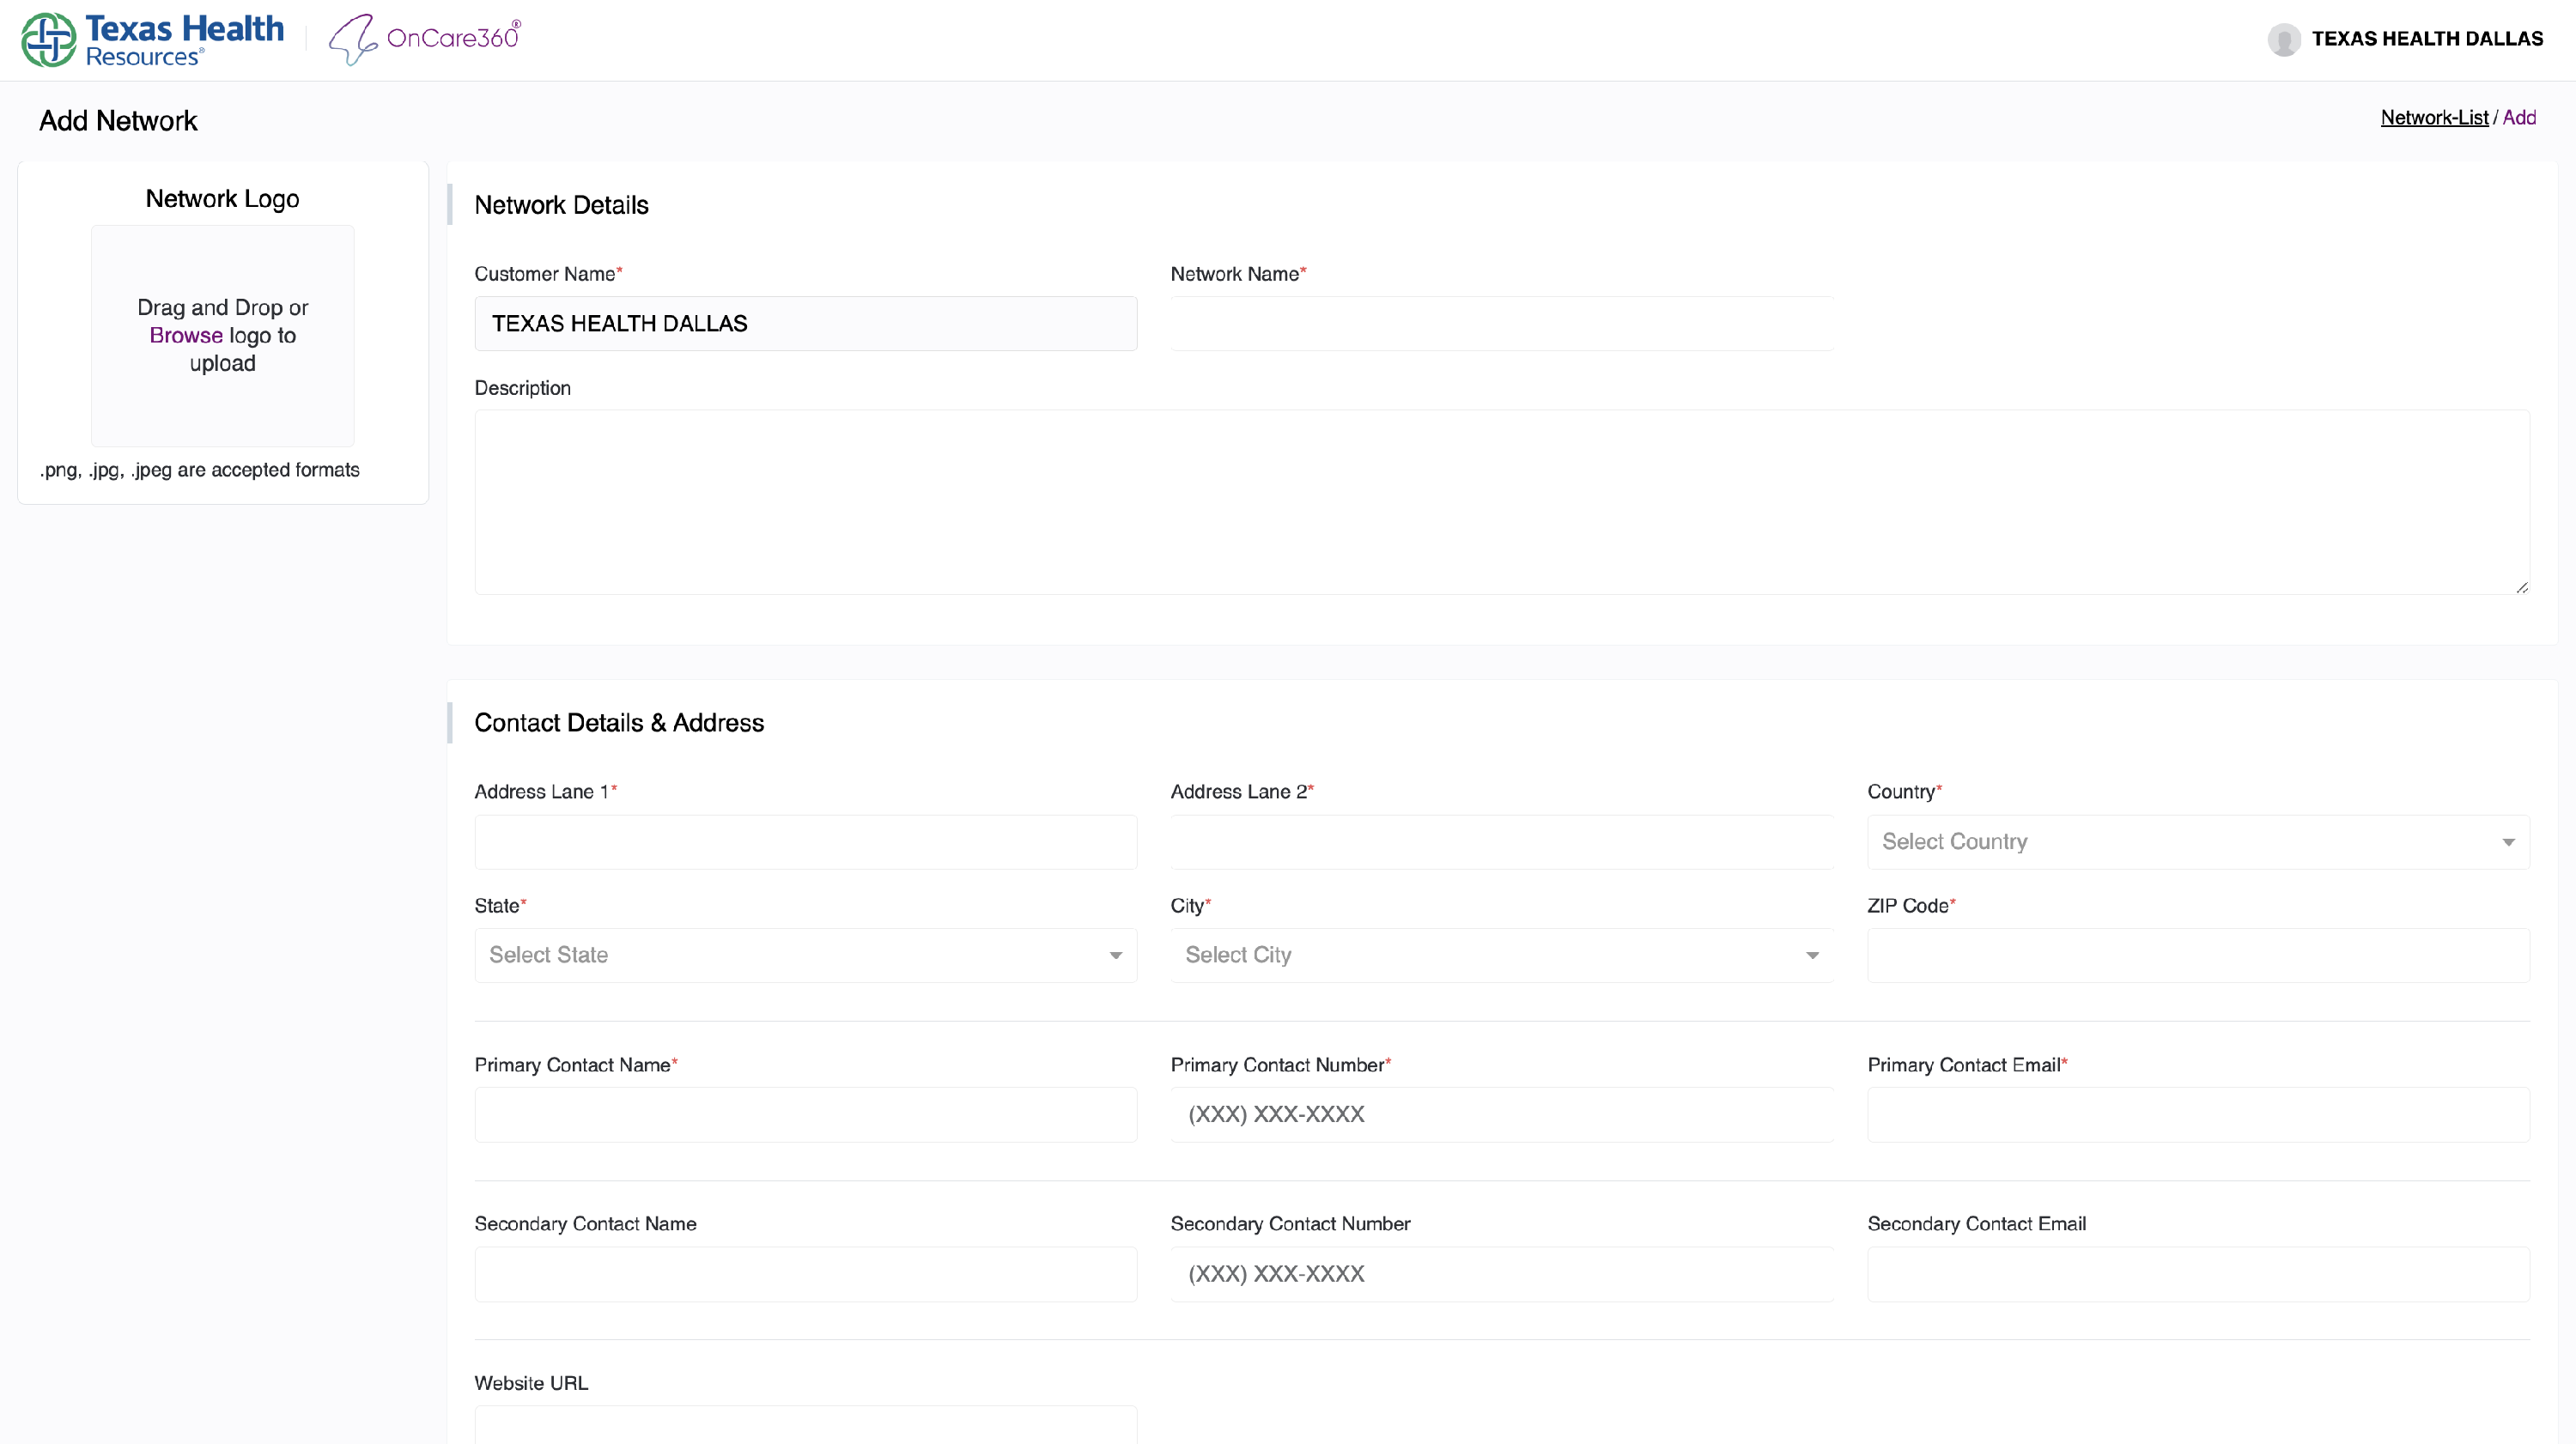
2.1 Network Details
- Enter a unique network name.
Note: Duplicate names are not allowed.
- Fill in all required information.
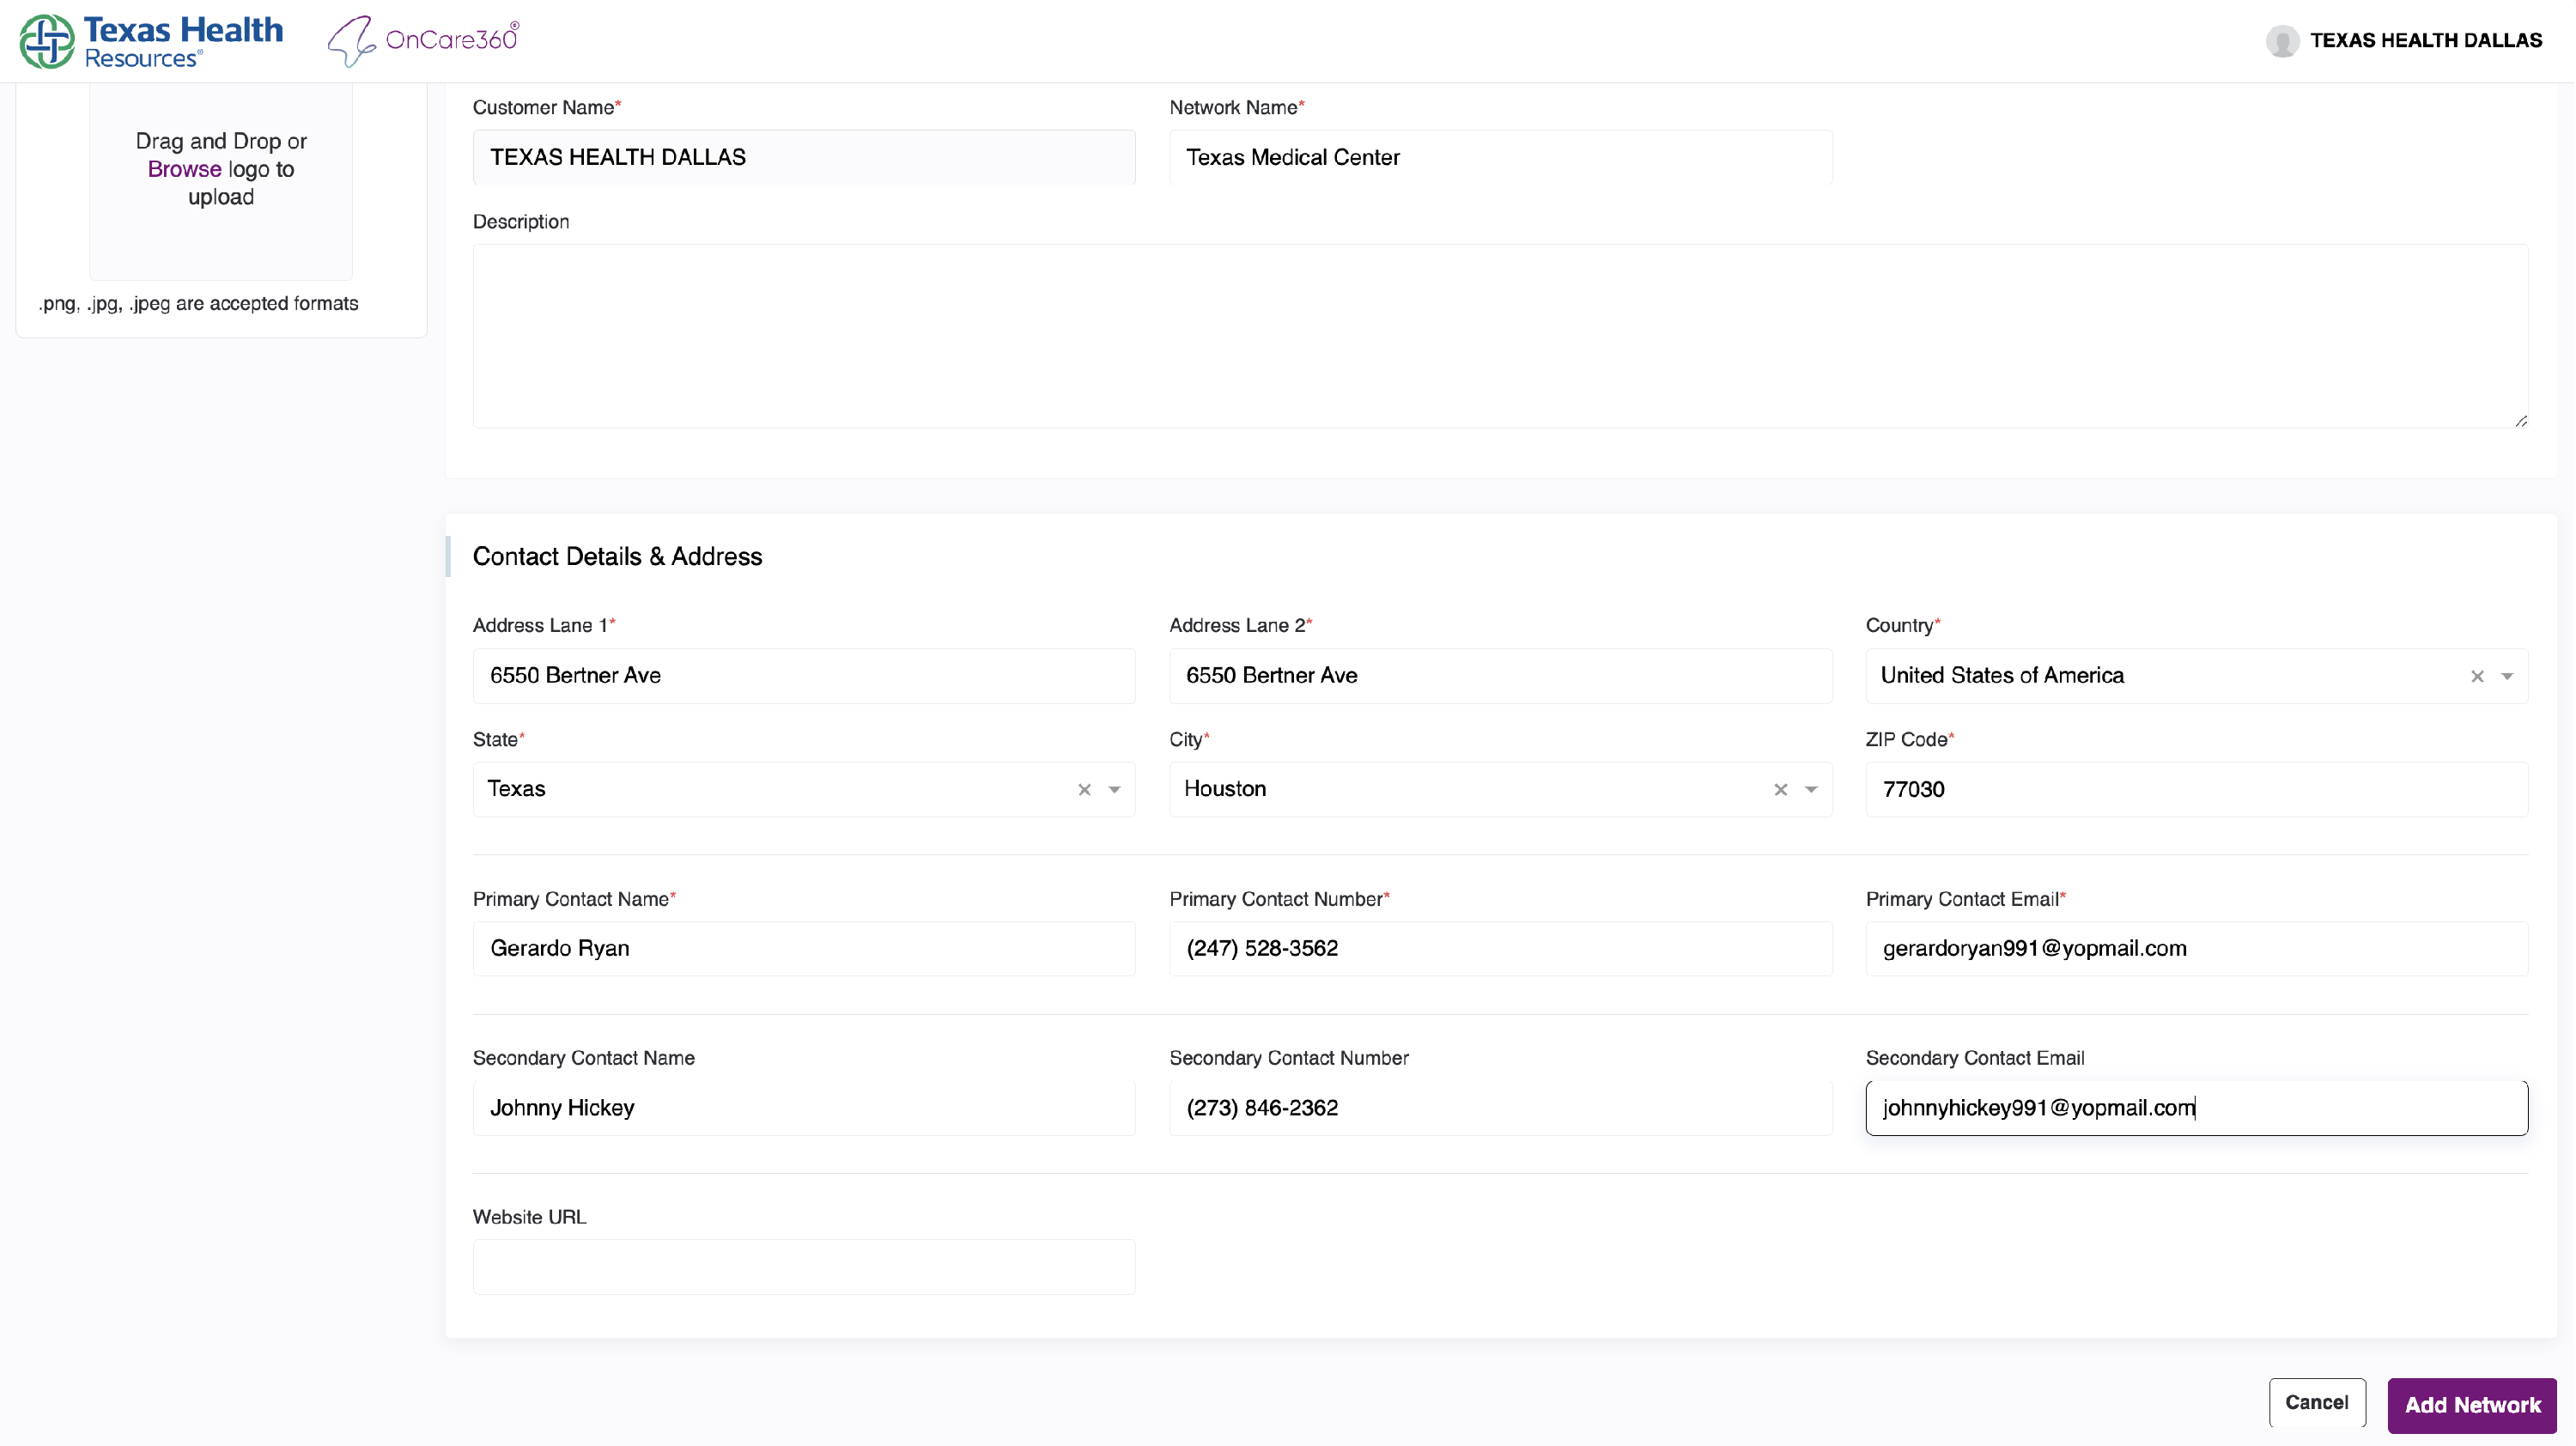
2.2 Contact Information
- Use a unique personal email address.
Note: The same email cannot be used across multiple networks.
2.3 Optional Network Image
- You can upload a network image/logo.
-
While optional, it helps improve identification and branding.

-
Network Management
After submitting the form:
- You will return to the Network Listing Page.
- Your new network will appear in the list.

3.1 Viewing the Network
Click on the eye icon next to any network to:
- View its details in read-only mode
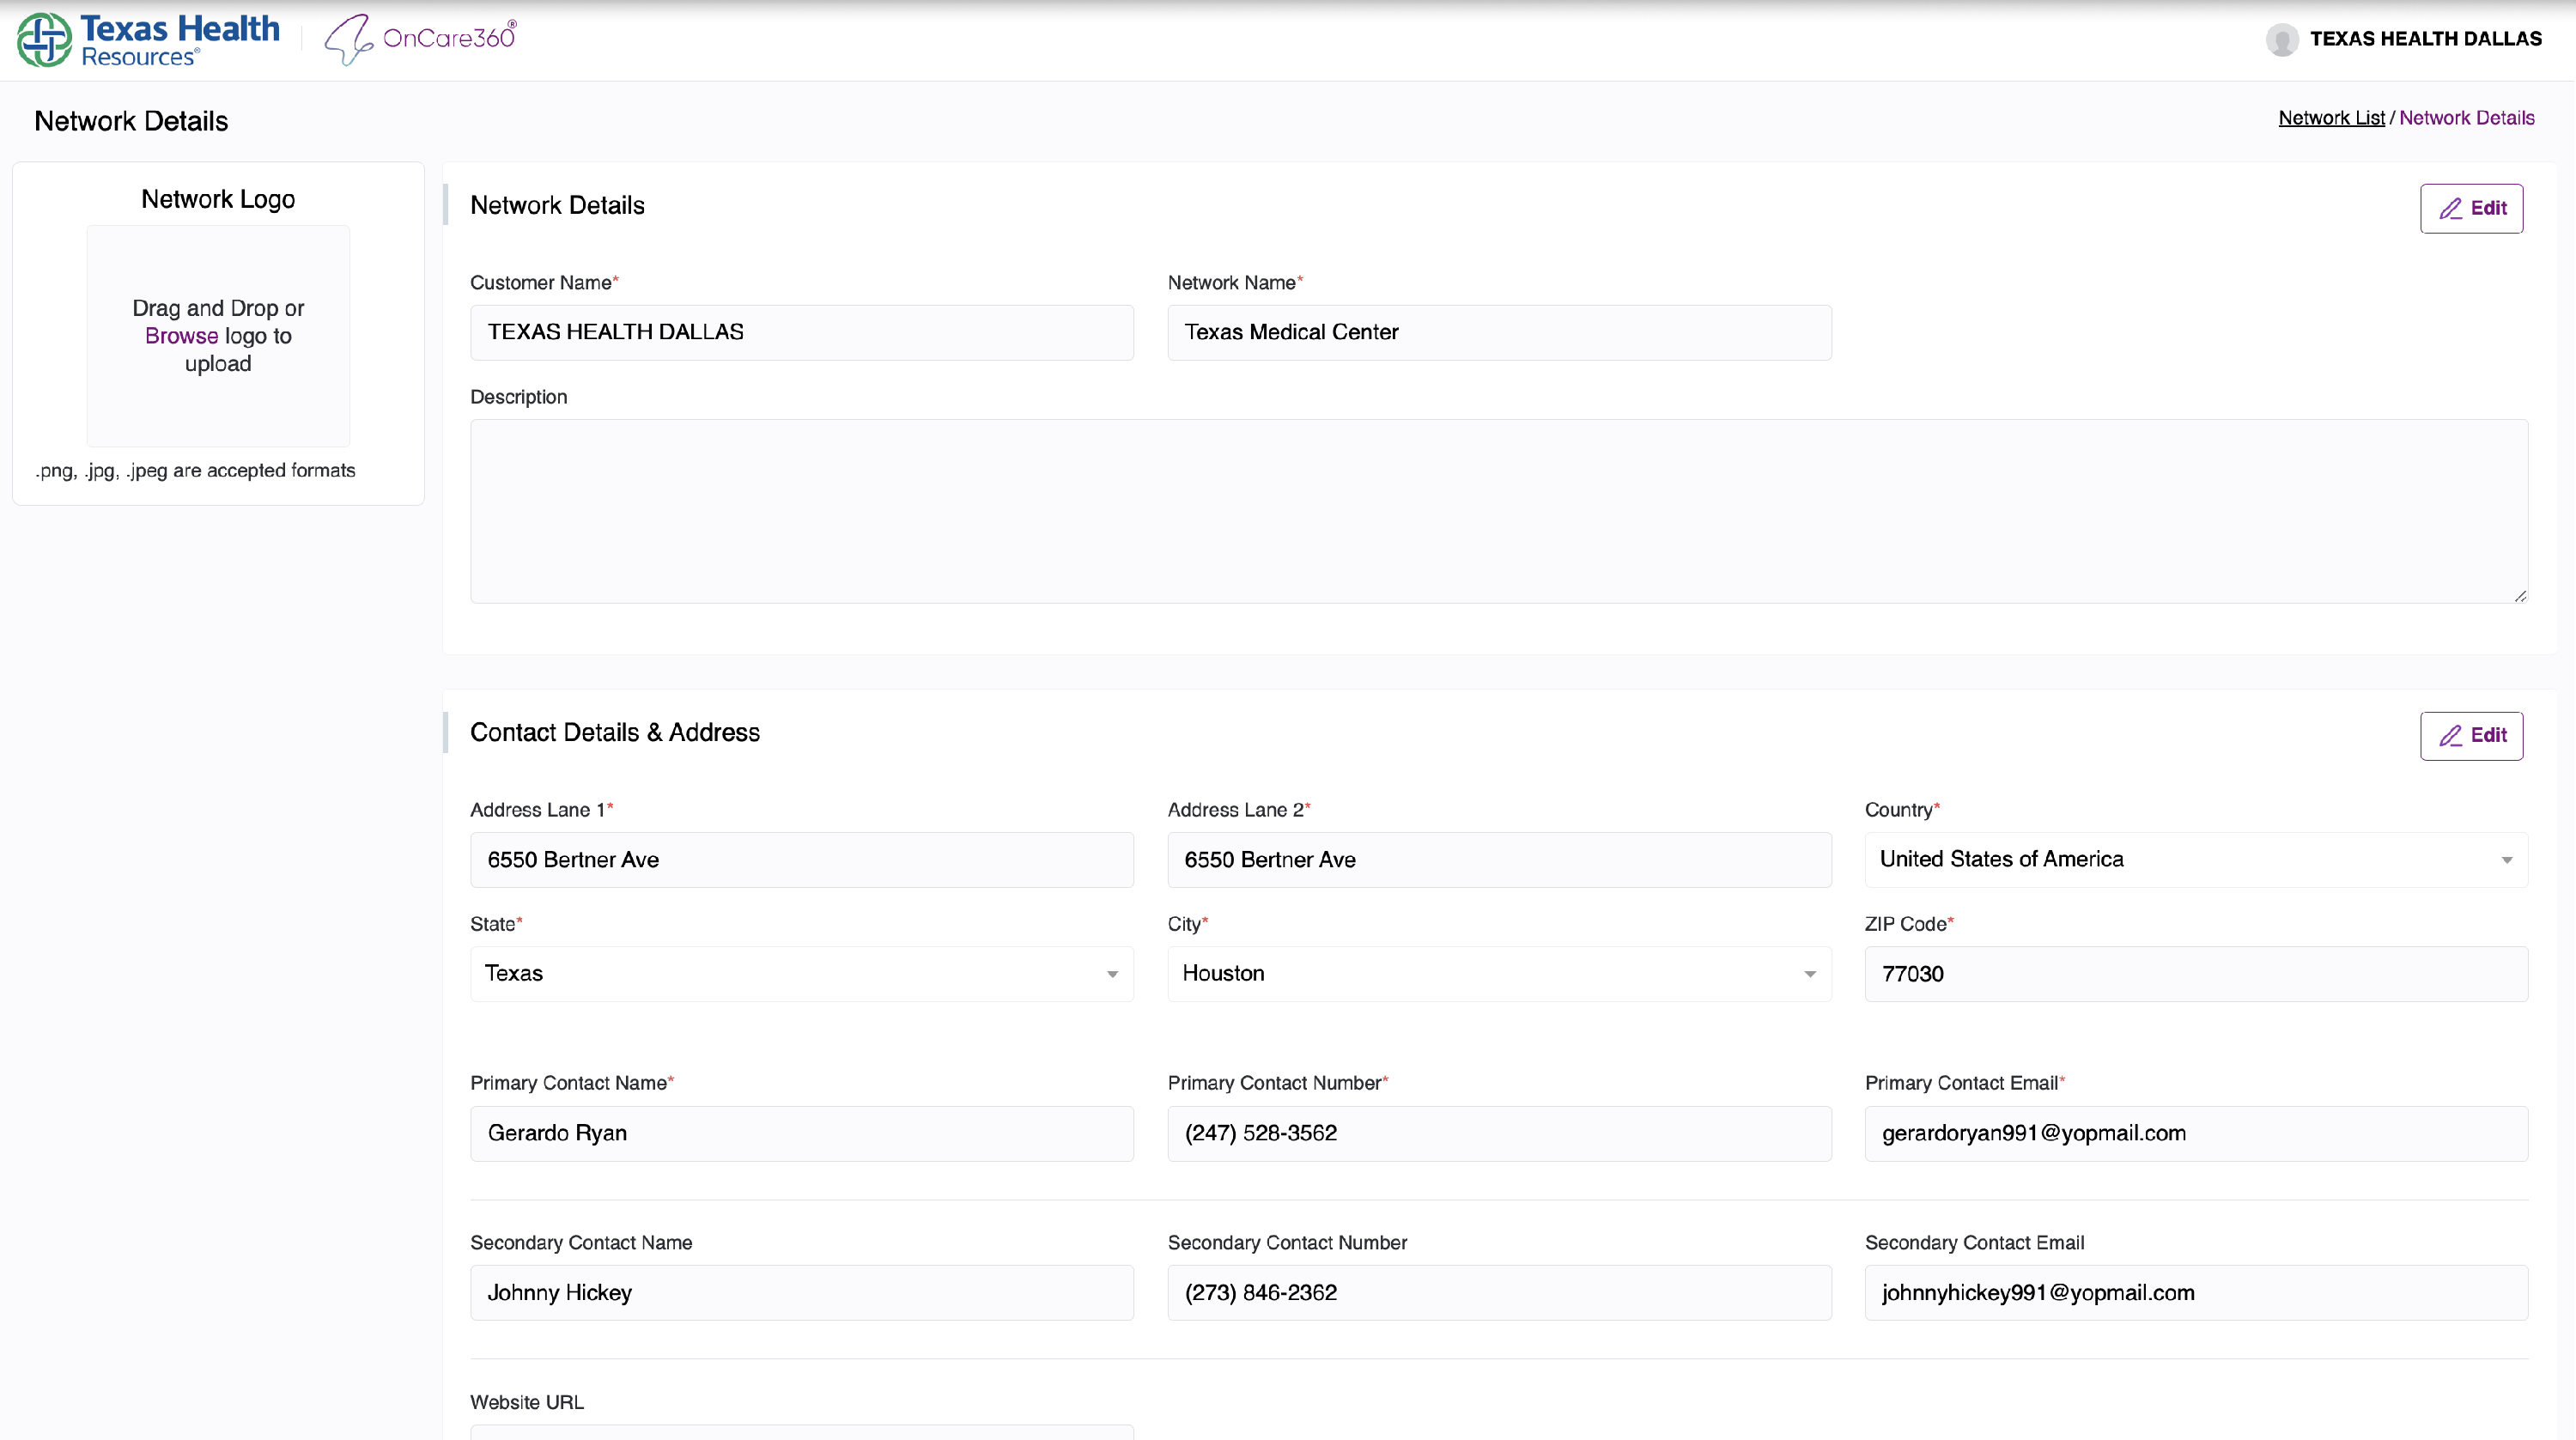
To make changes:
- Click the Edit icon.
- Modify necessary fields.
- Click Save Changes or Cancel to discard edits.
To return to the listing at any point, use the “Network List” link at the top-right corner.