
Network Listing
Table of Contents
- User Interface Overview
- Customer Dashboard Sections
- Survey Management
- Center Navigation & Listing
- Network Detail View & Editing
1. User Interface Overview
Upon successfully logging in, you will be directed to the network listing as the landing page.

Top Left Corner:
- Displays the Customer Logo
- The OnCare360 Logo appears next to it
Top Right Corner: User icon and name
- Clicking it opens a dropdown with:
- Privacy Policy

- Terms of Use

- Logout
Note: Logout will redirect you to the login page.
-
Customer Dashboard Sections
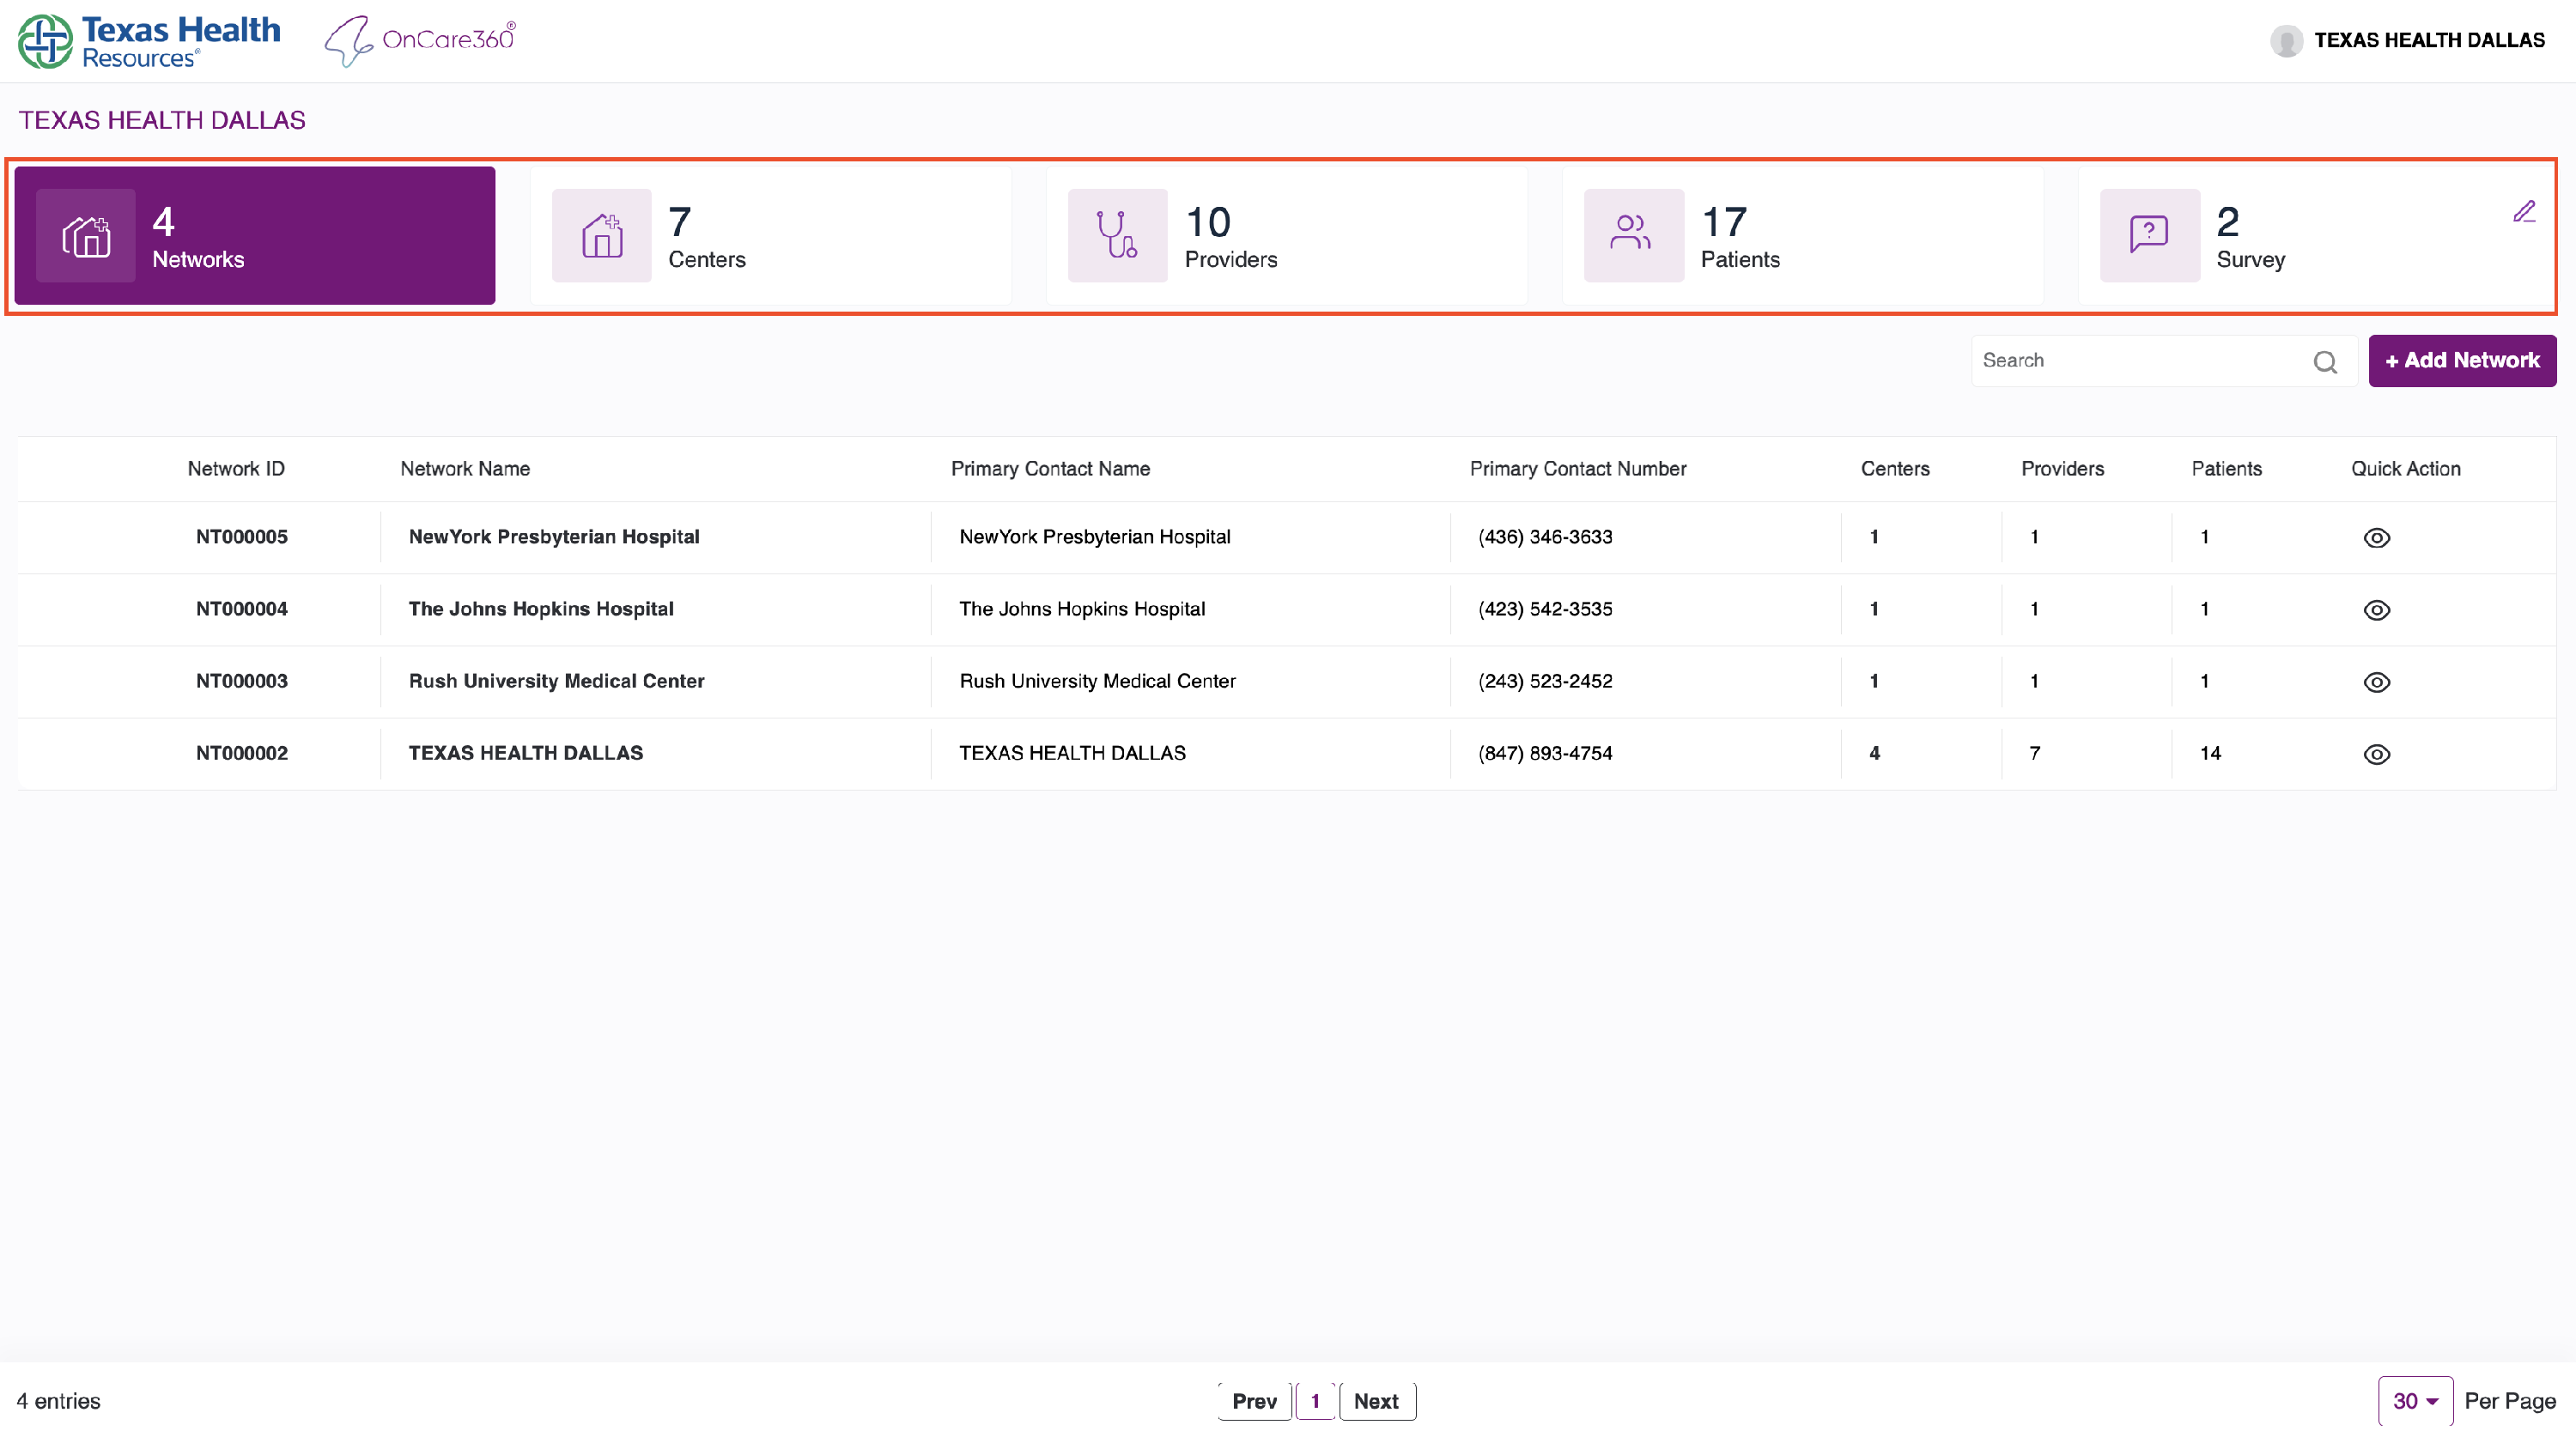

Underneath the customer name, you’ll see 5 key overview tiles:
- Networks : Number of networks under the customer.
- Centers: Total centers linked to networks.
- Providers: Total providers available.
- Patients: Registered patients across all centers.
- Survey: No of surveys available.
-
Survey Management
To manage surveys:
- Click the Edit icon in the survey tile.
- You’ll be redirected to the Manage Survey tab.

Add Survey
Click the Add Survey button (bottom-left).
- Use the toolbox to add:
- Input Fields
- Checkboxes
- Radio Buttons
- Dropdowns

Add a Question
- Click on the question text area after placing a field.
- Enter your custom question text.
- Click Save Survey (top) to finalise.

Note: All saved surveys will appear in the survey list.
Search Network
Below the dashboard tiles is the Network Search Bar.
You can search by:
- Network ID
- Network Name
- Contact Name
- Contact Number

Add Network Button:
- Opens the Add Network Form (see Add Network manual for steps)
Network Table:
- Each row shows:
- Network Name
- Number of associated centers, providers, patients
- Click on the center count to explore those centers.

-
Center Navigation & Listing
When you click a center count in the table:
- You are taken to the Center Listing Page
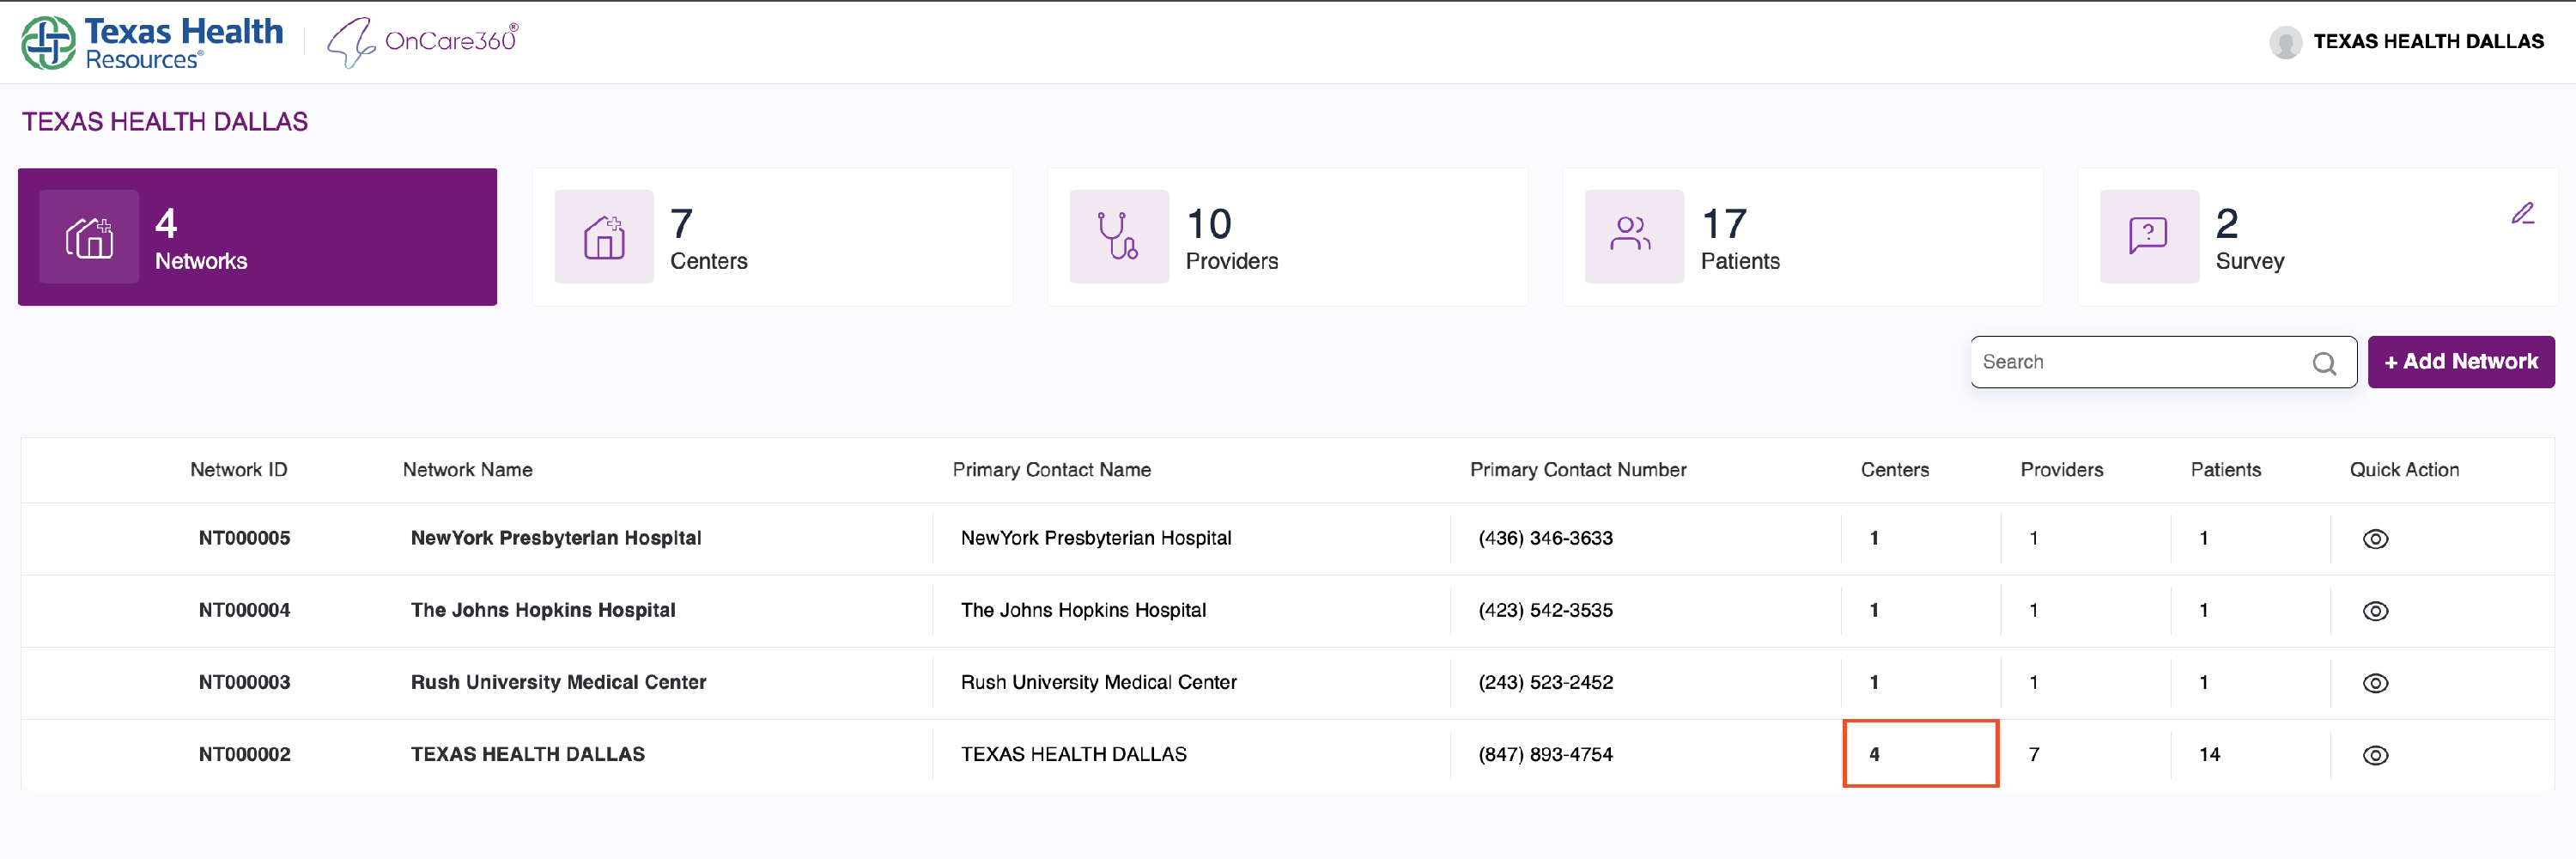
- You can view center details
- You can change networks using the dropdown
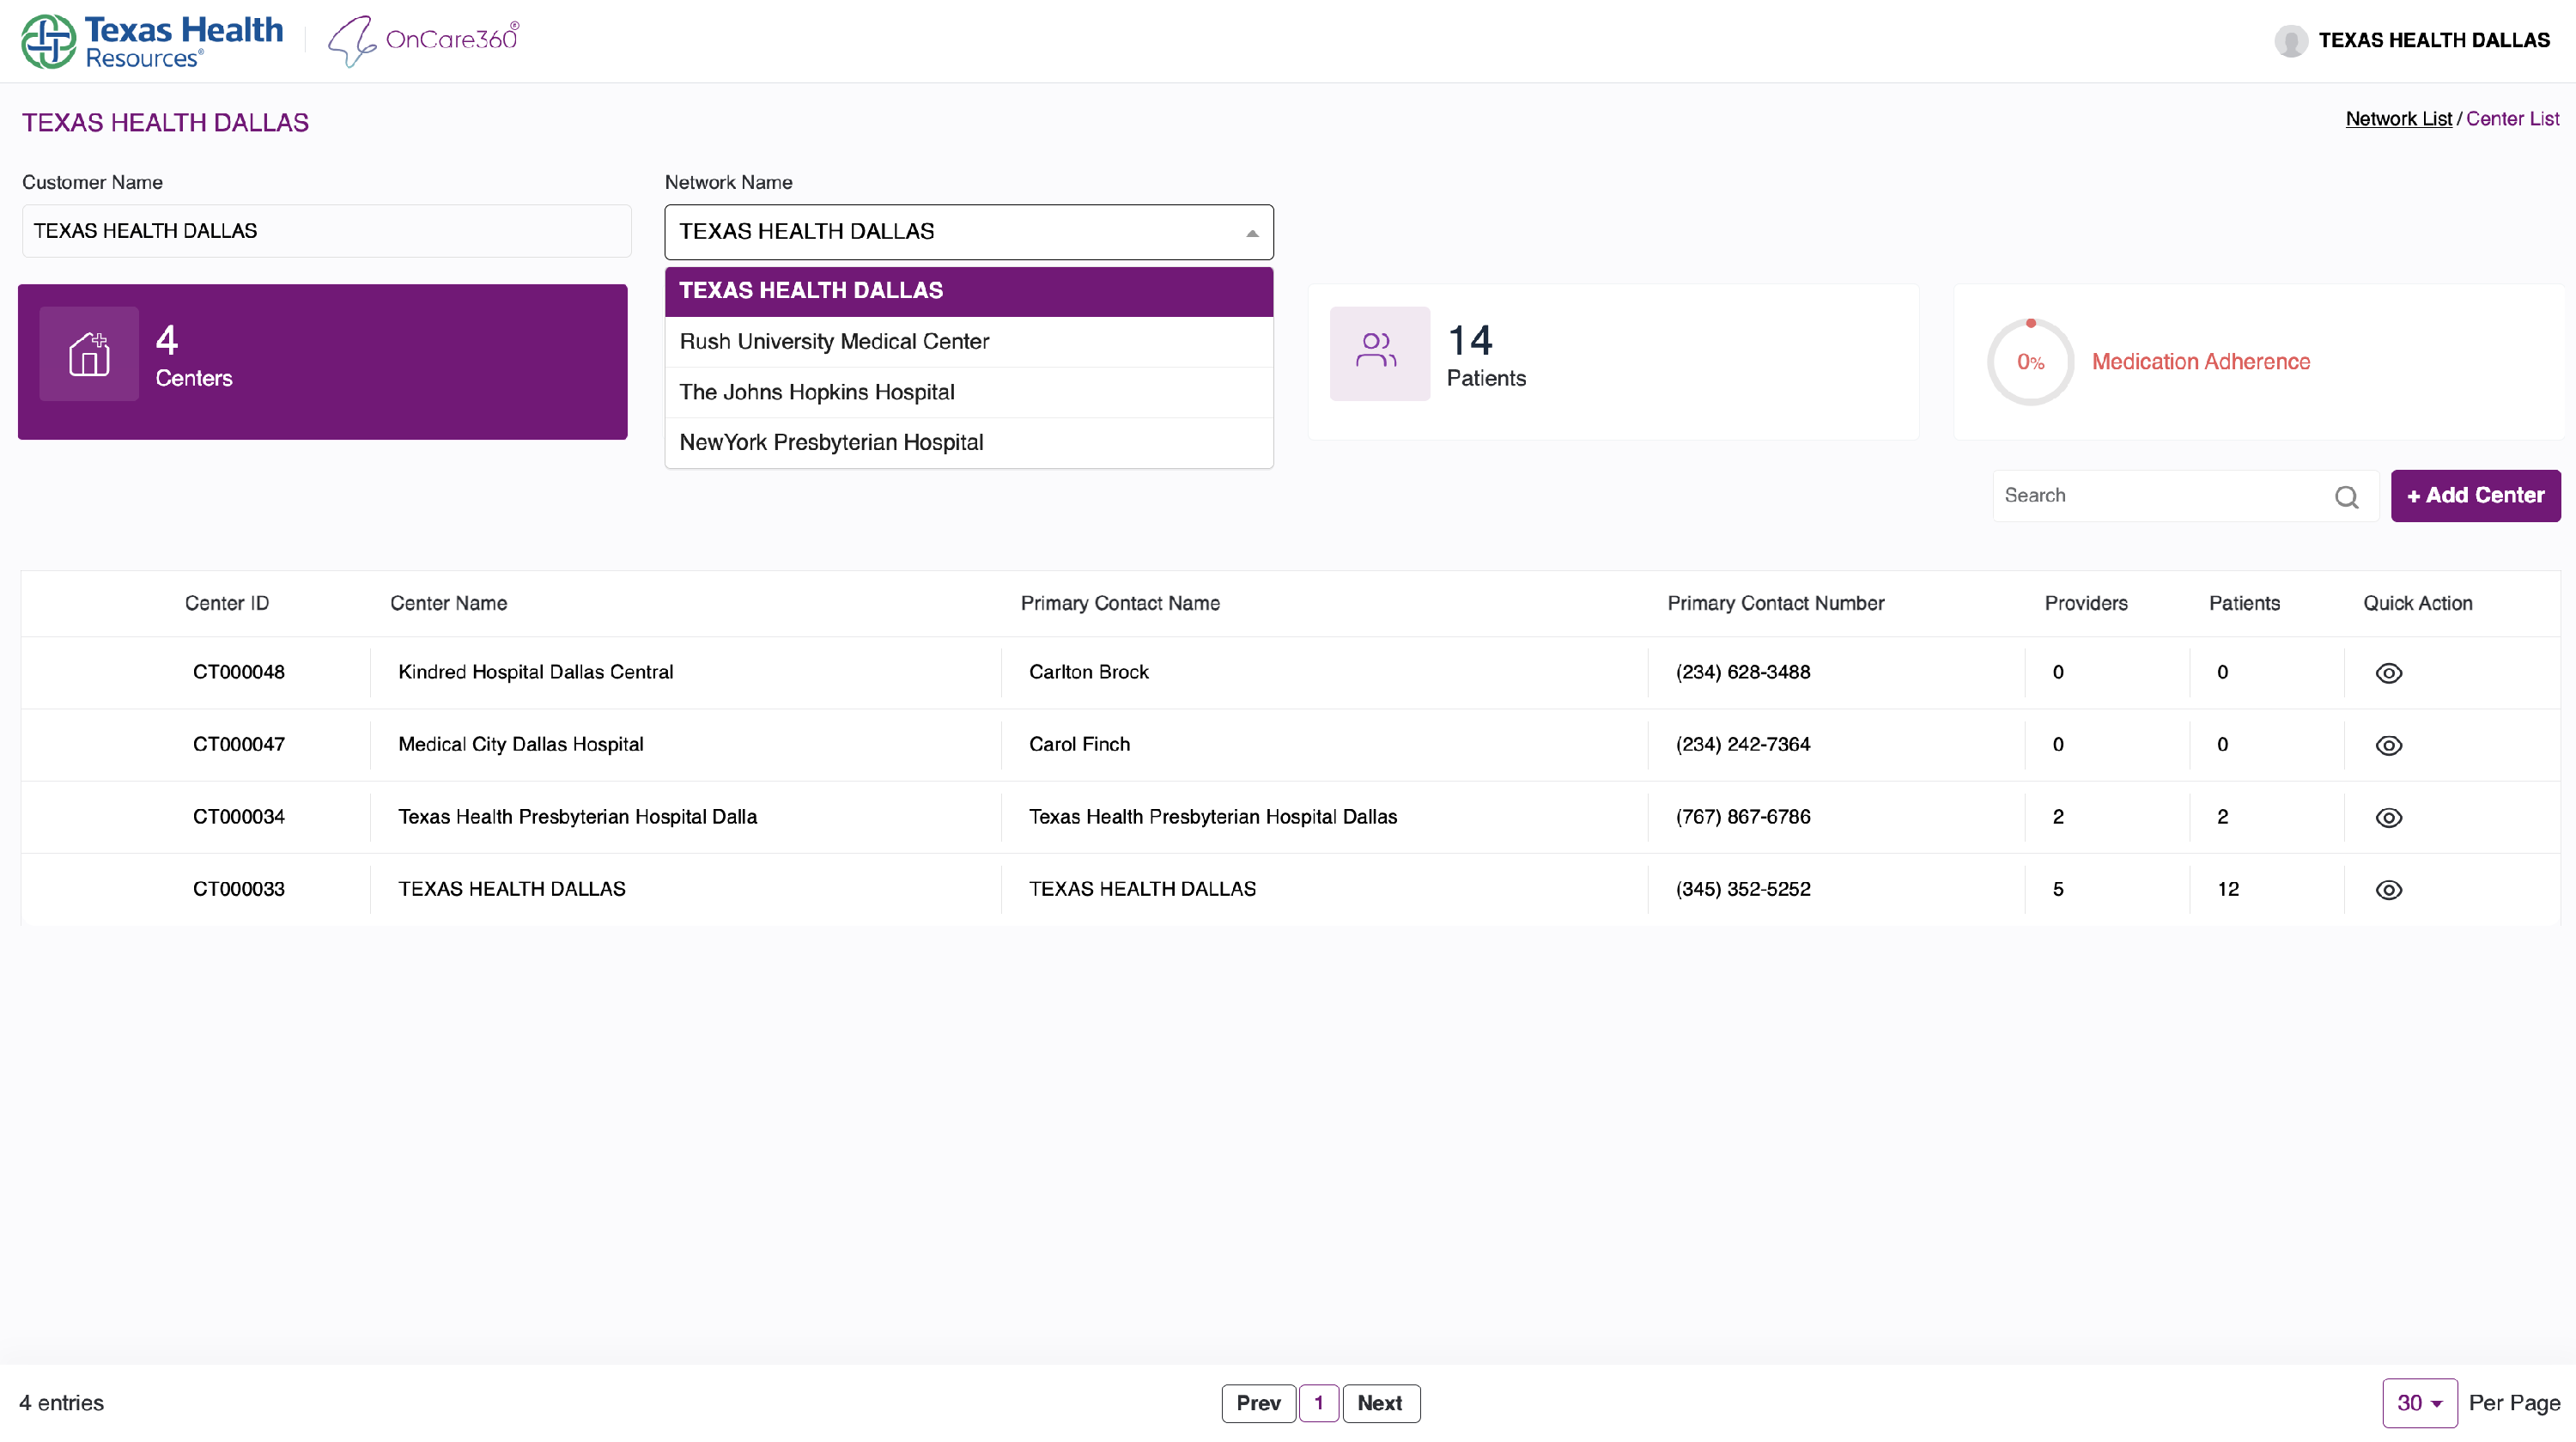
Return to Network Listing
- Click the "Network List" link in the top-right corner.

-
Network Detail View & Editing
To view a specific network:
- Click on the eye icon beside it in the list
You will be redirected to a read-only view of the network.
To Edit:
- Click the Edit icon
- Make your changes
- Click Save Changes or Cancel