
Add Patient
Table of Contents:
Instructions
- Log in to OnCare360.
- On the home page, you'll see the Patient tab active at the top.
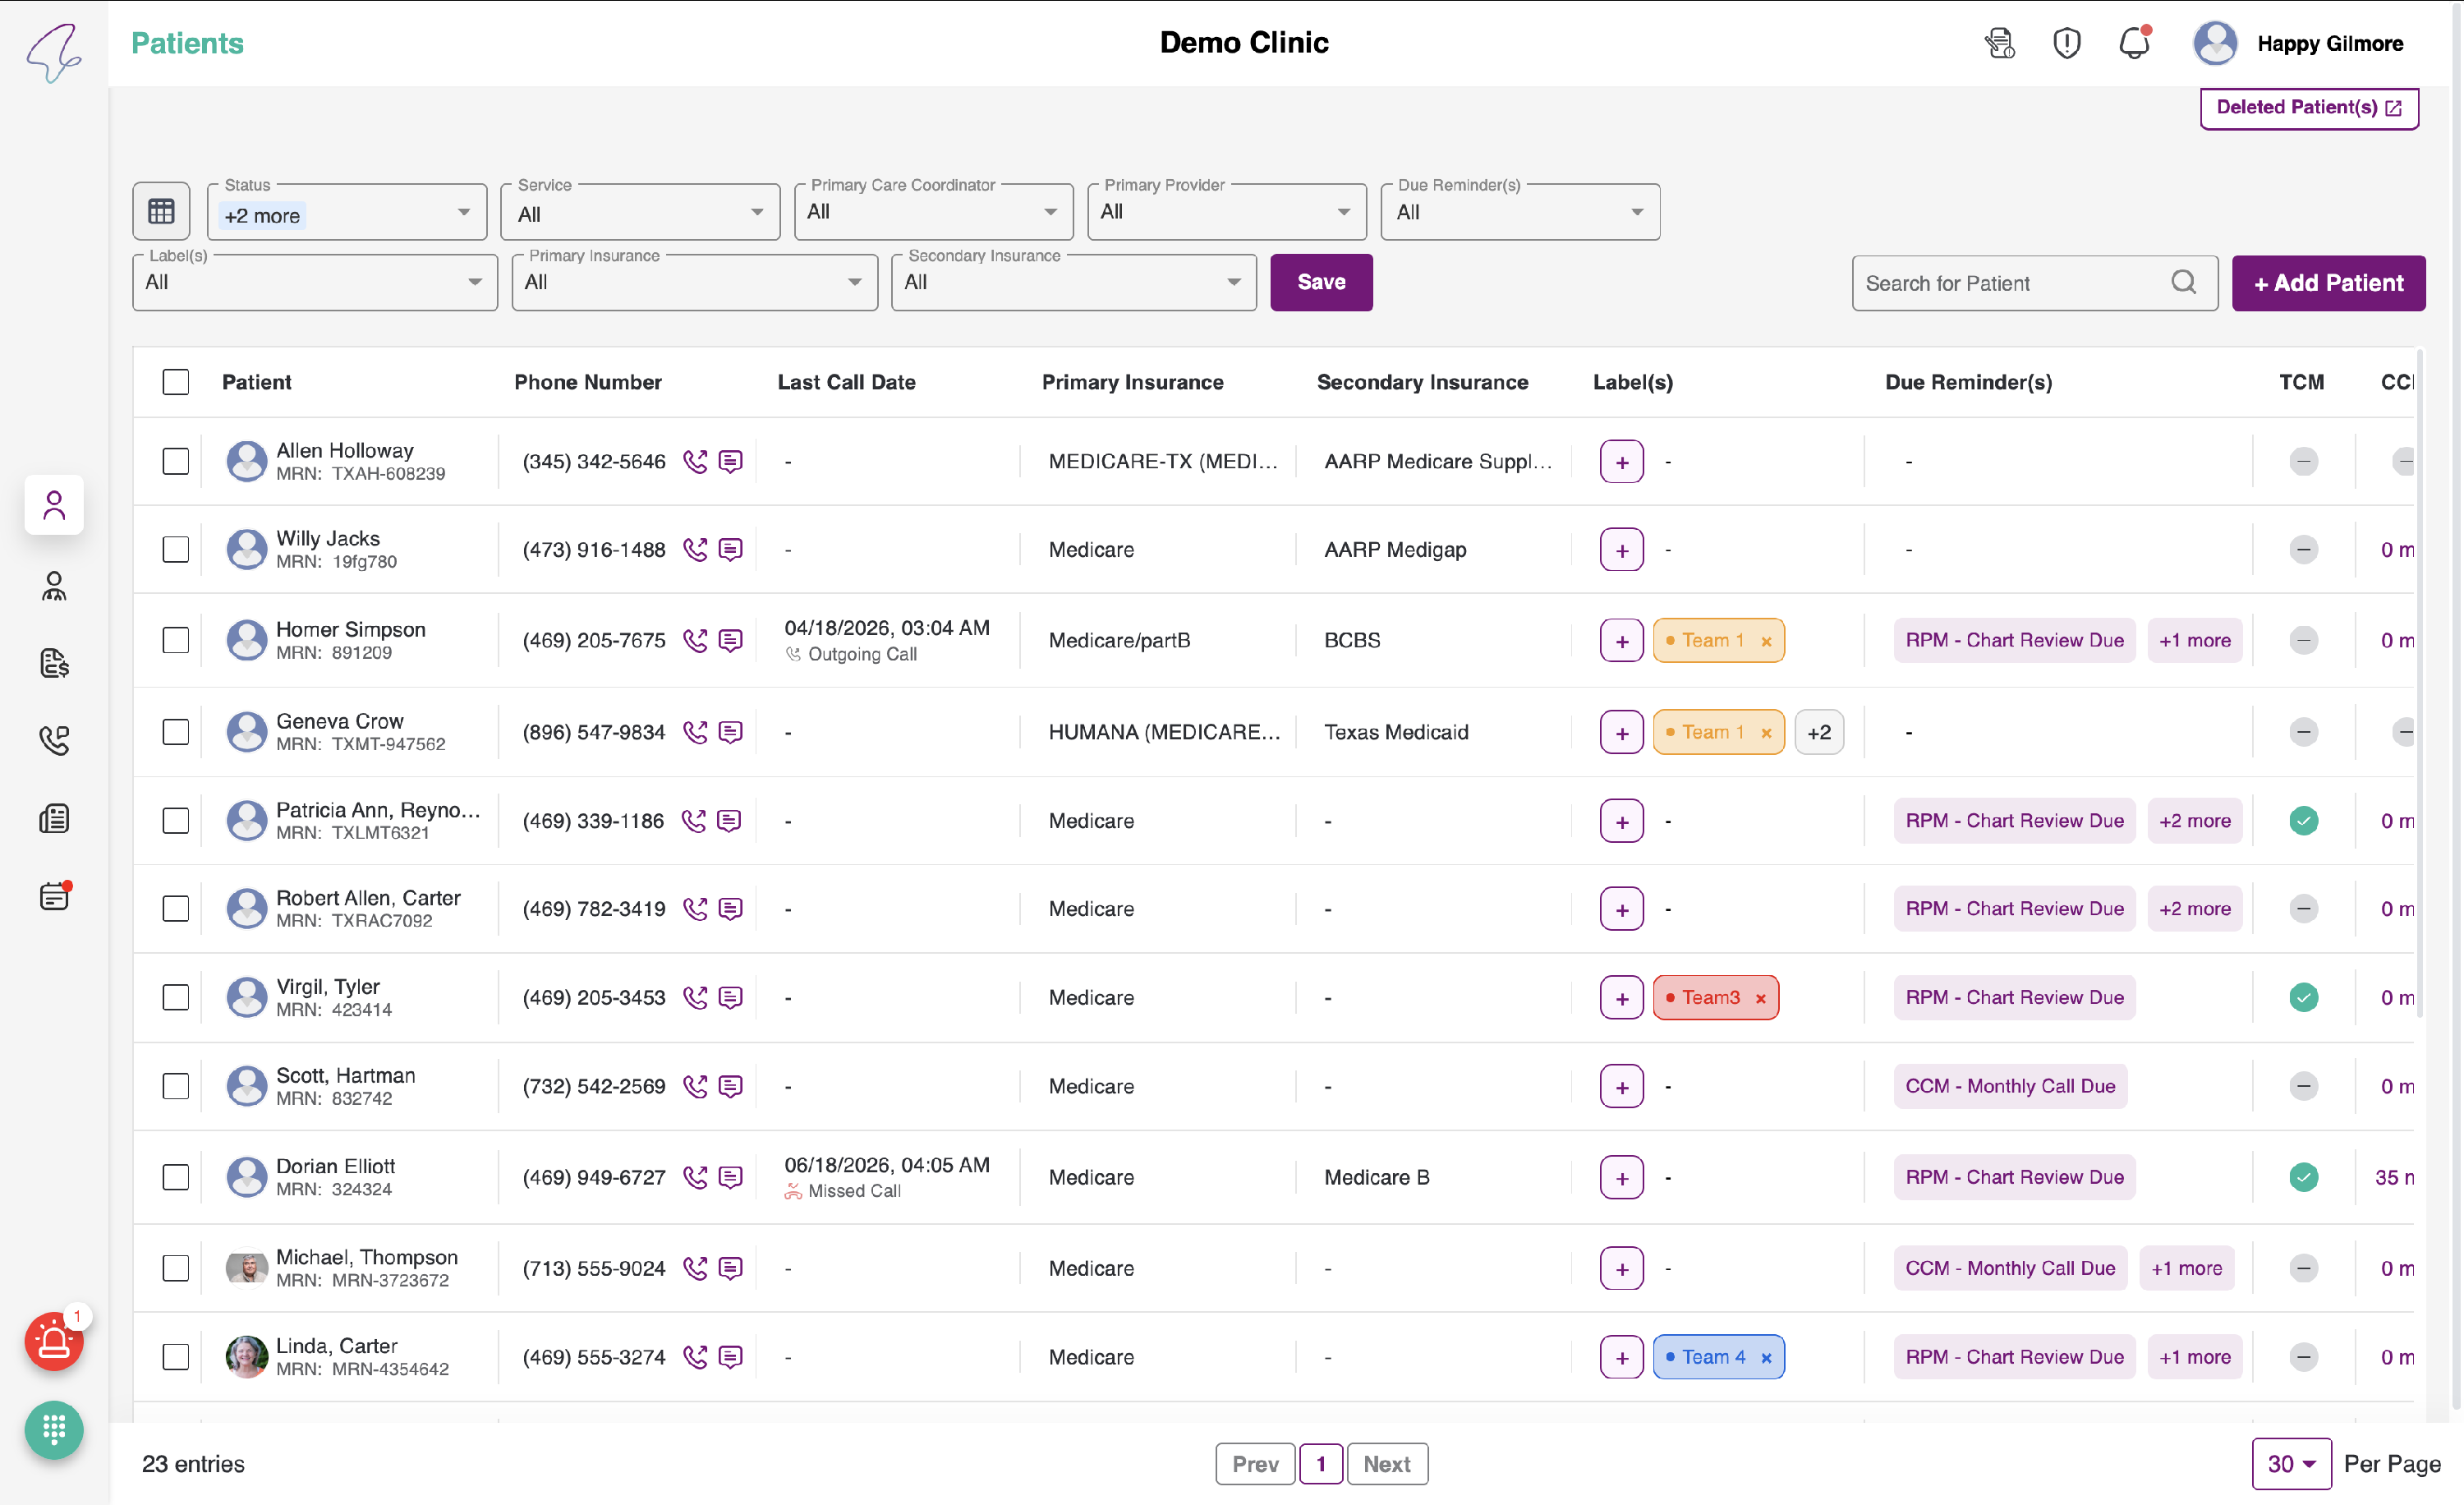
- You can view the phone icon next to the patient’s mobile number. Clicking it will call the patient directly on their cell phone.
- Click the “Add Patient” button on the right to add a new patient to a center.
- We have 4 sections as follows:
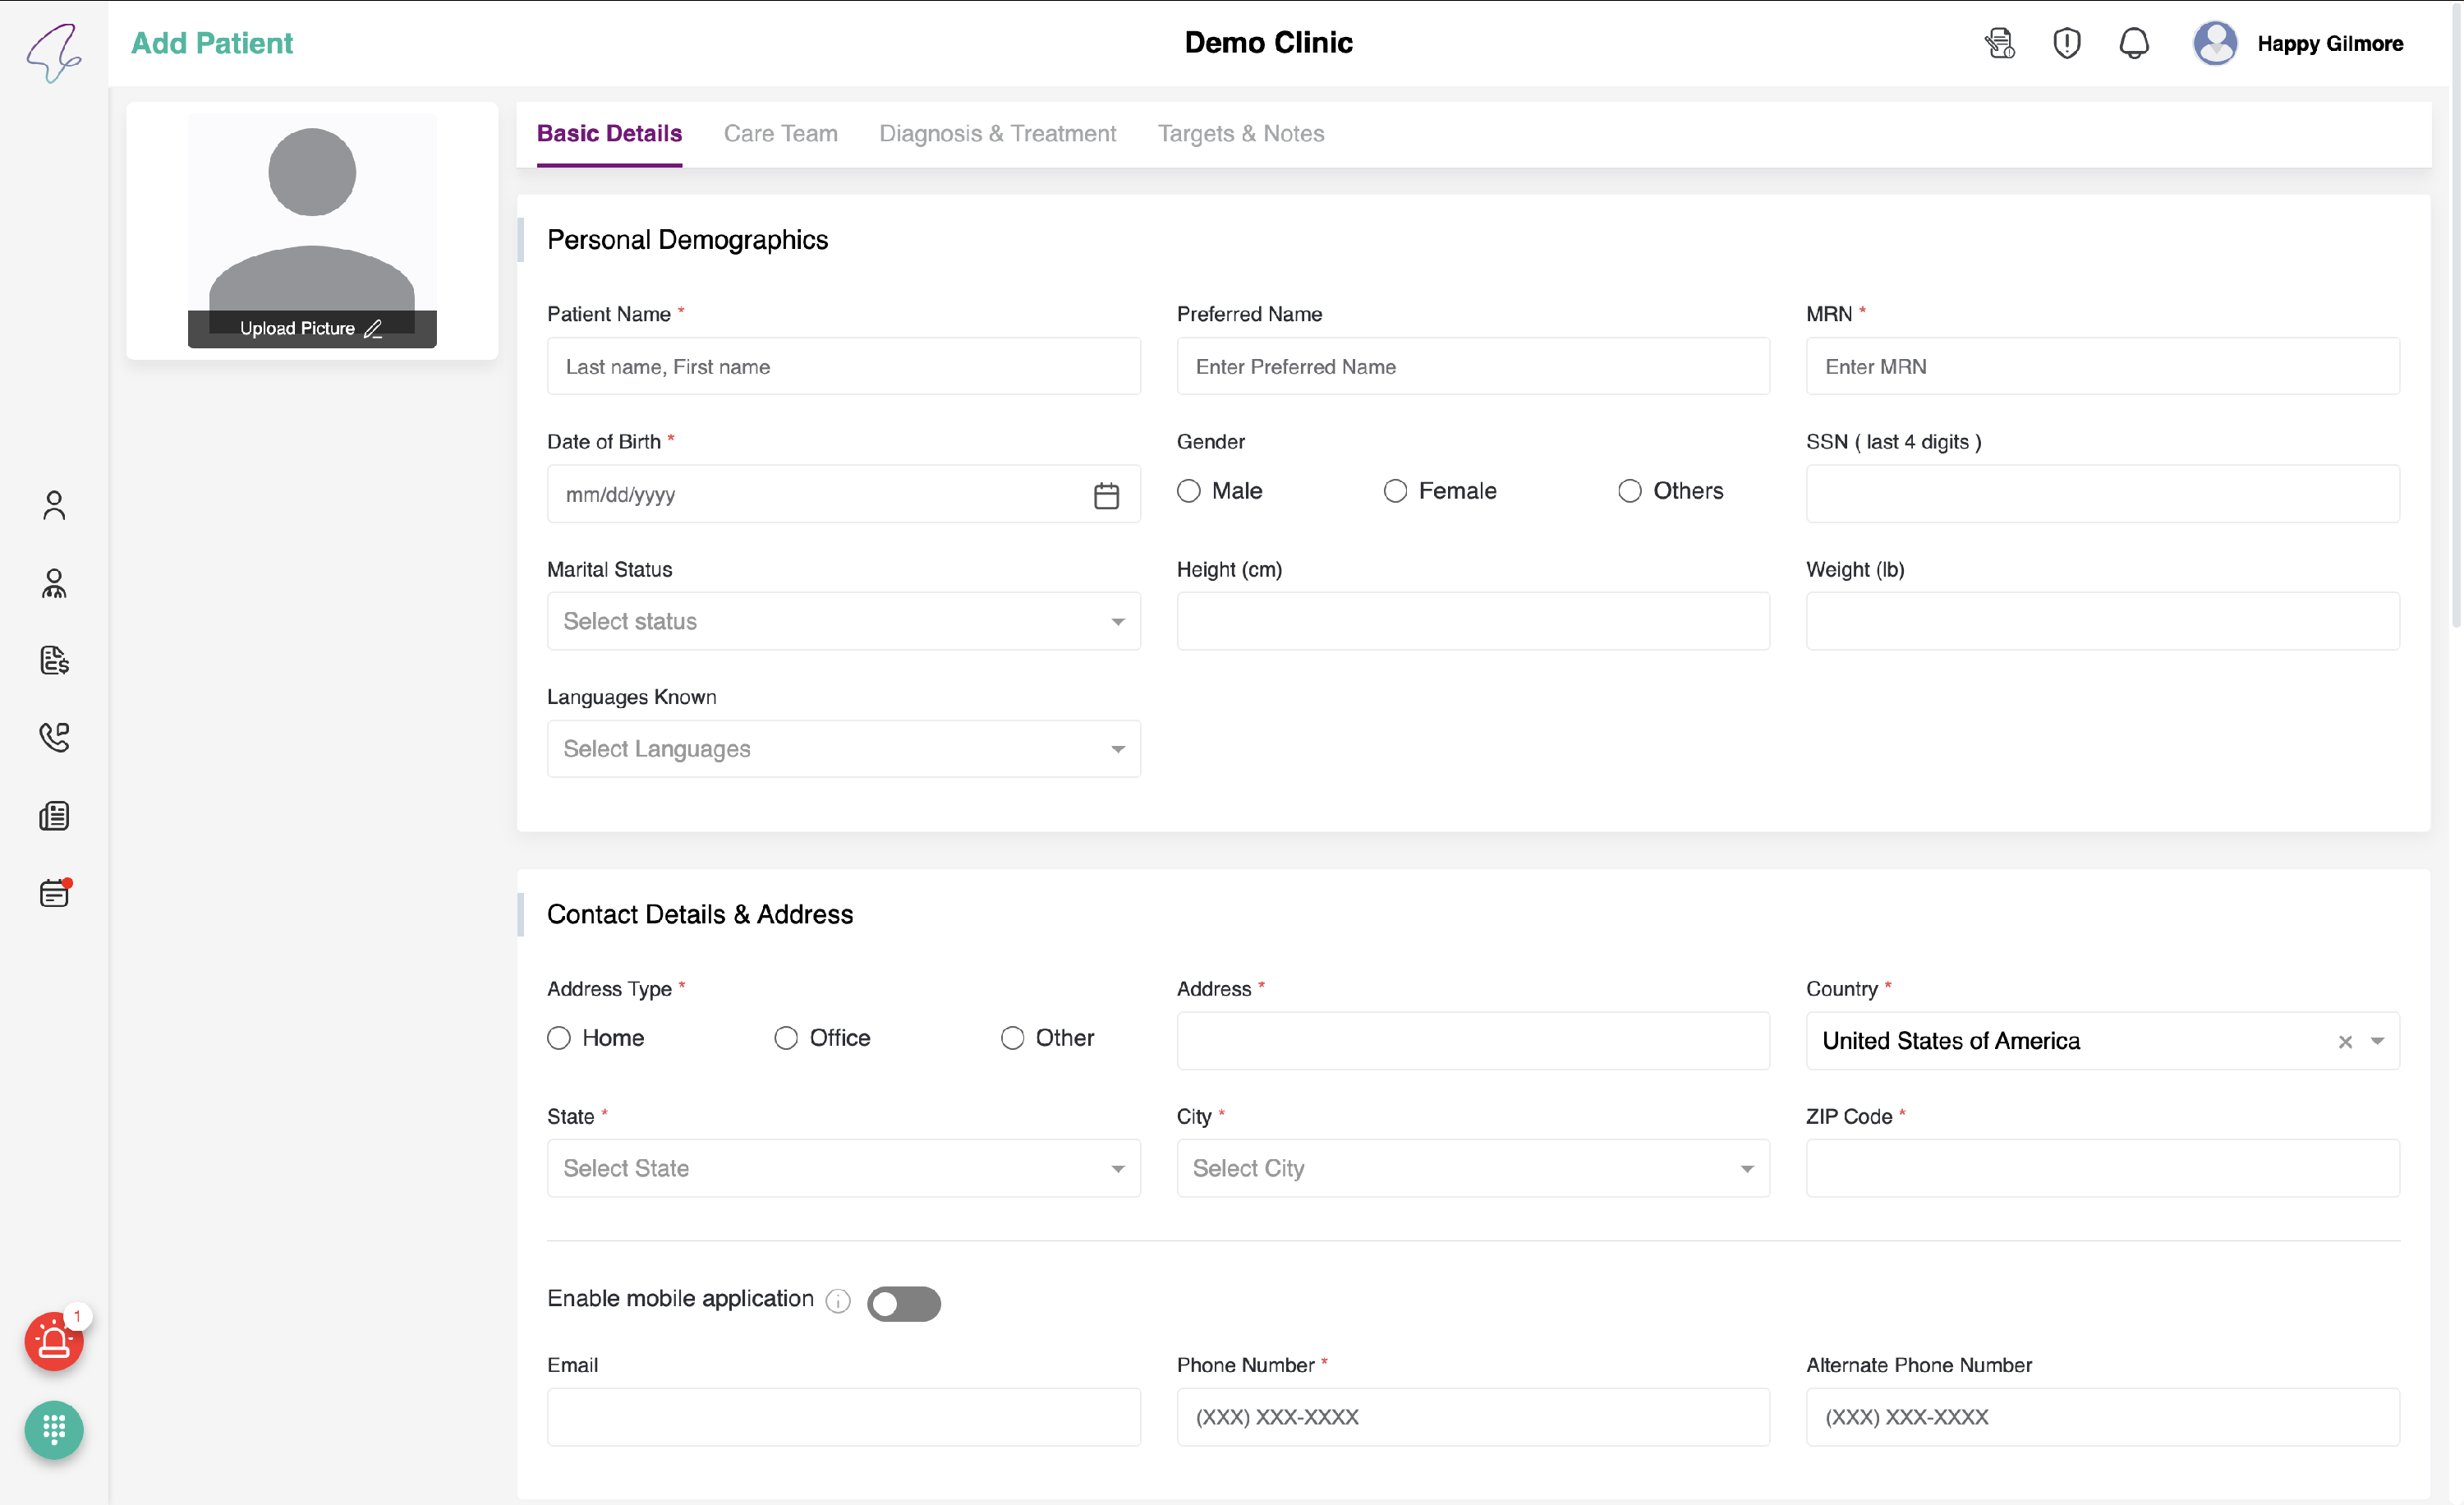
Basic Details
It further has 5 sections as follows:
- Personal Demographics
- Contact Details & Address
- Guardian Info
- Insurance
- QMB
- Communication Preferences

- You can fill in the contact details manually if the data does not populate.
- Here, you can view a toggle for enabling the mobile application. In other words, if the patient wants to use the mobile application, the PC should enable the toggle for which the email is Mandatory.
- If the toggle is OFF, the patient cannot use the mobile application. If he adds an email while keeping the toggle OFF, he will still receive the emails, but he won’t be able to use the mobile application. Until then, the email field is optional.
- You can view the info icon beside the toggle. When you hover over it, you will see an overlay as follows: "Email and Mobile number are required to enable Mobile app services"
- Enter the Email and Mobile number based on the preferences.

- You have the option to manually enter your personal details.
- Secondary Contact is optional; it is for the Guardian Info.

- To add insurance, click the button, Add Insurance.

- You will view the Insurance pop-up as follows:

- Enter all required field details. The Group Number and Group Name fields are optional.
- Click the Save button to add this Insurance record. To delete it, click Delete while adding, or click the delete icon on the record.
- You can enable the toggle if the patient has QMB insurance.
- In Communication preferences, notifications are sent via SMS, email, and app notifications. By default, all boxes will be unchecked.
- Once you’ve filled in all the fields, click the Save & Continue button at the bottom right to proceed. The Provider Details tab will appear.

Provider Details
In the Provider Details tab, you have two sections as follows:
- External Consultant Details
- Assigned Provider
- Assigned Care coordinator

- To add an External Consultant, click the 'Add Consultant' button on the right.
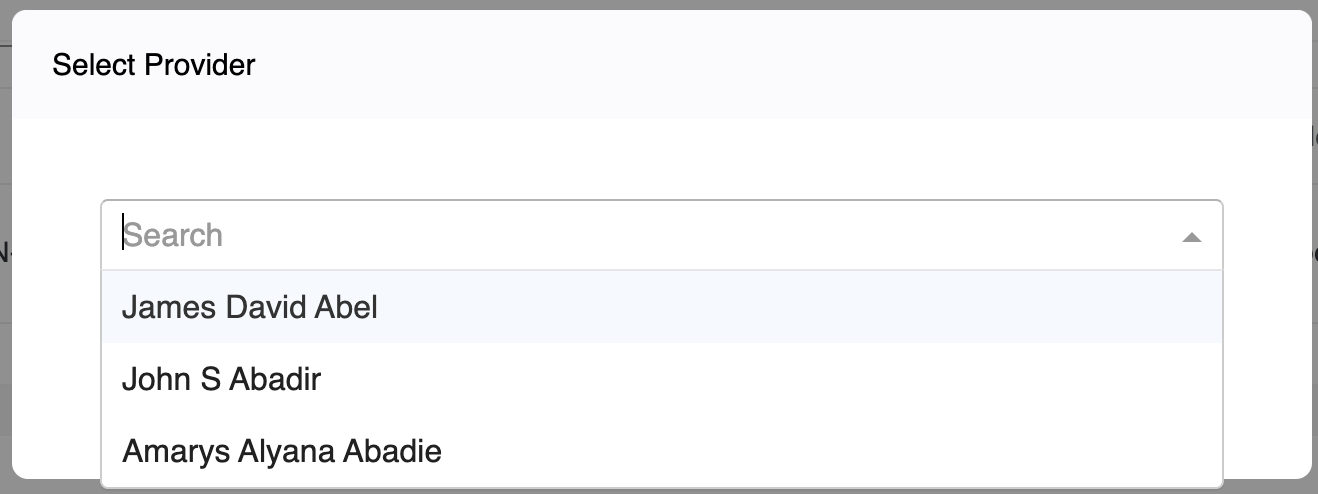
- The search provider pop-up is displayed.

- You can search by NPI or any of the fields in the pop-up. Click the Search button to view the list of providers that match your search criteria.

- Select the provider you want to add, then click the Select button.
- The details will be populated in the respective fields of the External Consultant pop-up as follows:

- You can make edits here and click Save to add the record. When you click Delete, this record will be deleted or cancelled.
- By clicking the "Add Consultant" button, you can include additional external consultants if needed.
- To assign a Provider, select the human avatar. Once it is selected, the icon colour will change to purple, and you will see the label "primary" above the provider name in the table.

-
By clicking the "Assign Provider" button, you can include or add any unassigned or deleted providers, if necessary.
-
To assign a care coordinator, select the human avatar. Once it is selected, the icon colour will change to purple, and you will see the label "primary" above the provider’s name in the table.


- By clicking the “Assign Care Coordinator” button, you can include or add an unassigned or deleted care coordinator, if necessary.

- Once all fields are filled, click Save & Continue to proceed. The Diagnosis & Treatment tab will appear.
Diagnosis & Treatment
In this tab, we have five sections as follows:
- Diagnosis
- Surgery
- Test/ Procedures
- Medications
- Allergies

- To add the Diagnosis, Surgeries, Tests/Procedures, and Allergies sections, you must fill in the details in the respective pop-ups.
- In the Diagnosis section, click the Add Condition button. You will see a pop-up as follows:

- Click the Search button, and you will see the Search Condition pop-up as follows:

- Enter 3 characters to view the dropdown. Click the condition you want to add, then click the Select button. Click the Save button to add this condition; otherwise, click the Delete button.

- The same applies to Surgeries and Test/Procedures. Click the “Add Surgery” and “Add Test/Procedure” buttons.

- You will view the following pop-up as shown below.


- Fill in all required fields and click the Save button to add or save the record, or click the Delete button to delete the record.
- In the test procedure, you have an optional field called Attachment, where you can upload an attachment by clicking the “Choose file” button.
- To add medications, click the Add Medications button; the medication pop-up will appear.

- Click the Search button, and you will see the following pop-up:

- Search for the medicine to view the dropdown list. Select the medicine you want to add and click the Select button. The medicine details will populate in the corresponding fields.

- All the medicine details will be auto-populated. Please fill in the remaining details and click the Save button to add this medicine, or click Delete to cancel or delete this record.
- You can also add a refill reminder. Click the checkbox to add the reminder.

- You can view two options: 5 Days and 10 Days. The patient will be notified either 5 days before or 10 days before the Course End date.

- To fill in the Allergy Sections, click the Add Allergy button to view the following pop-up:

- Enter the required fields and click the Save button to add the record, or click the Delete button to remove the record.
- After entering all details, click the Save & Continue button. The Target & Notes screen will appear.
Note: If there is no information you need to add for a section, you may proceed without including any details, and you will view the tables as follows.

Targets & Notes
In this tab, you will see three sections as follows:
- Activity
- Vital sign parameters
- Critical Alert Rules
- Surveys
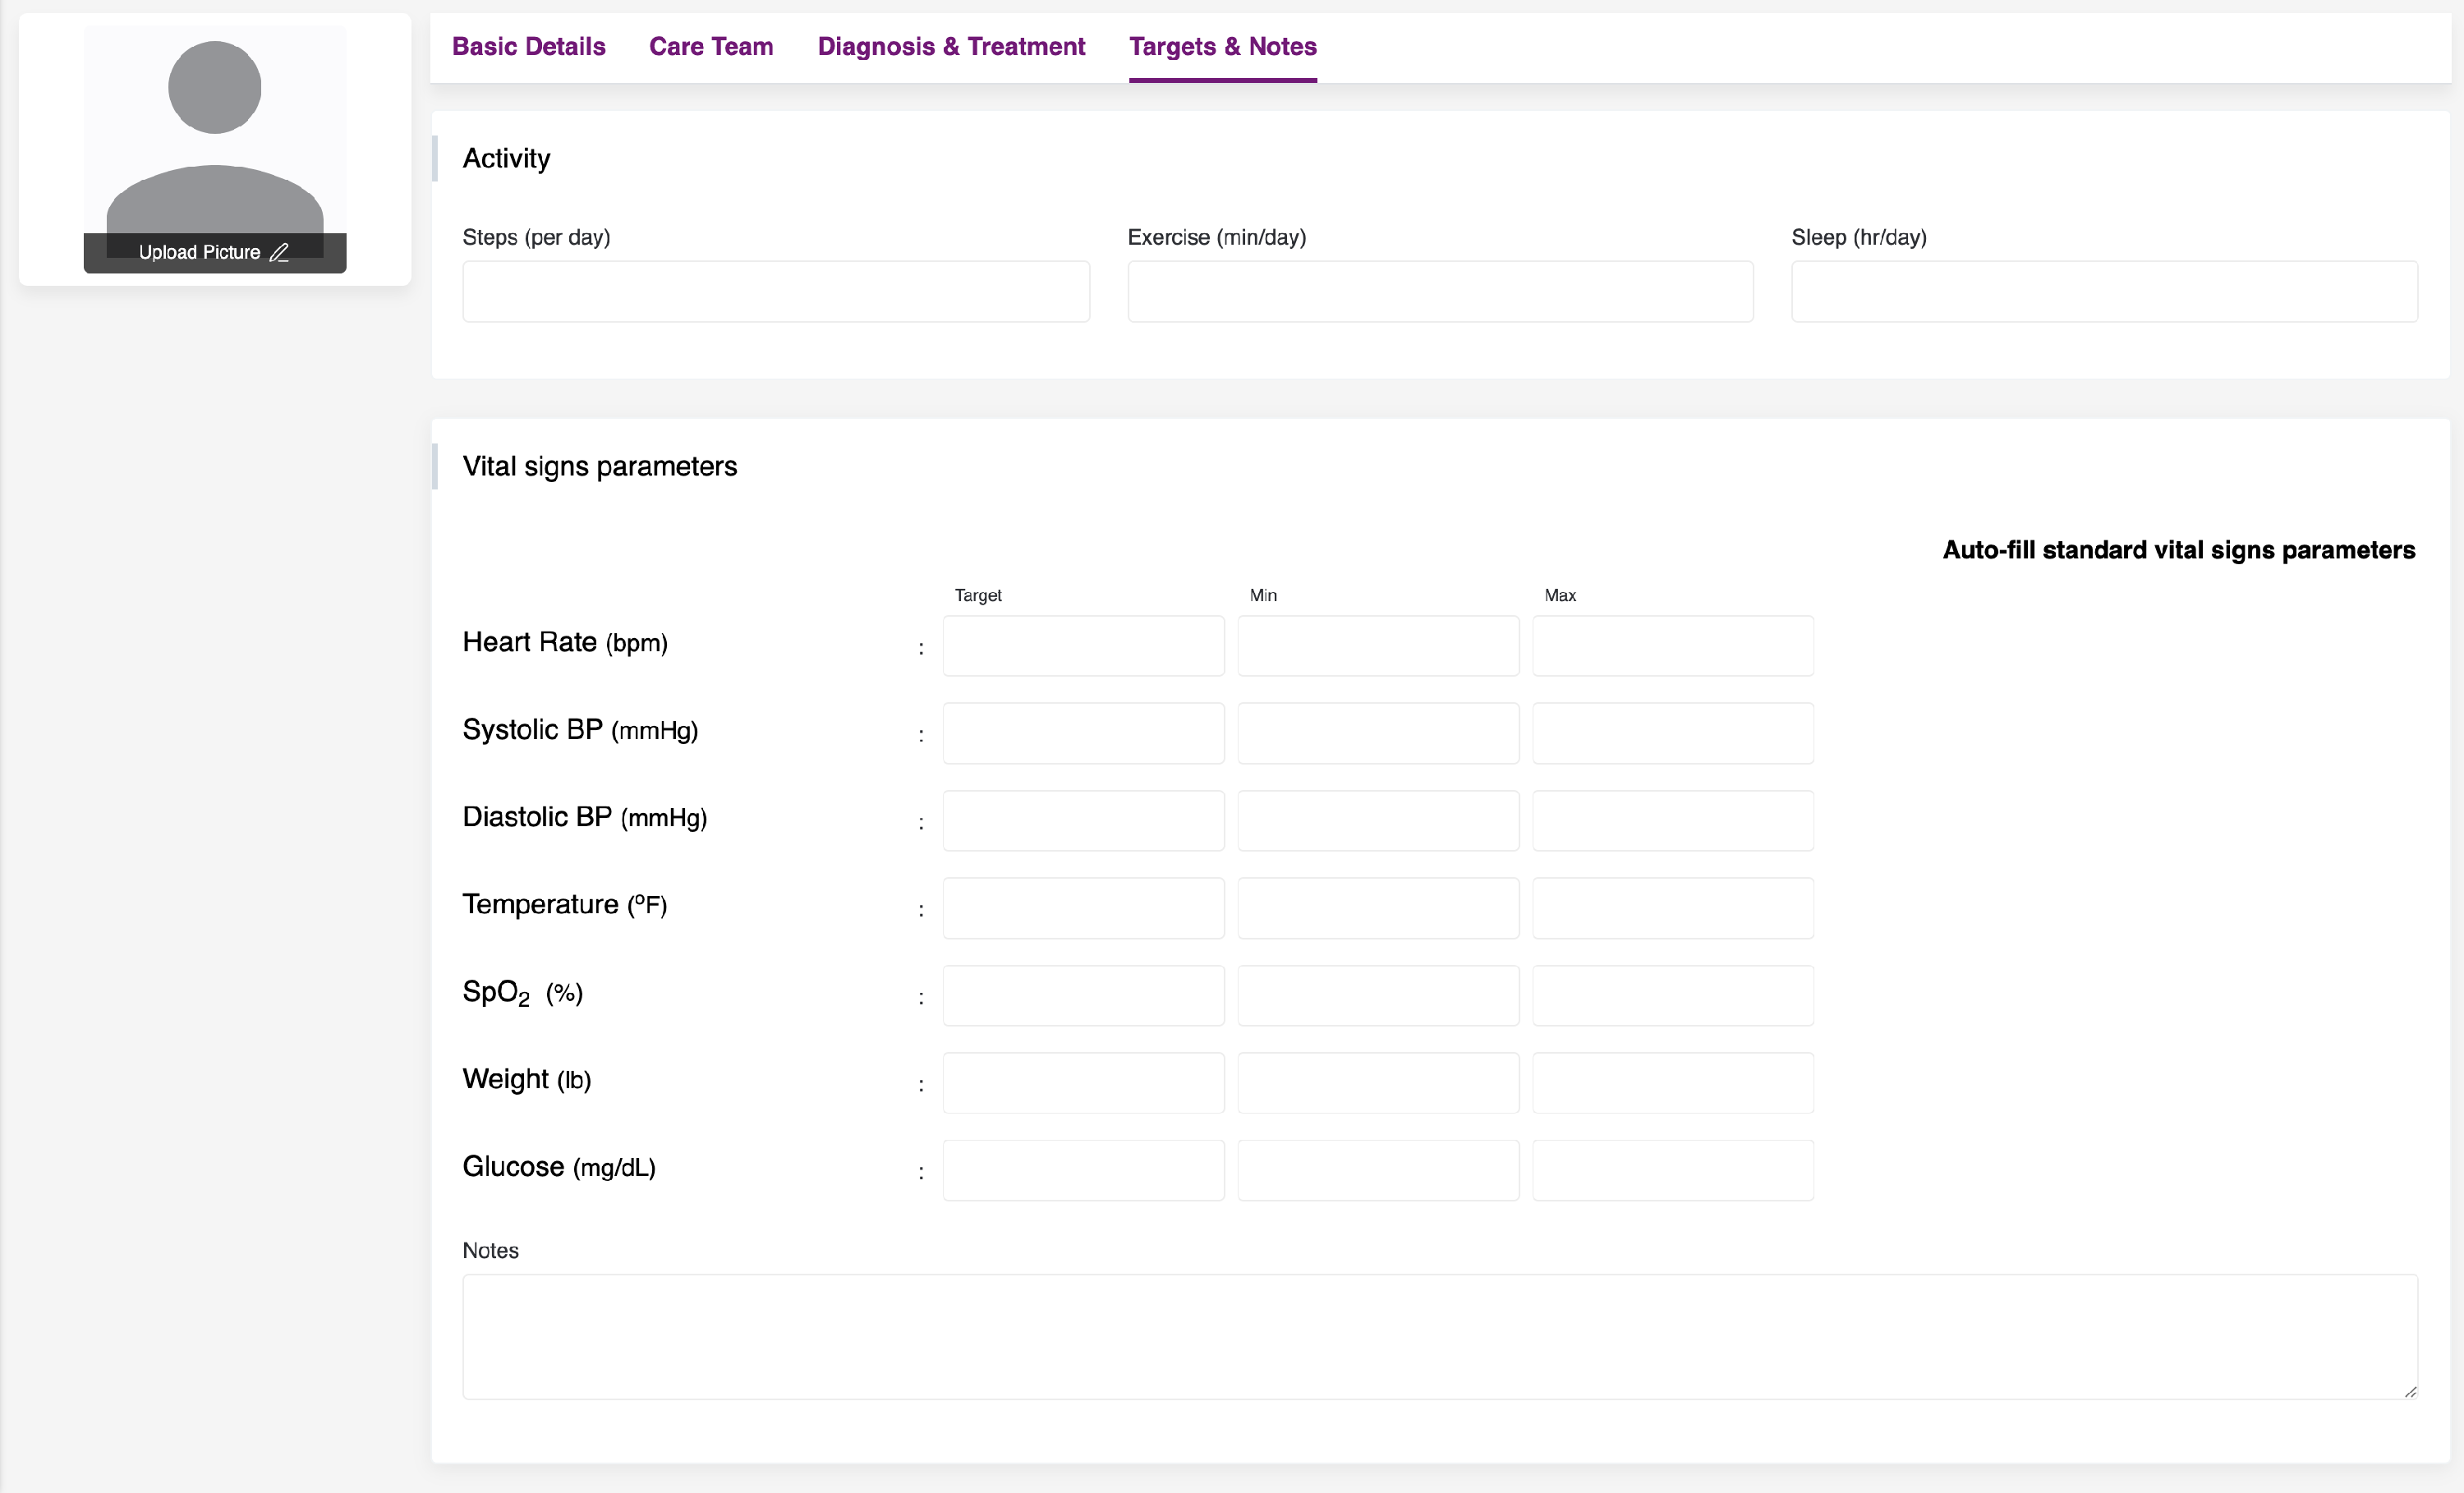
- Complete the fields in the Activity section. You can click Auto-fill standard Vital signs parameters to populate the data (other than weight), and then fill in the remaining details.
- You can add rules for critical alerts, such as when they should be triggered based on how many consecutive readings are recorded and the threshold for any vital type.

- You can add a new survey by clicking the Add Survey button on the right. You will see the following pop-up:

- After you enter all the details, click the Save button to add the record or the Delete button to remove it.
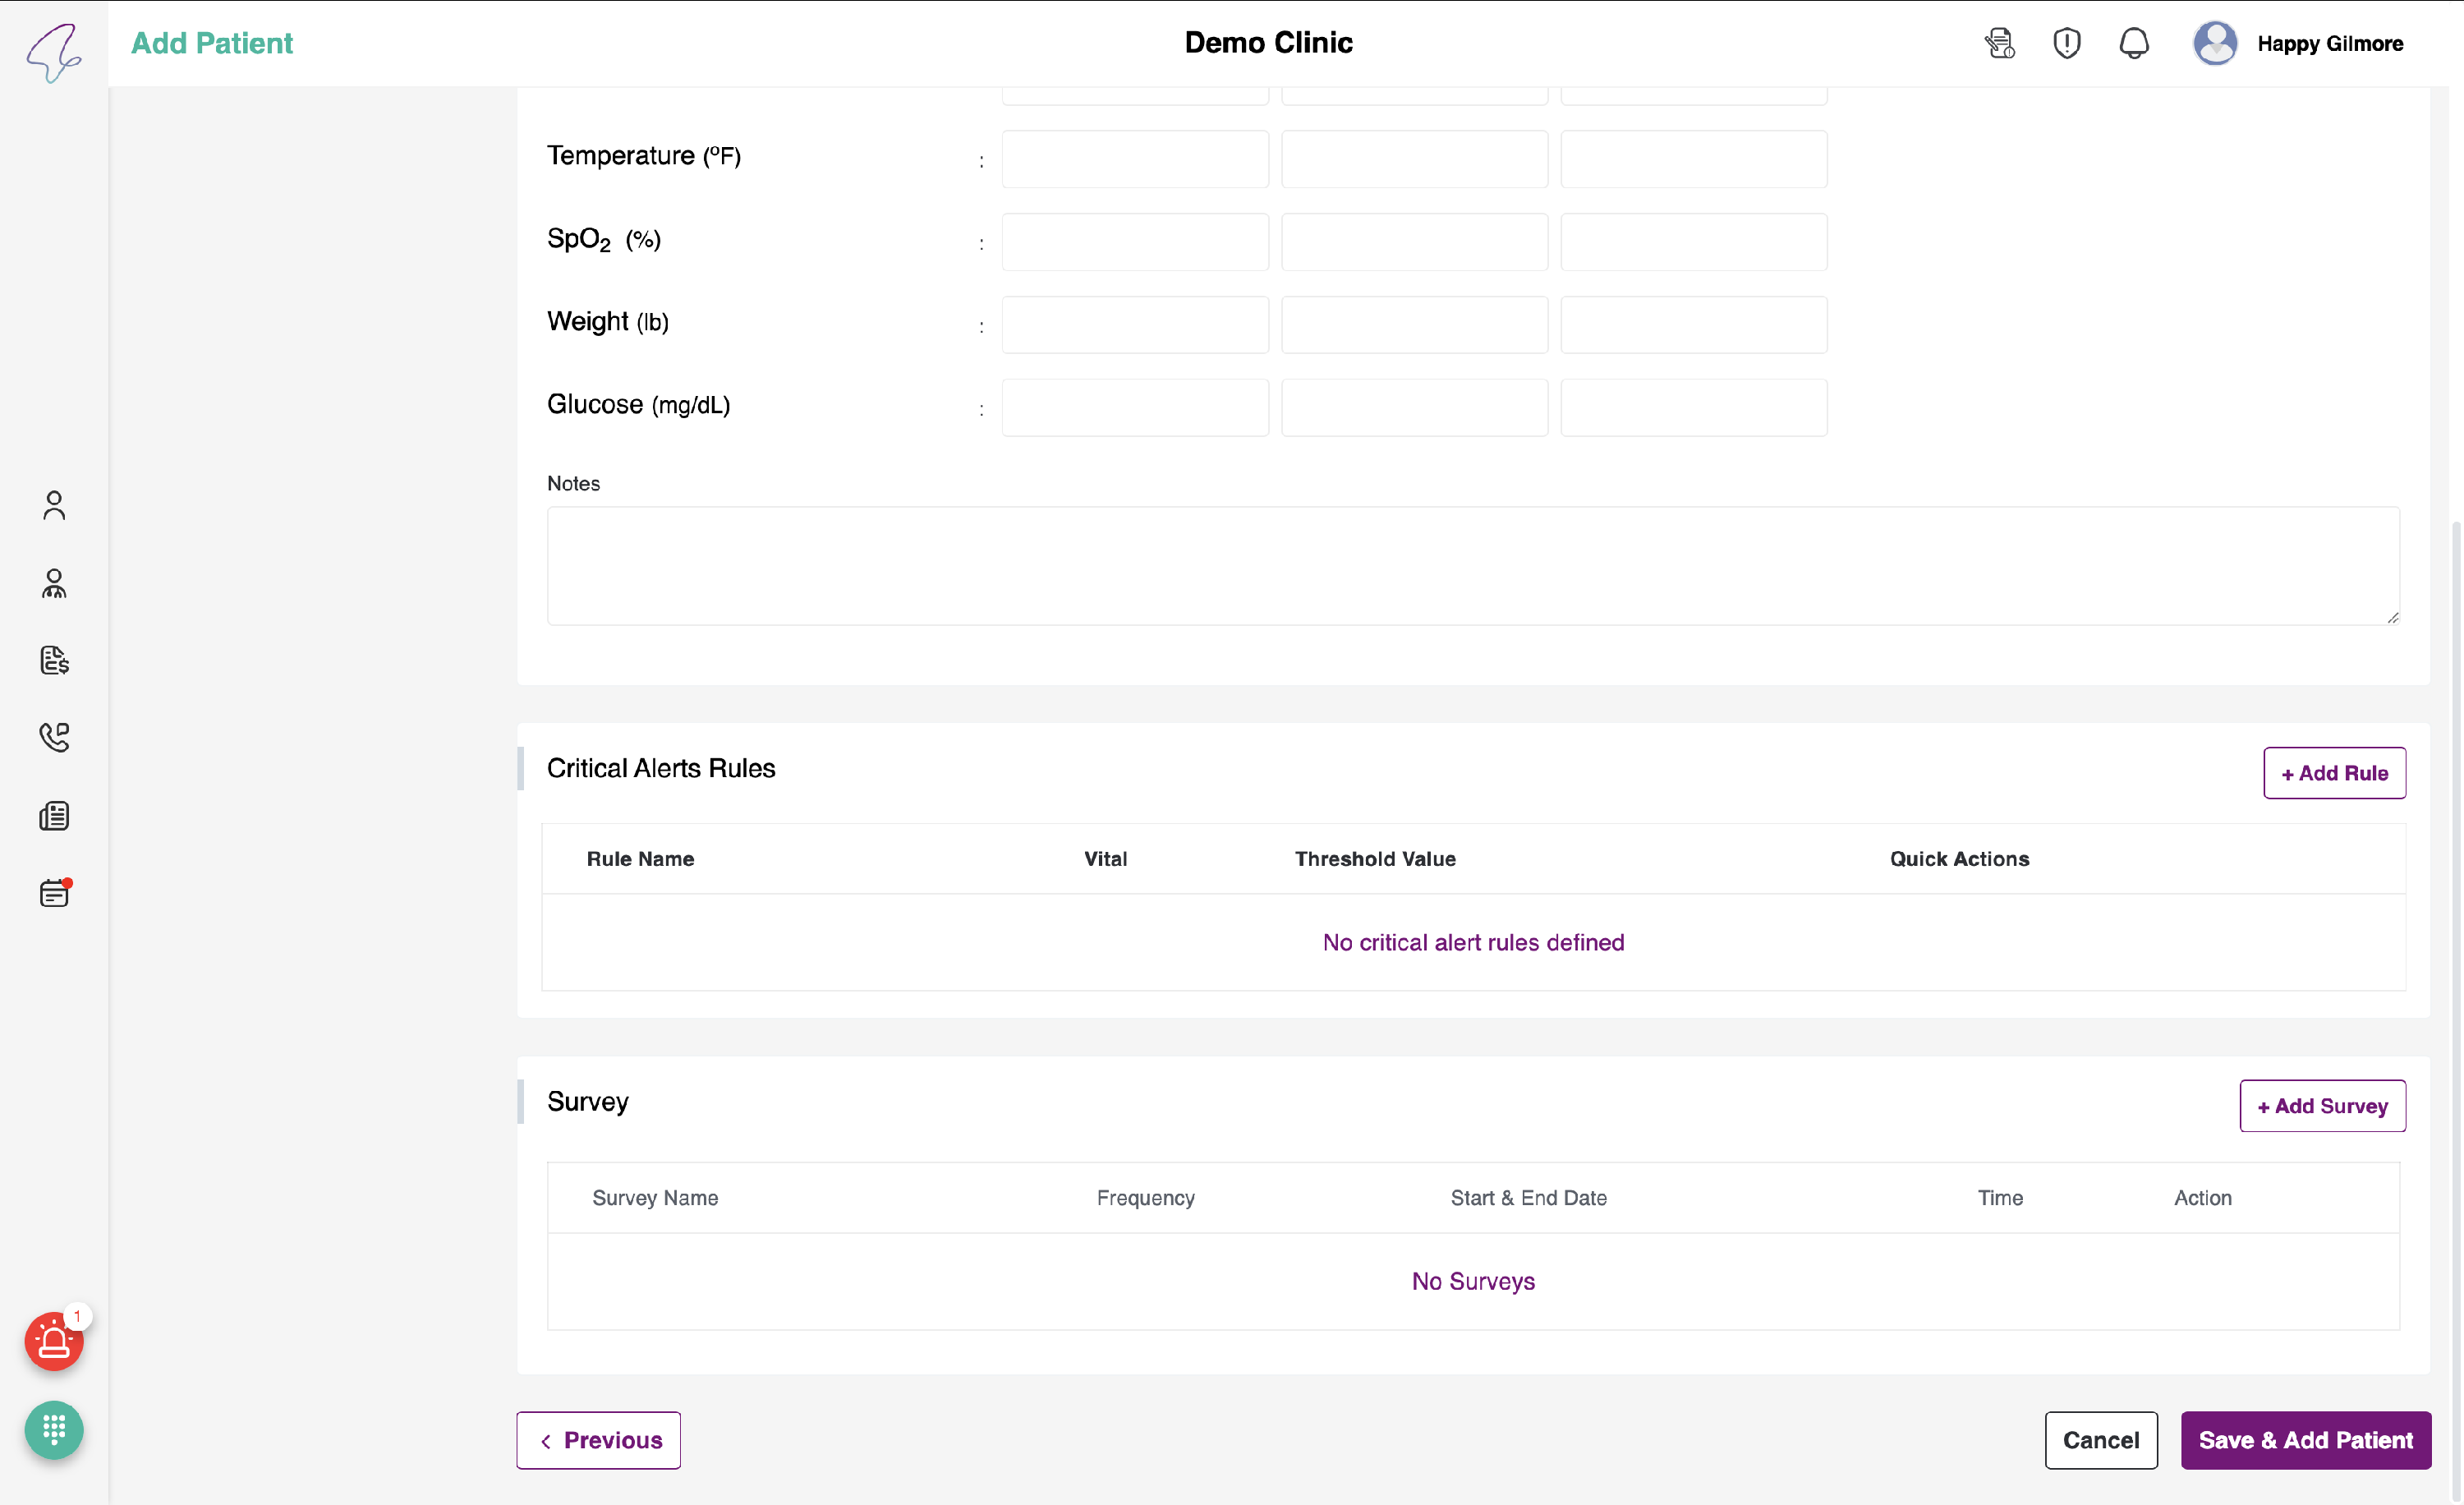
- All patient details are filled in. Now, click Save & Add Patient. The patient will be added to the list in the Dashboard under Patient Listing.
View Patient Profile:
- To view the patient profile, click the eye icon of the desired patient.

- When you navigate to the patient profile, all sections will be disabled. If you would like to edit any section, click the edit button in the top-right corner of that section.

- Once the necessary changes have been made, click the "Save Changes" button to apply them. If you wish to revert the changes, click the "Cancel" button.
- When you click the "Cancel" button, a pop-up will appear to confirm that you want to cancel the changes you have made.

- We can also perform actions such as adding, editing, and deleting.

- To modify the Diagnosis & Treatment section, click the edit icon. When you click it, you will be presented with a pop-up containing pre-filled data.

- When entering a diagnosis, please note that the condition name cannot be modified once it has been added. If you wish to make changes, you have the option to either add a new diagnosis condition or delete the undesired conditions.
- Regarding surgeries, tests or procedures, and allergies, you have the ability to fully edit the data.


- Regarding the medications section, it is important to note that once a medication name is added, it cannot be changed. If a change is necessary, a new medication can be added, the unwanted medication can be deleted, or it can be made inactive by clicking the toggle button.

- To reactivate the medication, click the inactive toggle button. Once you click it, a popup will appear prompting you to select the end date for the medication. After you select it, the medication will become active.


- When you click the delete icon for any selection record, a pop-up will appear to confirm whether you want to make the change. If you select “Yes,” the record will be permanently deleted.


Note: In all tabs, to go back, you can click the Previous button on the bottom-left and the Cancel button to cancel and discard the changes you made.